!"##"$"%"&%*""#
XM_unity_Installation&Maintenance_Manual Ed.1.3c2013 Page ;Cof (()
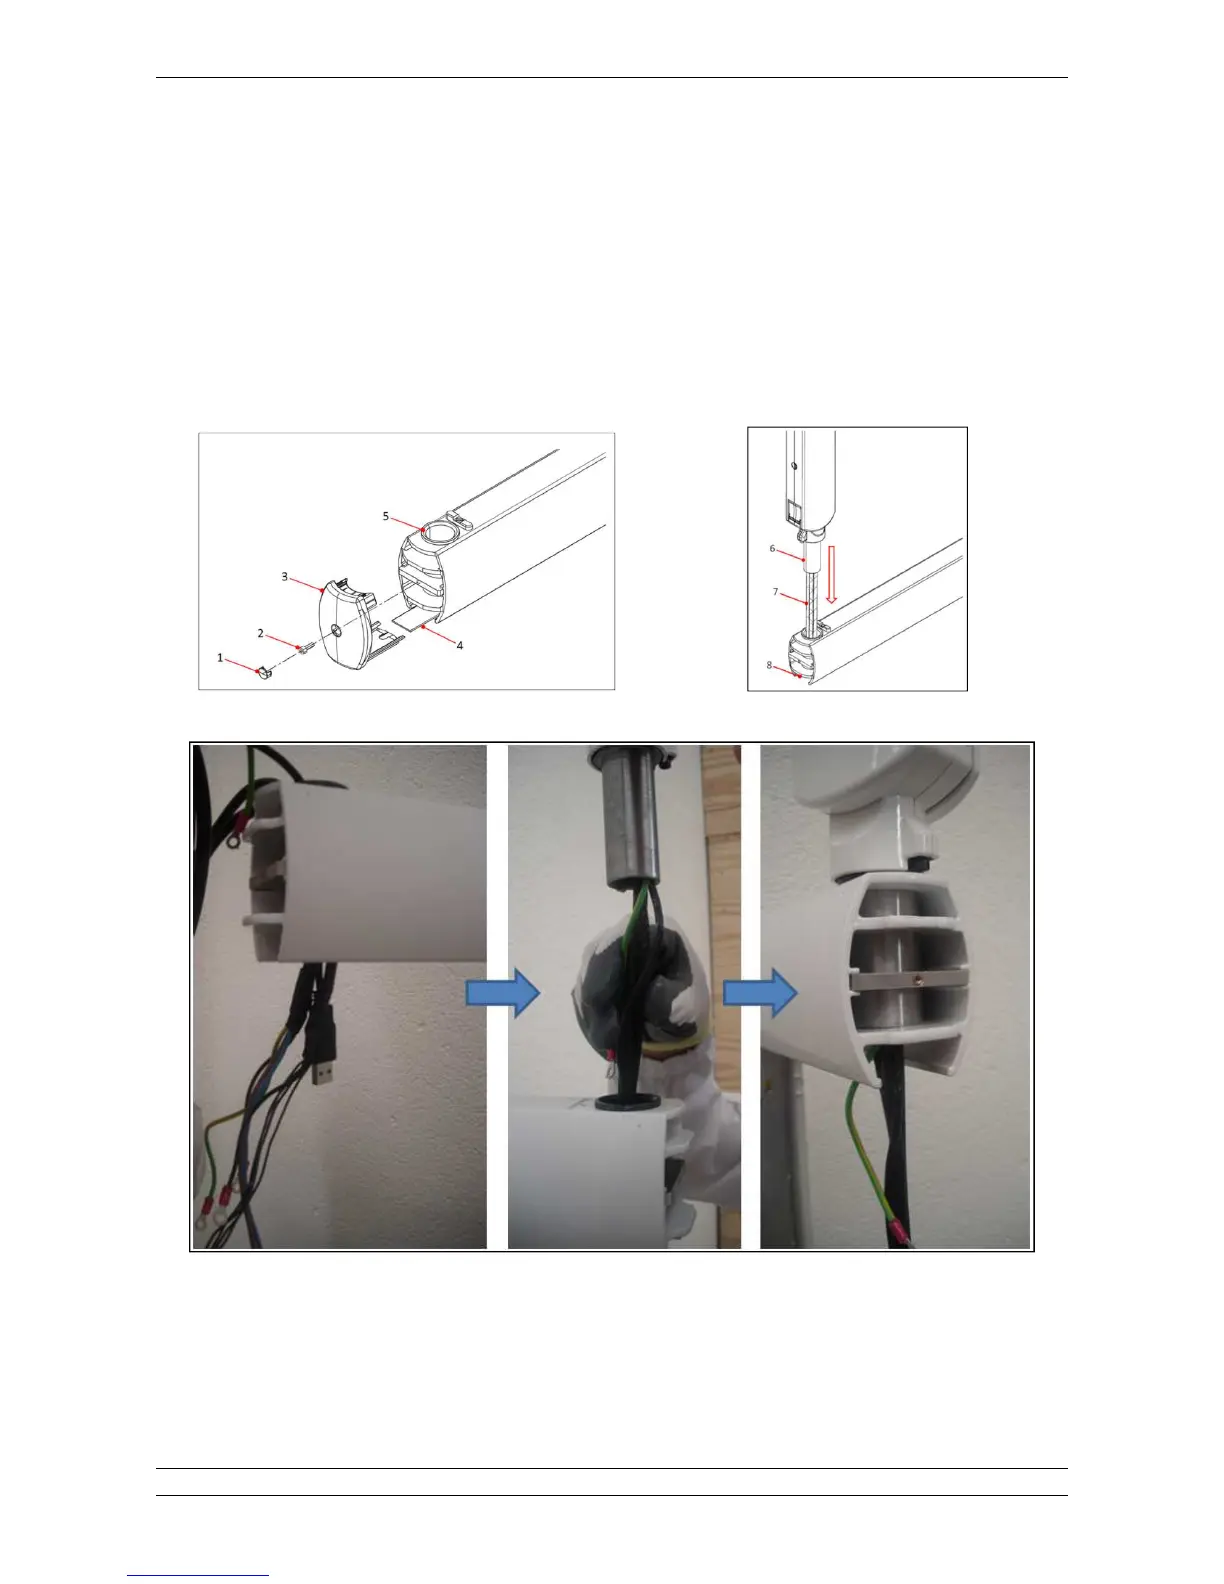
2. If not yet done, lift the screw cap D(Eusing a little flat screwdriverGthen remove the fixing screw D'E and the bracket cap D5E by
pulling it out from the bracket profile, at the end slide the bottom coverD;Eof the bracket.
3. Insert the SCISSOR group wiring DCE into the bushing D=E and then the SCISSOR tube D@E.
4. If required, clean the tube and the bushing and lubricate with Molikote D grease type only according to manufacturer’s
instructions..
5. Insert the wiring into the bracket housing DBE.
6. Fix and connect the cables in the bracket as shown below.
7. Arrange the cable in the bracket and close the covers.
Fig.5.16 Fig.5.17
Fig. 5.18