!"##"$"%"&%*""#
XM_unity_Installation&Maintenance_Manual Ed.1.3c2013 Page C(of (()
>@!1'8%5@@38B@C2
1. Disassemble the XMIND unity light case by unscrewing the 2 fixing screws (6).
2. Fix the back cover (2) to the wall by using the wall anchors (1) and anchors screws (3).
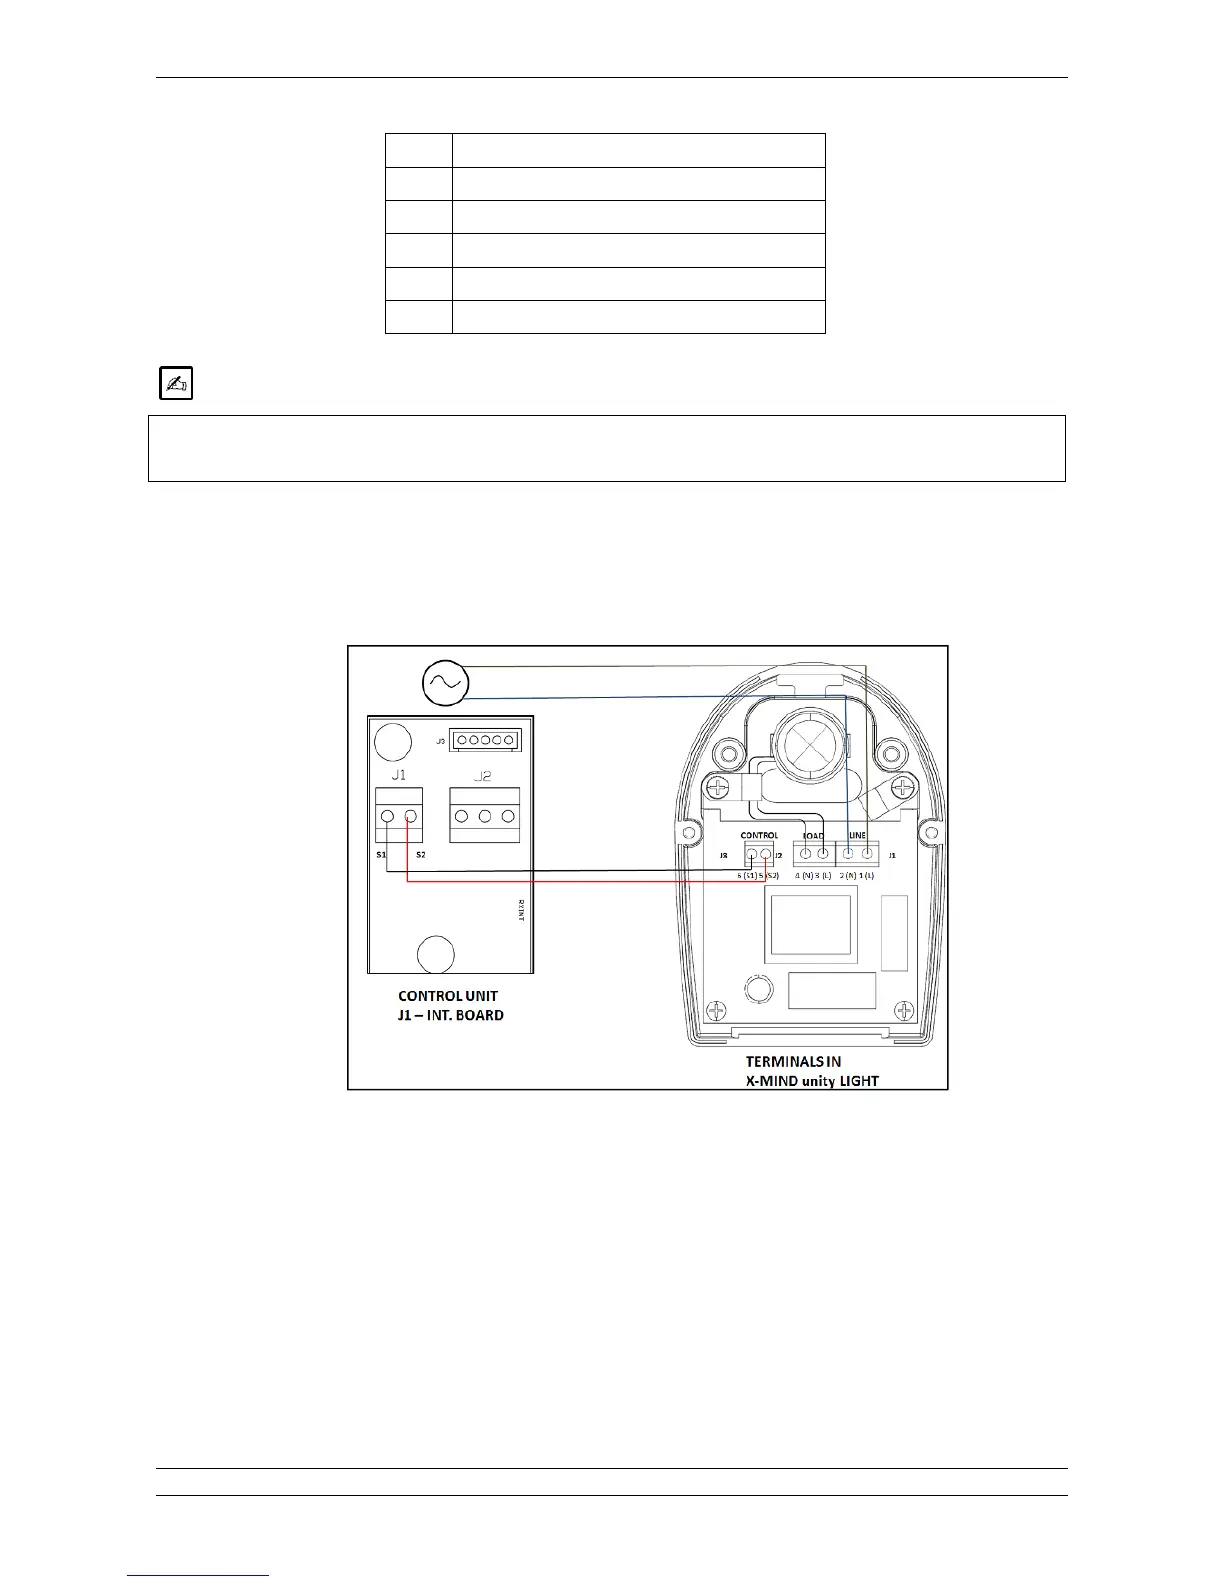
3. Connect the wires to the terminal as indicated in the figure below, it is important to respect polarity of L and N and S1
and S2. (For further details please refer to the wiring scheme in the chapter “ELECTRICAL SCHEME”)
Fig. 5.48
4. Arrange connections in the XMIND unity light as shown below, use the cable ties provided to fix the cable and always
respect polarity.