Doc : AM220-001E Release: 1.5 updated : October 2014
USE OF WICK INSERTION AND TRIMMING TOOLS
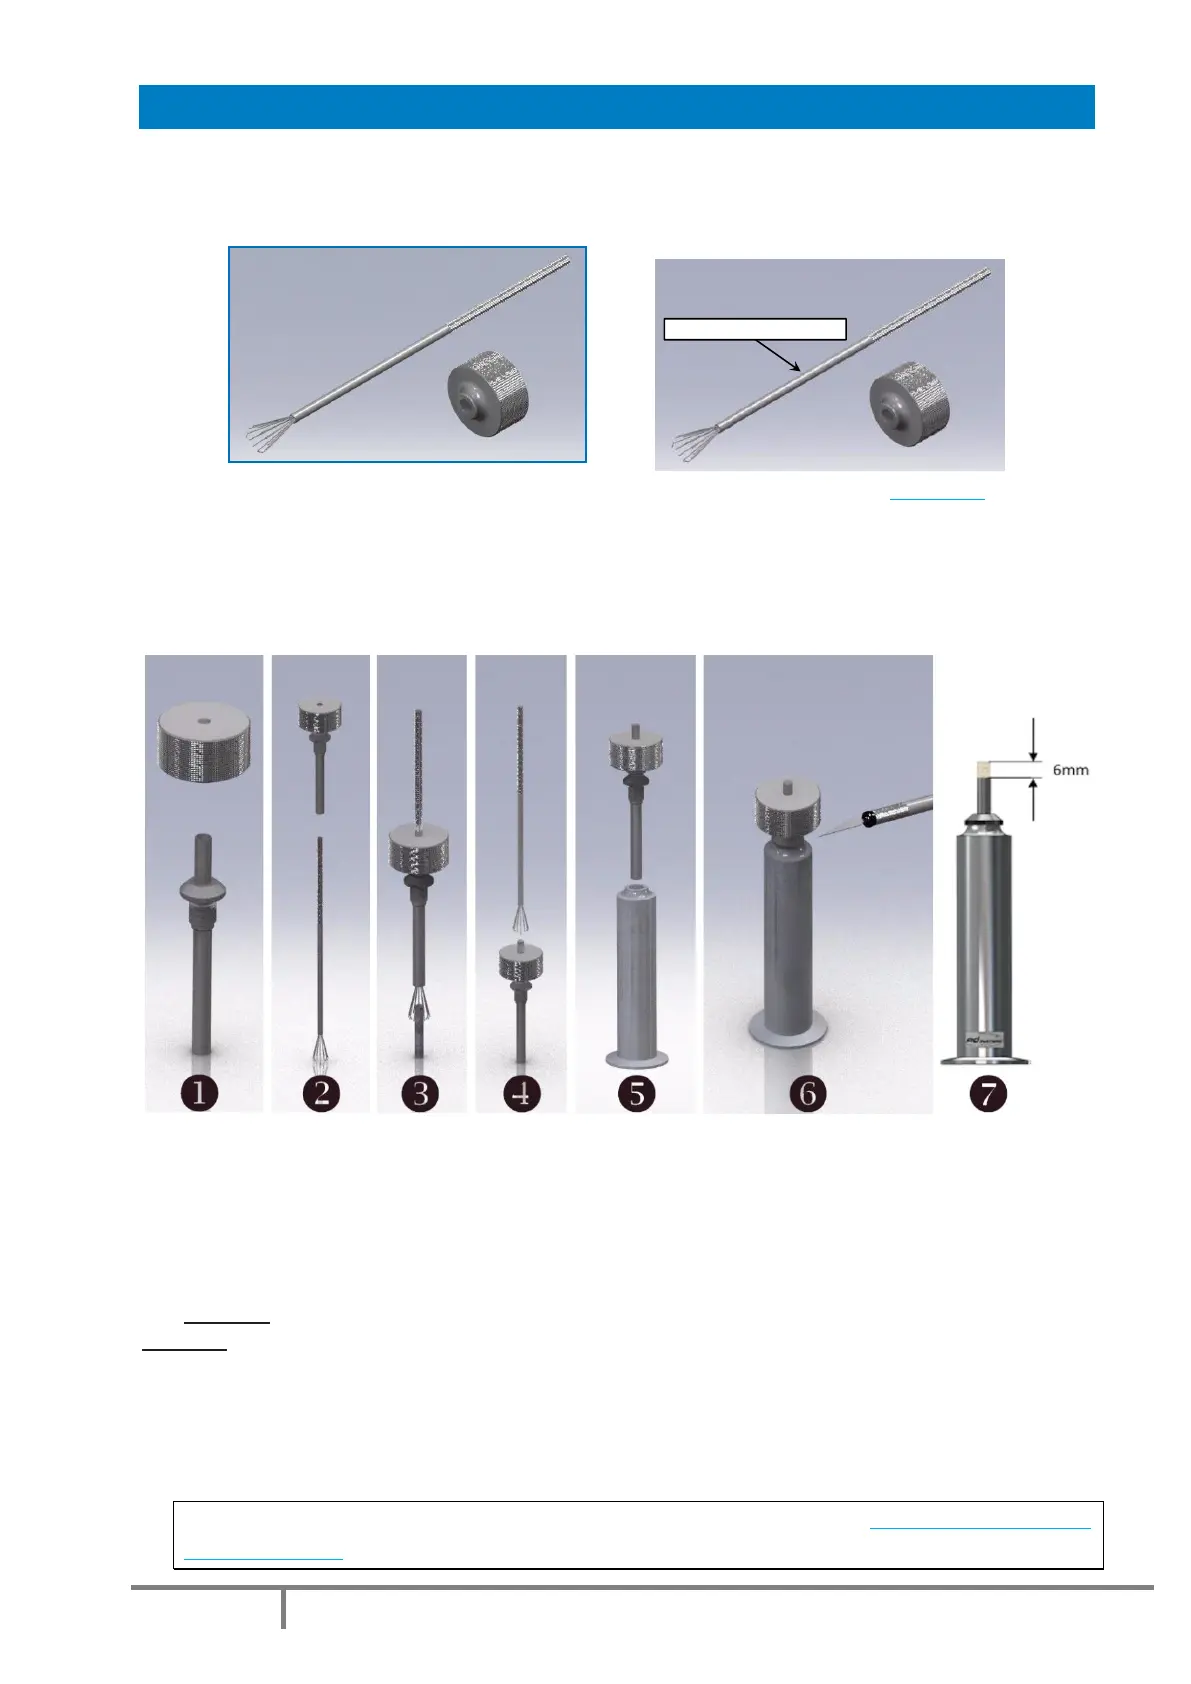
The “Wick Insertion Tool” (part number: AK220-001) consists of two parts:
1. Wick Insertion Tong (Top)
2. Wick Trim Gauge (Bottom).
Please note that the wick insertion tong is available separately as P/N ST220-004
Instructions:
This tool saves a significant amount of time in test preparation, avoids twisting of the wick and fraying of
ends. It is easy and straightforward to use.
1. Place the wick trim gauge on the top of the wick tube
2. Insert the tongs into the wick tube
3. Grip the top of the wick after it has been properly soaked in the sample according to the method
4. Gently pull the tongs with grasped wick through the wick gauge
5. When the wick is in place, keep the trim gauge on the wick tube and screw the assembly to the
candle filled with the sample according to the method
6. CAUTION: Use care when handling a sharp blade or knife!
CAUTION: Some new blades have a protective coating; remove the coating with a solvent before use
Using a clean sharp blade or knife, trim the wick level with the top of the trim gauge. Before
removing the trim gauge, thoroughly inspect the trimmed wick tip to ensure there are no frayed ends
or rough edges. Remove any frays or edges with a sharp blade or knife.
7. Remove the trim gauge. The candle is now ready for testing.
For more details, please note that a video is available on our website: http://www.adsystems-
sa.com/sp10.php
AK220-001 - SET OF TOOLS FOR WICK INSERTION AND TRIMMING
ST220-004 - Tong for wick trimmer