• Connect a MIDI continuous controller, such as the ADA CCP/ MXC combination,
to the MP-2's MIDI In. Be sure that the controller is set to the same MIDI channel
as the MP-2.
NOTE: If the MIDI Mismatch Warning feature in System Edit is set to "ON," the
MP-2 will display the previously shown error message if it receives MIDI data on a
channel other than its own.
• Move the controller slightly. The MP-2 will detect the MIDI continuous controller
number and change the Stereo Volume Controller value to match it.
The Stereo Volume Controller value can also be set with the "v" and "∧"
buttons.
• Press the SYSTEM EDIT button to exit System Edit mode.
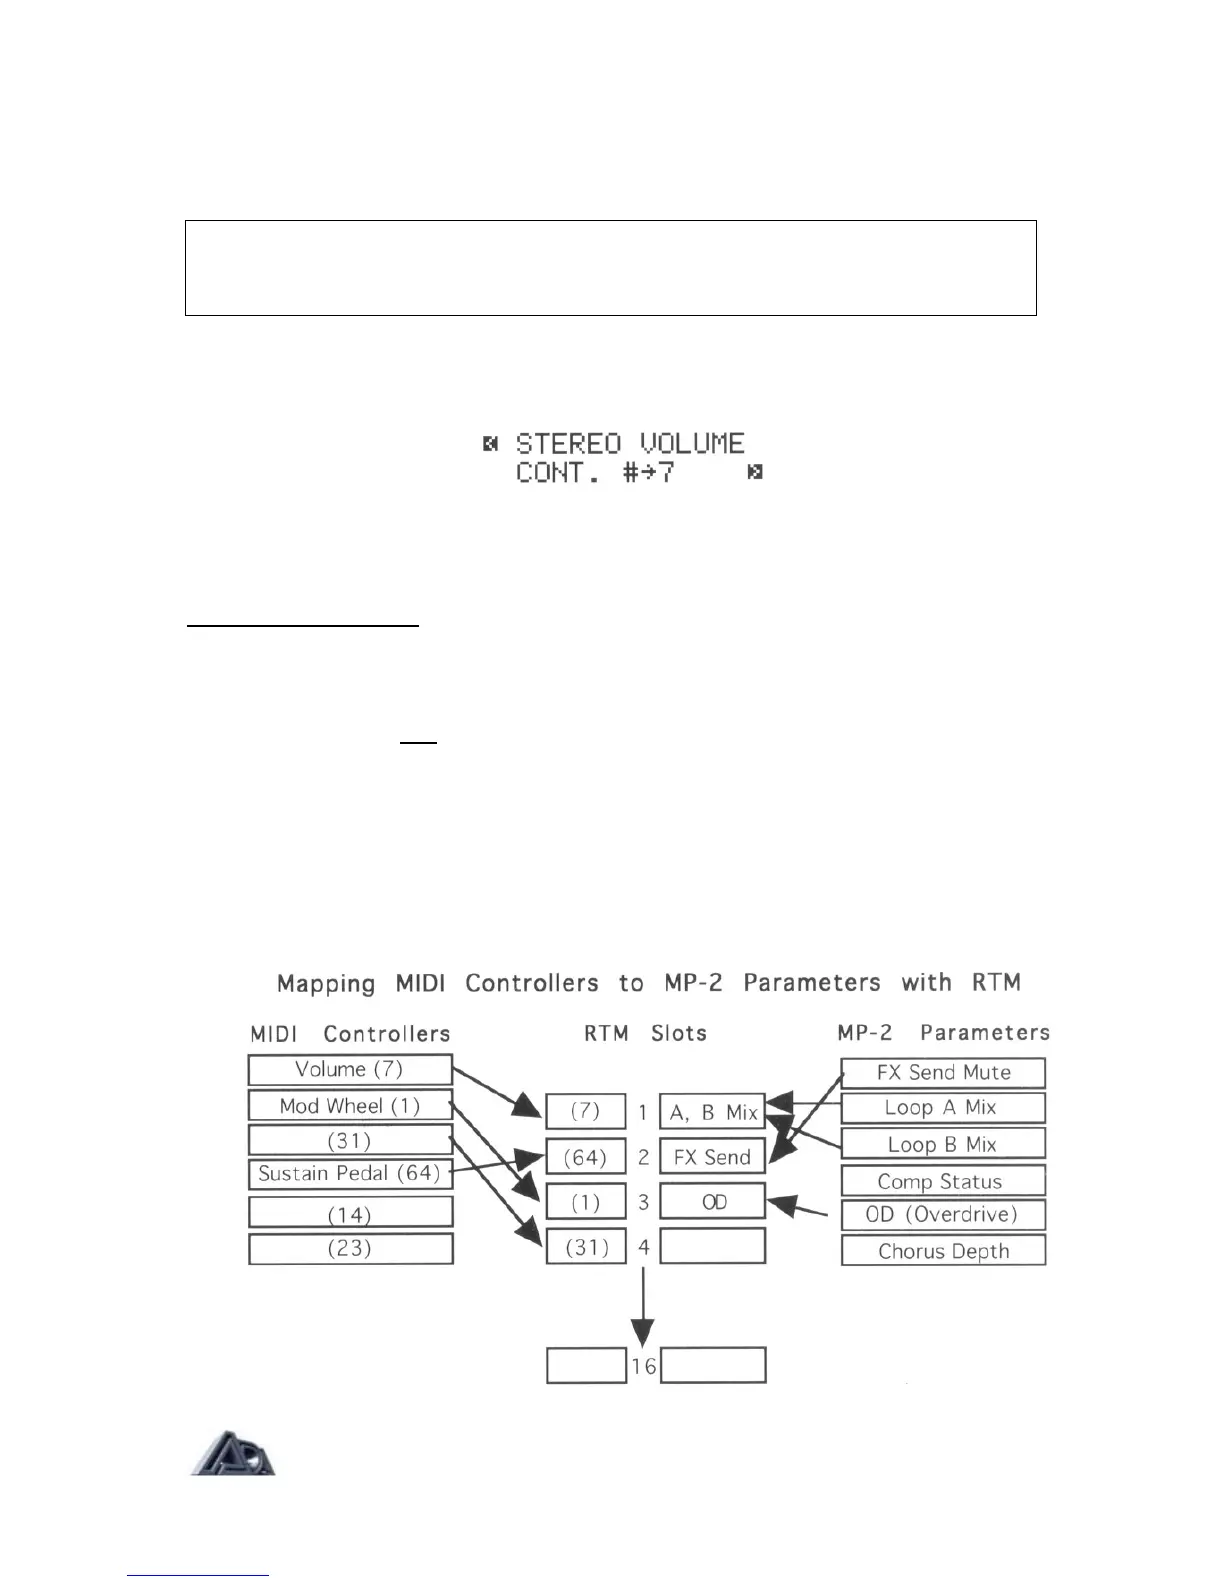
Real-Time MIDI (RTM)
Real-Time MIDI (RTM) is one of the MP-2's most powerful features, allowing control of
virtually any MP-2 program parameter in performance through MIDI. The MP-2 can make up
to sixteen assignments of MIDI controllers to MP-2 parameters for each program. Each
assignment is called a slot. RTM assignments are made in Program Edit mode and used in
Play mode.
There are two modes for making RTM assignments: Quick and Expert. Expert mode allows
more detailed programming at the expense of taking a little more time to do. Quick mode is
an extremely fast method of making assignments but does not allow them to be as finely
tailored. See page 55 in the Reference chapter for complete information on programming
RTM assignments in Expert mode.
Page: 31