BYB User Manual Page 36 of 55 PN: 90020 Version: 1.4
Lower again, then raise the lift. If cables are adjusted properly the lift should be raising level and all four
primary locks engage or audibly “click” simultaneously. If not adjust a low cable by tightening the adjusting
nut on the top cap, locking it into place with the jam nut.
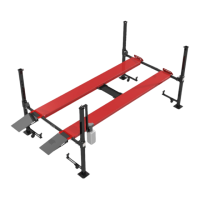
Before Loading
• Check that the primary locks and hiem joints are adjusted correctly.
• Check the secondary locks move freely and return to their home position.
• Check that the lift is “timed” (primary locks click simultaneously & the deck is level when raised).
• Check all nuts, bolts and snap rings are in place and tightened.
There will be some initial stretching of the cables in the beginning. It may be necessary to
re-adjust the cables a week after first use.
• Once the lift is timed, drive a typical vehicle on to the lift and slowly raise. If the lift is not lifting the
vehicle level, place onto the locks and re-time the lift by tightening/loosening the nut/cable on the top
cap. This is normal operation as the cables stretch.
STEP 12: Operation
Do not use this lift unless you know the proper operation of the lift and its safety devices,
and the hazards involved. See Safety Instructions page 2 of this manual.
• Read and follow all safety instructions in this document and the power unit before operation.
Advantage Lifts also recommends ALI’s “Lifting it Right” and “Safety Tips” from autolift.org.
• Drive the vehicle onto the lift platform using a spotter. It is recommended to center the wheelbase on
the runways. Set the vehicle’s parking brake and leave the transmission in park / gear. Chock the
vehicles wheels.
• Stand clear – Push the power switch on the power unit (figures 11.1 & 11.2) to raise vehicle to
desired height. When the desired height is reached, release the power button then push the
hydraulic release lever on the Power Unit and lower runways until it stops, check all four latches for
full engagement in the square holes on each leg.
• To lower – push the power button to raise – rotate primary lock release handle and hold – push
hydraulic release lever on Power Unit to lower (figures 11.1 & 11.2).
• Any hydraulic oil leakage, unusual noise, or excessive wear must be fixed before using lift.
Warning: Make sure all four latches release – if not STOP, raise higher until latch is clear, if a latch still
does not release, adjust the threaded rod attached to the hiem joint end on the appropriate latch.