Home
Agilent Technologies
Laboratory Equipment
8860
Agilent Technologies 8860 Installation And First Startup
4
of 1
of 1 rating
76 pages
Give review
Manual
Specs
To Next Page
To Next Page
To Previous Page
To Previous Page
Loading...
1
Installing th
e GC
24
Installation and First Startup
Step 4 Connect the power cord and turn on the GC
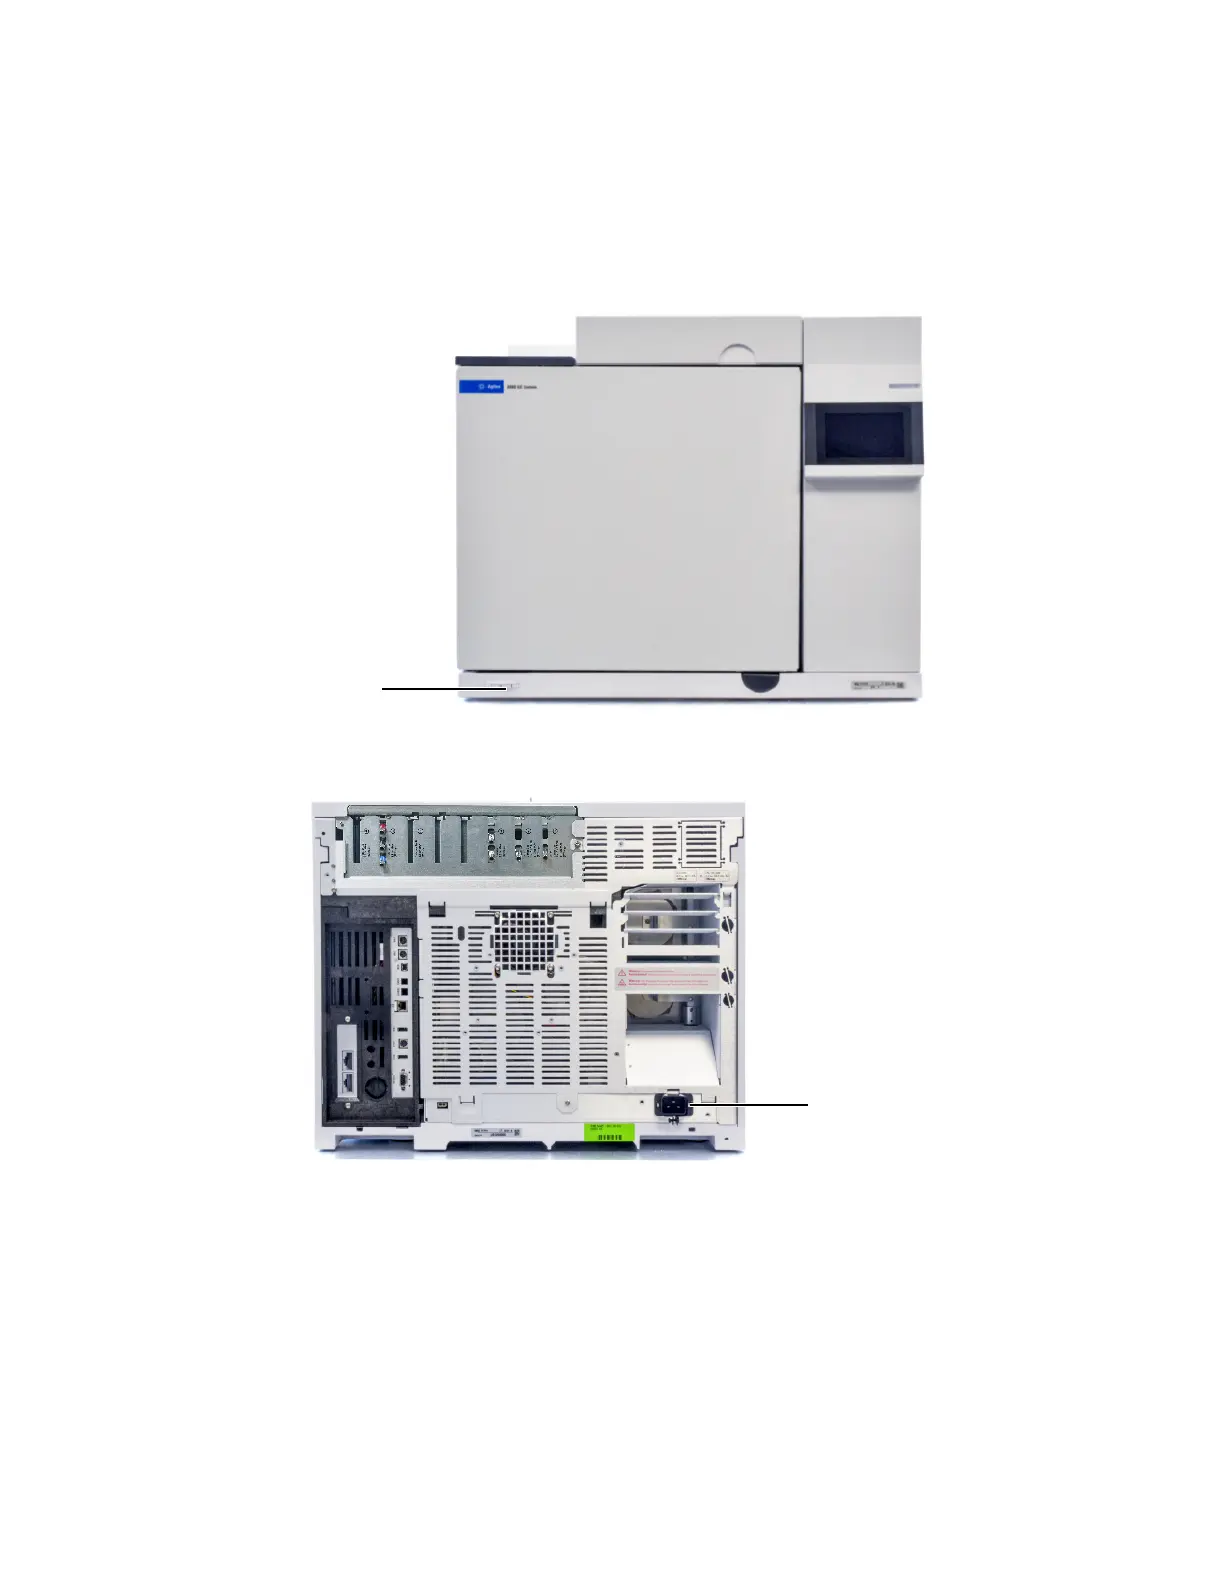
1
Verify
that the power switch is in the Off position.
Figure 6.
Power switch location
2
Plug the
power cord
into the back
of the G
C and the p
ower outl
et.
Figu
re 7.
Power cord
loca
tio
n
Powe
r
Switch
Attach
powe
r
cord he
re
23
25
Table of Contents
Table of Contents
3
Installing the GC
7
Overview of Installation
8
Purpose of this Procedure
8
Customer Responsibilities
8
About Agilent' S Installation Service
8
Tools and Additional Parts Required
8
Performing Checkout
9
System Installation
9
Configuring the GC
9
Connecting to the Browser Interface
10
The 8860 GC
11
Unpacking
12
Place the GC on the Bench
13
Verify Line Voltage, Voltage Settings, and Power Cord
15
Line Voltage
15
Power Consumption
16
Power Cords Available
17
Grounding
21
Connect GC to LAN, Local Computer, or Tablet
22
Connect the Power Cord and Turn on the GC
24
Configure the GC IP Address
25
Set the Pressure Units
26
Configure Carrier Gas Types
27
Connect Gases and Traps
28
Install the Gas Regulators
28
Connect the Tubing to the Gas Source
30
Install Traps
31
Plumb to EPC Flow Modules
31
Install aux EPC Module Frits for Your Application
32
Install Hydrogen Sensor Calibration Gas
34
Leak Test All Connections and Set Source Pressures
36
Set Source Gas Pressures
38
Install Inlet Checkout Parts
39
Install ALS, if Ordered
40
Configuring GC-MSD Communications
41
Connect the External Cables
42
Back Panel Connectors
42
Connecting Cables
43
GC / MS / Agilent Data System / als
45
Additional Cabling Configurations
45
Vent ECD or Uncombusted Hydrogen to a Fume Hood
46
Connect Valve Actuator Air (if Present)
47
Configure the Checkout Column
48
Checkout Column
48
Install the Checkout Column
49
Transfer the Checkout Sample to a Screw-Top Sample Vial
50
When the System Stabilizes, Run One Injection
51
Prepare for the Next Analysis
52
A Making Swagelok Connections
53
Making Swagelok Connections
54
Using a Swagelok Tee
57
B Cabling Diagrams and Remote Start/Stop
59
Using the Remote Start/Stop Cable
60
Connecting Agilent Products
60
Connecting Non-Agilent Products
60
Multi-Instrument Cabling Examples
63
GC / als / Non-Agilent Data System
63
GC / 3395A/3396B Integrator / als
64
GC / 3396C Integrator / als
64
Example: Using a Y-Cable in a Setup (Gc/Msd/Data System/Headspace Sampler)
65
GC / External Events (Unspecified, Non-Agilent Instrument)
66
Cable Diagrams
67
Analog Signal Cable, General Use, G1530-60560
67
Agilent Analog Signal Cable, G1530-60570
68
Remote Start/Stop Cable, General Use, 35900-60670
68
Agilent APG Remote Start/Stop Cable, 03396-61010
69
Agilent APG Remote Start/Stop Cable, G1530-60930
69
Agilent Remote Start/Stop Y-Cable, G1530-61200
70
External Event Cable, G1530-60590
72
Other manuals for Agilent Technologies 8860
User Manual
86 pages
Maintaining
244 pages
Site Preparation Guide
56 pages
4
Based on 1 rating
Ask a question
Give review
Questions and Answers:
Need help?
Do you have a question about the Agilent Technologies 8860 and is the answer not in the manual?
Ask a question
Agilent Technologies 8860 Specifications
General
Brand
Agilent Technologies
Model
8860
Category
Laboratory Equipment
Language
English
Related product manuals
Agilent Technologies 8890
278 pages
SureCycler 8800
66 pages
Agilent Technologies 8453
632 pages
Agilent Technologies 850-DS
100 pages
Agilent Technologies Cary 8454
118 pages
Varian CP-8400
62 pages
Varian CP-8410
62 pages
Agilent Technologies 6460
28 pages
Agilent Technologies 5975
192 pages
Agilent Technologies 7820A
294 pages
1260 Infinity
252 pages
1290 Infinity II
291 pages