139
Slice
Using this method, the pads correspond to slices of the currently recorded sample. Slice markers divide the sample
into multiple regions called slices, which you can adjust in the Chop Mode of Sample Edit Mode (see Sample Edit
Mode > Chop Mode for more information). This is useful when working with a long sample with different sounds
throughout (e.g., a drum loop or a long melodic or harmonic passage).
To start recording, do one of the following:
• Start performing so that the incoming audio level exceeds the level of the threshold slider.
• Tap Record under the Sample Length counter.
To insert a slice marker in a sample while recording, press any pad as the sample records. Each time you press
it, a slice marker will be placed at that location.
The number of the pad that flashes red is the number of the slice marker that will be inserted next. The numbers of
the pads that are lit yellow are the numbers of the slice markers that are already inserted.
When you are done recording, you can name the sample and create a new program using the slices.
To stop recording, tap the round Stop button.
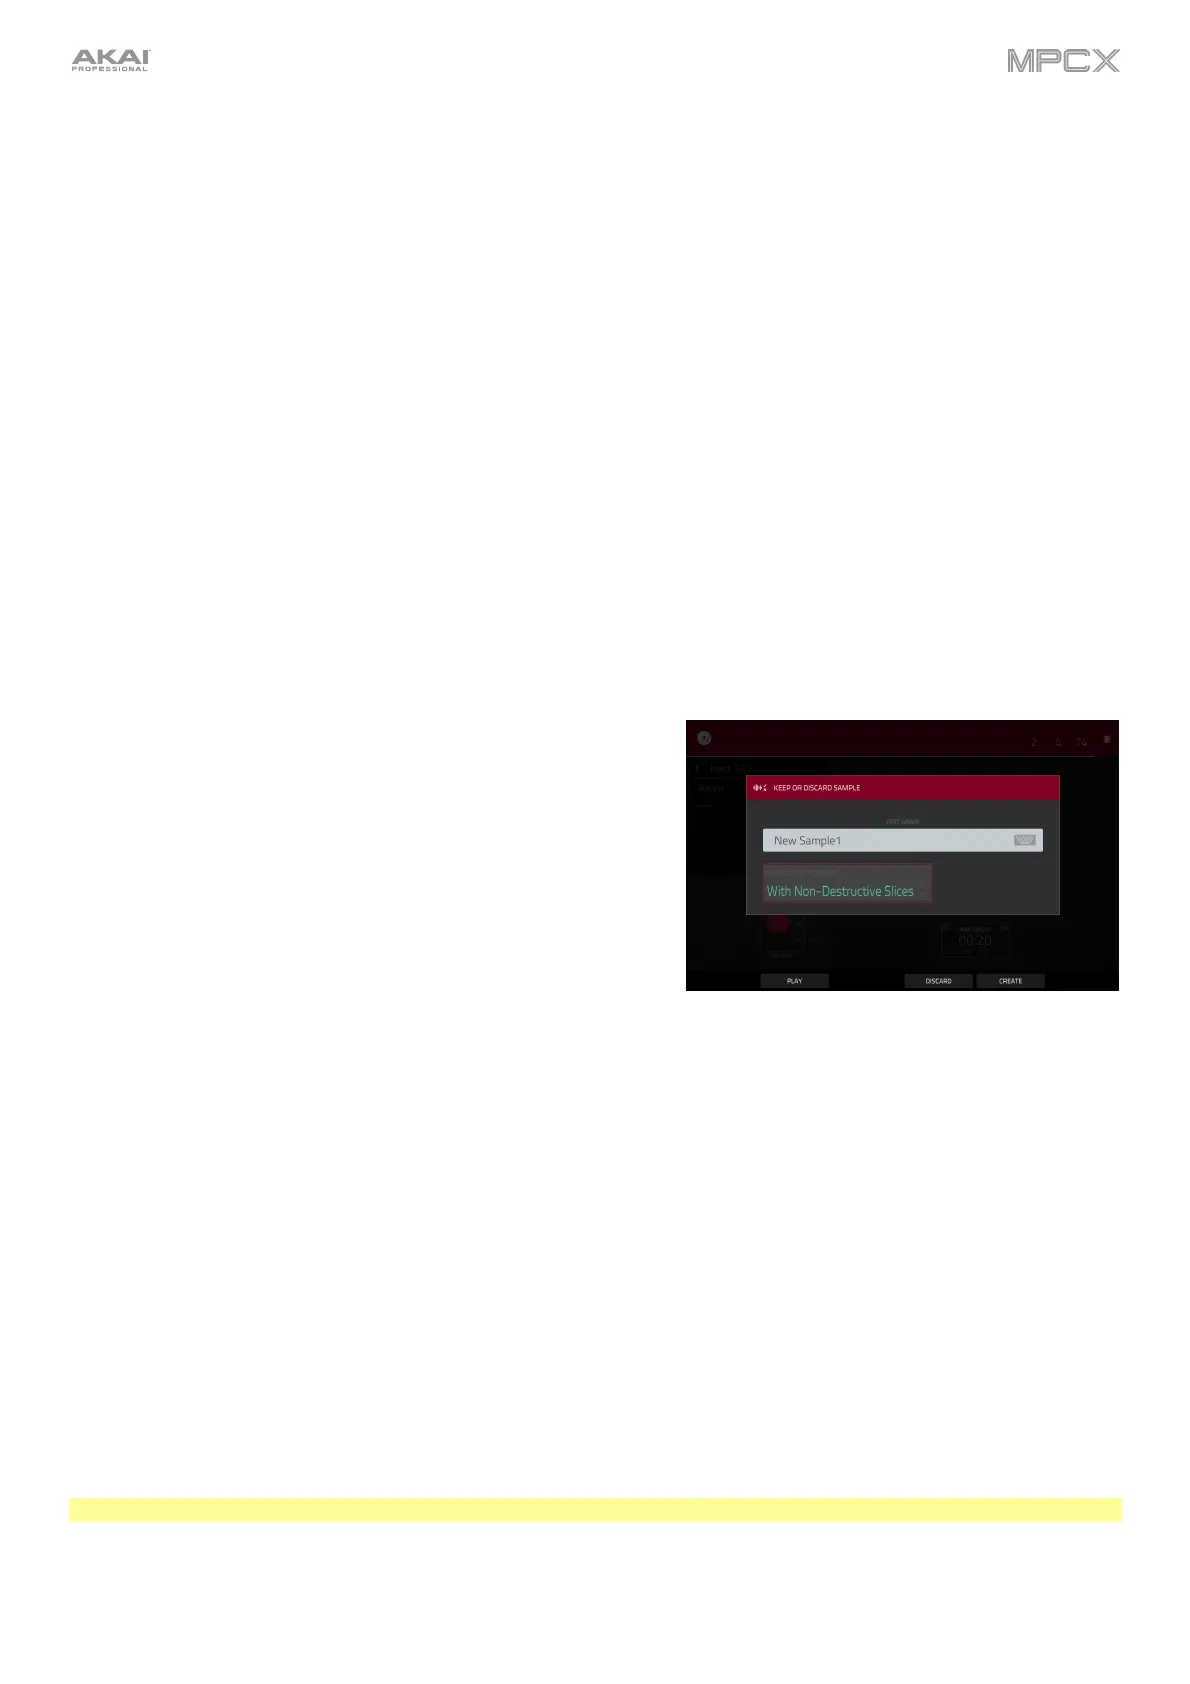
After you stop your recording, the Keep or Discard Sample window
will appear.
Use the Edit Name field to name the new sample. Tap it and use
the virtual keyboard that appears. Otherwise, the process will add a
consecutive number after the sample name.
Use the Create New Program field to assign the new sample to a
new program:
Off: No program will be created. The slices will still be added to
your project’s sample pool.
With Non-Destructive Slices: In the new program, each pad’s
Slice setting will be set to the corresponding slice number. This is
identical to how you can assign samples in Sample Edit Mode (as
described in Sample Edit Mode > Chop Mode > Converting or
Assigning Slices).
With Pad Parameters: In the new program, each pad’s Slice
setting will be set to Pad. The Pad Start and Pad End will be
set to the slice’s start point and end point values, and the Loop
Position
will be set to the slice’s start point but with Pad Loop
deactivated. This is identical to how you can assign samples in
Sample Edit Mode (as described in Sample Edit Mode > Chop
Mode > Converting or Assigning Slices).
To confirm your selections, tap Create or Keep at the bottom of the touchscreen.
To discard the recording and return to the Sampler, tap Discard at the bottom of the touchscreen.
To play the recording, tap Play at the bottom of the touchscreen.
Tip: We recommend editing your recorded sample in Sample Edit Mode (see Sample Edit Mode for more information).