28
Drum Loops & Chop Mode
Modern music producers often use drum loops to add grit and nuance to programmed beats. This section explains
how to use Sample Edit Mode to work with drum loops.
Use the Browser to locate a drum loop, and then double-tap it to add it to the current program. The loop does not
have to match the tempo of anything in the project.
To enter Sample Edit Mode, press Sample Edit.
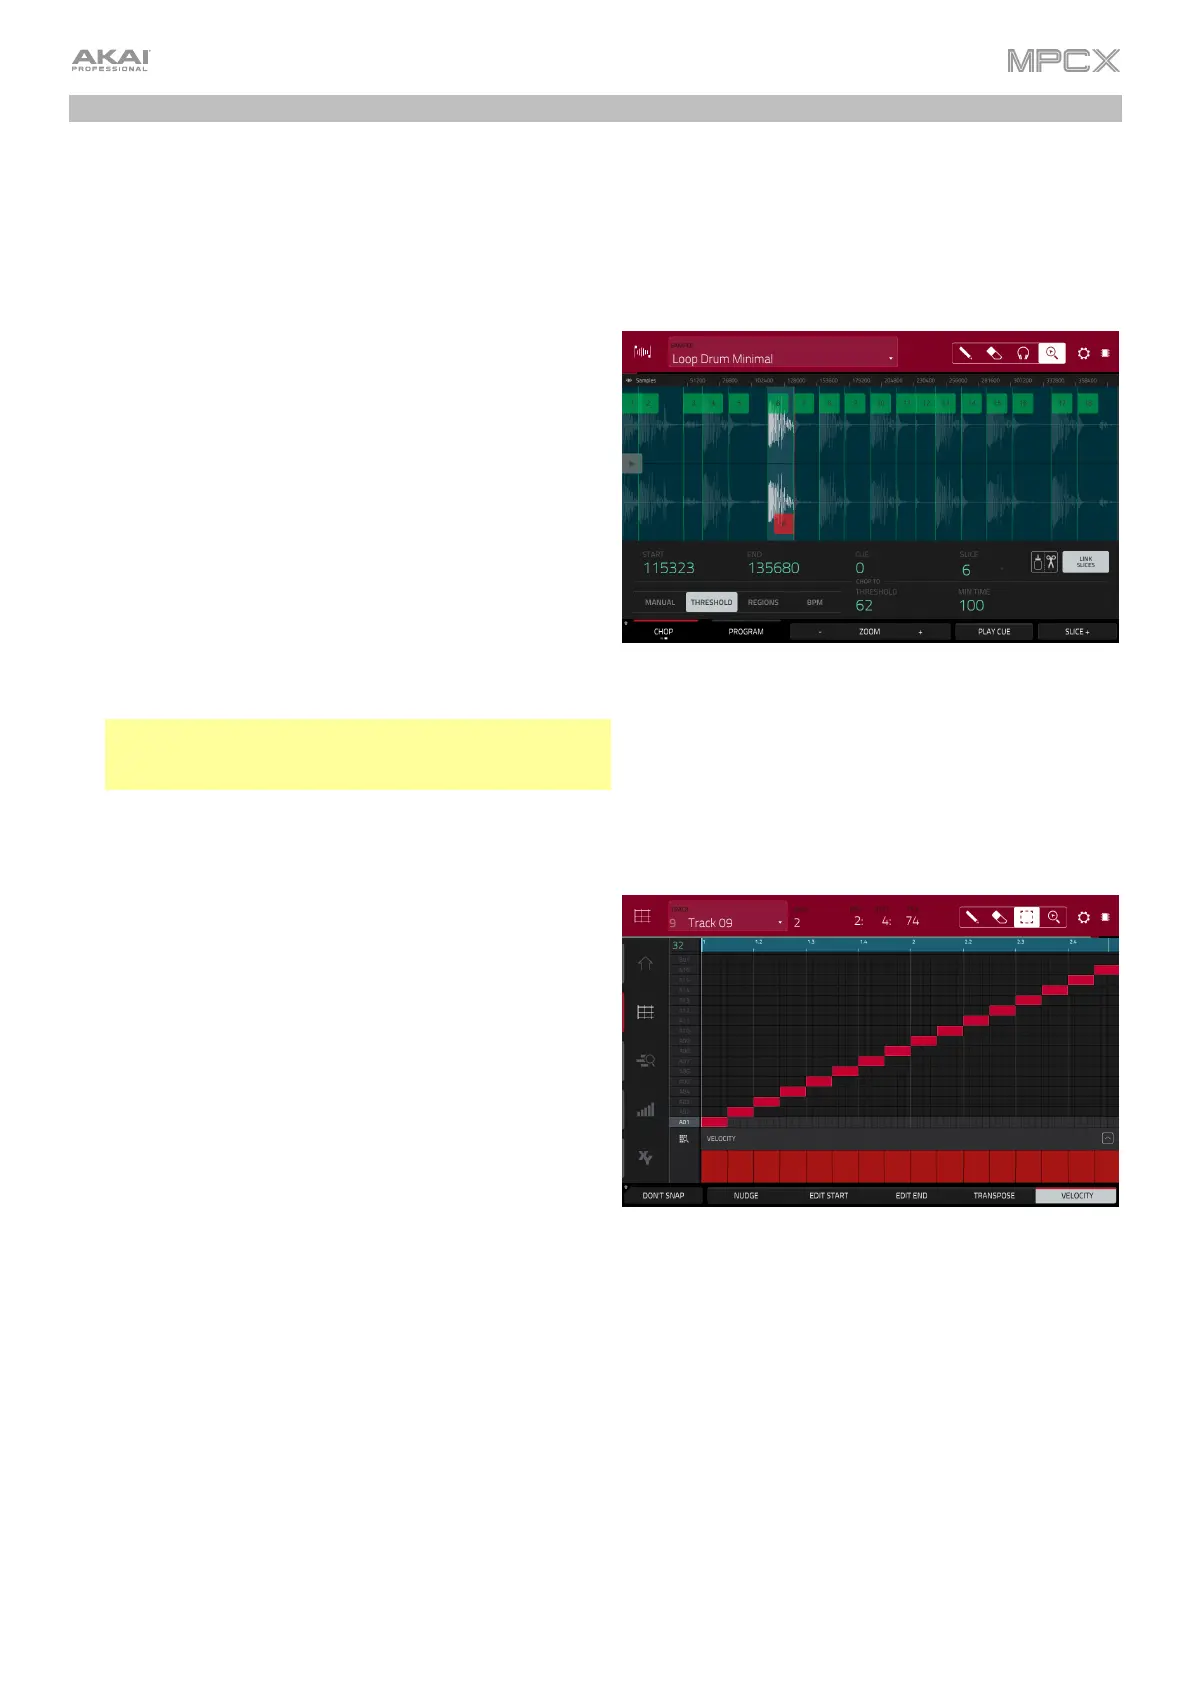
1. Tap the Sample field at the top of the touchscreen, and
then use the data dial or –/+ buttons to select the
loaded drum loop. You can scroll through all loaded
samples in the project. Alternatively, double-tap the
Sample field, and then tap a sample to select it.
2. Tap the Trim/Chop tab in the lower-left corner to switch
between Trim Mode and Chop Mode. Select Chop
Mode, which will let us cut the drum loop into slices.
3. Tap Threshold, and then tap the Threshold field to the
right of it. Use the data dial, –/+ buttons, or numeric
keypad to select a value. Alternatively, double-tap the
Threshold field and use the numeric keypad in the
touchscreen. The lower the threshold, the more slices
will be created. Be sure to select a value so that every
transient peak of the drum loop has a corresponding a
slice marker.
Tip: Each slice will be automatically assigned to a pad:
Pad A01 plays Slice 1, Pad A02 plays Slice 2, etc. Press
each pad to play the slice with the same number.
Let’s use this chopped sample to create a new program in which each of these slices is an individual sample. We
can also automatically create corresponding note events to play back these slices sequentially.
1. Press and hold Shift and then tap Convert at the bottom
of the touchscreen to enter the Convert or Assign
Slices window.
2. Tap the Convert To field, and then use the data dial or –
/+ buttons to select New Program with New Samples.
3. Make sure Crop Samples is checked. If it is not, tap it.
4. Make sure Create New Program is checked. If it is
not, tap it.
5. Make sure Create Events is checked. If it is not, tap it.
6. Tap the Bars field, and then use the data dial or –/+
buttons to select how many bars the entire sample
should use in your program.
7. Tap Do It to proceed. Each slice will be assigned to a
pad, and each pad will have a recorded note event in the
track. When you play that track, it will play each pad (each
slice) in the original order. Press Menu and then tap Grid
View to see how the sample appears in your sequence.
8. Press Play and listen to how the drum loop matches
your song tempo now.
You can also edit the note events of the drum loop slices—enter Main Mode to do this. A new track with the note
events playing their corresponding slices has been automatically created. Tap the TC/clock icon at the top of the
touchscreen to use the Timing Correct window to quantize the note events so they fall on exact, even time intervals.
You can also rearrange the note events, thus creating a new playback order for the slices. You can also edit each
slice or sample in Program Edit Mode. You can add effects for slices or use the filter function to change the
frequency range of a selected slice. There are almost no limits to what you can do.
See Operation > Modes > Sample Edit Mode > Chop Mode to learn more about this feature.