LS User Manual 13
4.0 LOAD CELLS
4.1 CARE OF LOAD CELLS
ALL machine operators should be aware that LLOYD INSTRUMENTS’ Load Cells are precision force
measuring instruments, which should be treated with the utmost care to avoid accidental damage. In
particular low force Load Cells are easily damaged if abused or used without sufcient care.
NOTE: Do not submit Load Cells to physical shock of any kind. DO NOT DROP!
NOTE: When a Load Cell is removed from a machine immediately put it in a safe and dry
place.
4.2 FITTING LOAD CELLS
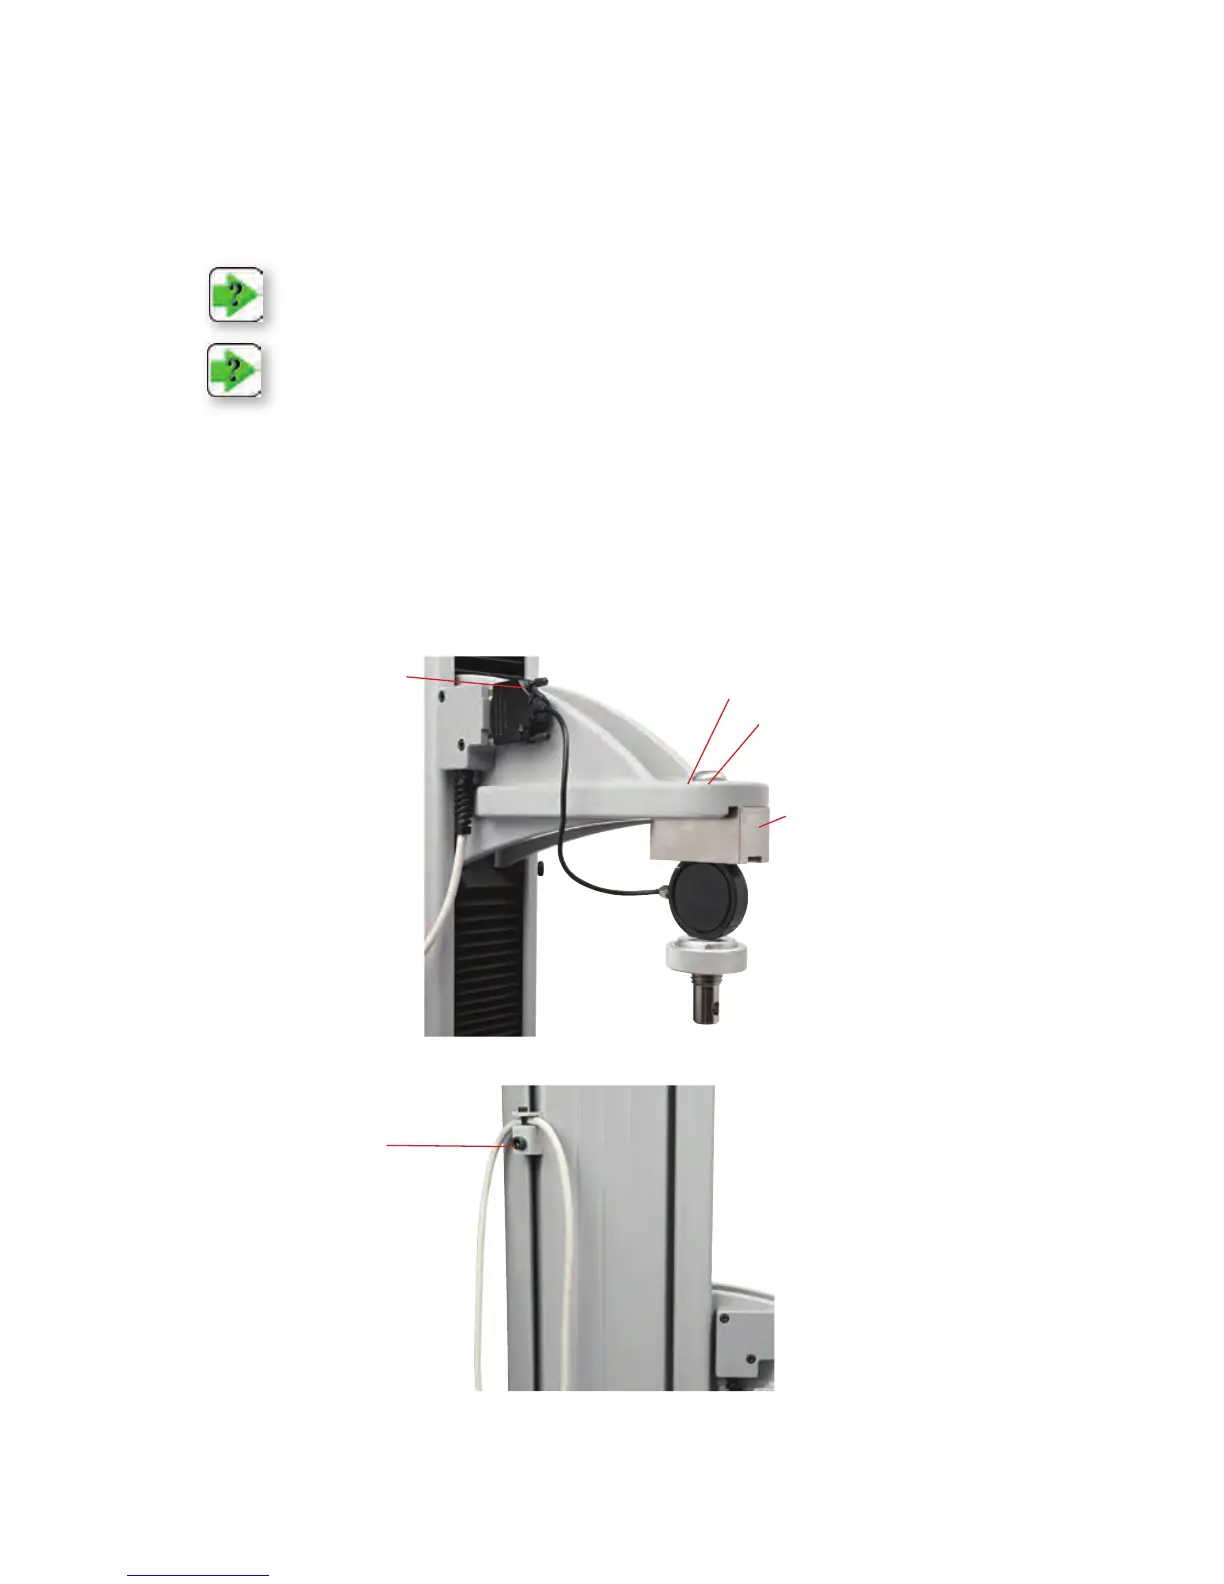
Place the Load Cell xing screw through the hole in the crosshead and carefully offer up the load cell
with the connecting lead facing inwards under the crosshead.
Screw the xing screw (A) into the load cell (D), taking care to ensure that the locating dowel (B),
when tted) on the load cell sits in the hole in the moving crosshead. Tighten the screw with the 8mm
HEX key provided. Insert the load cell plug (C) in the socket on the top of the moving crosshead and
nger tighten the two retaining screws.
A
B
C
D
LS Load Cell Fitting
The Load Cell Cable Support can be adjusted up or down on the LS Column Extrusion using a 5mm
Hex Key. Ensure there is plenty of length in the cable so that the crosshead can travel without pulling
the cable assembly.
Load Cell Cable Support
 Loading...