46
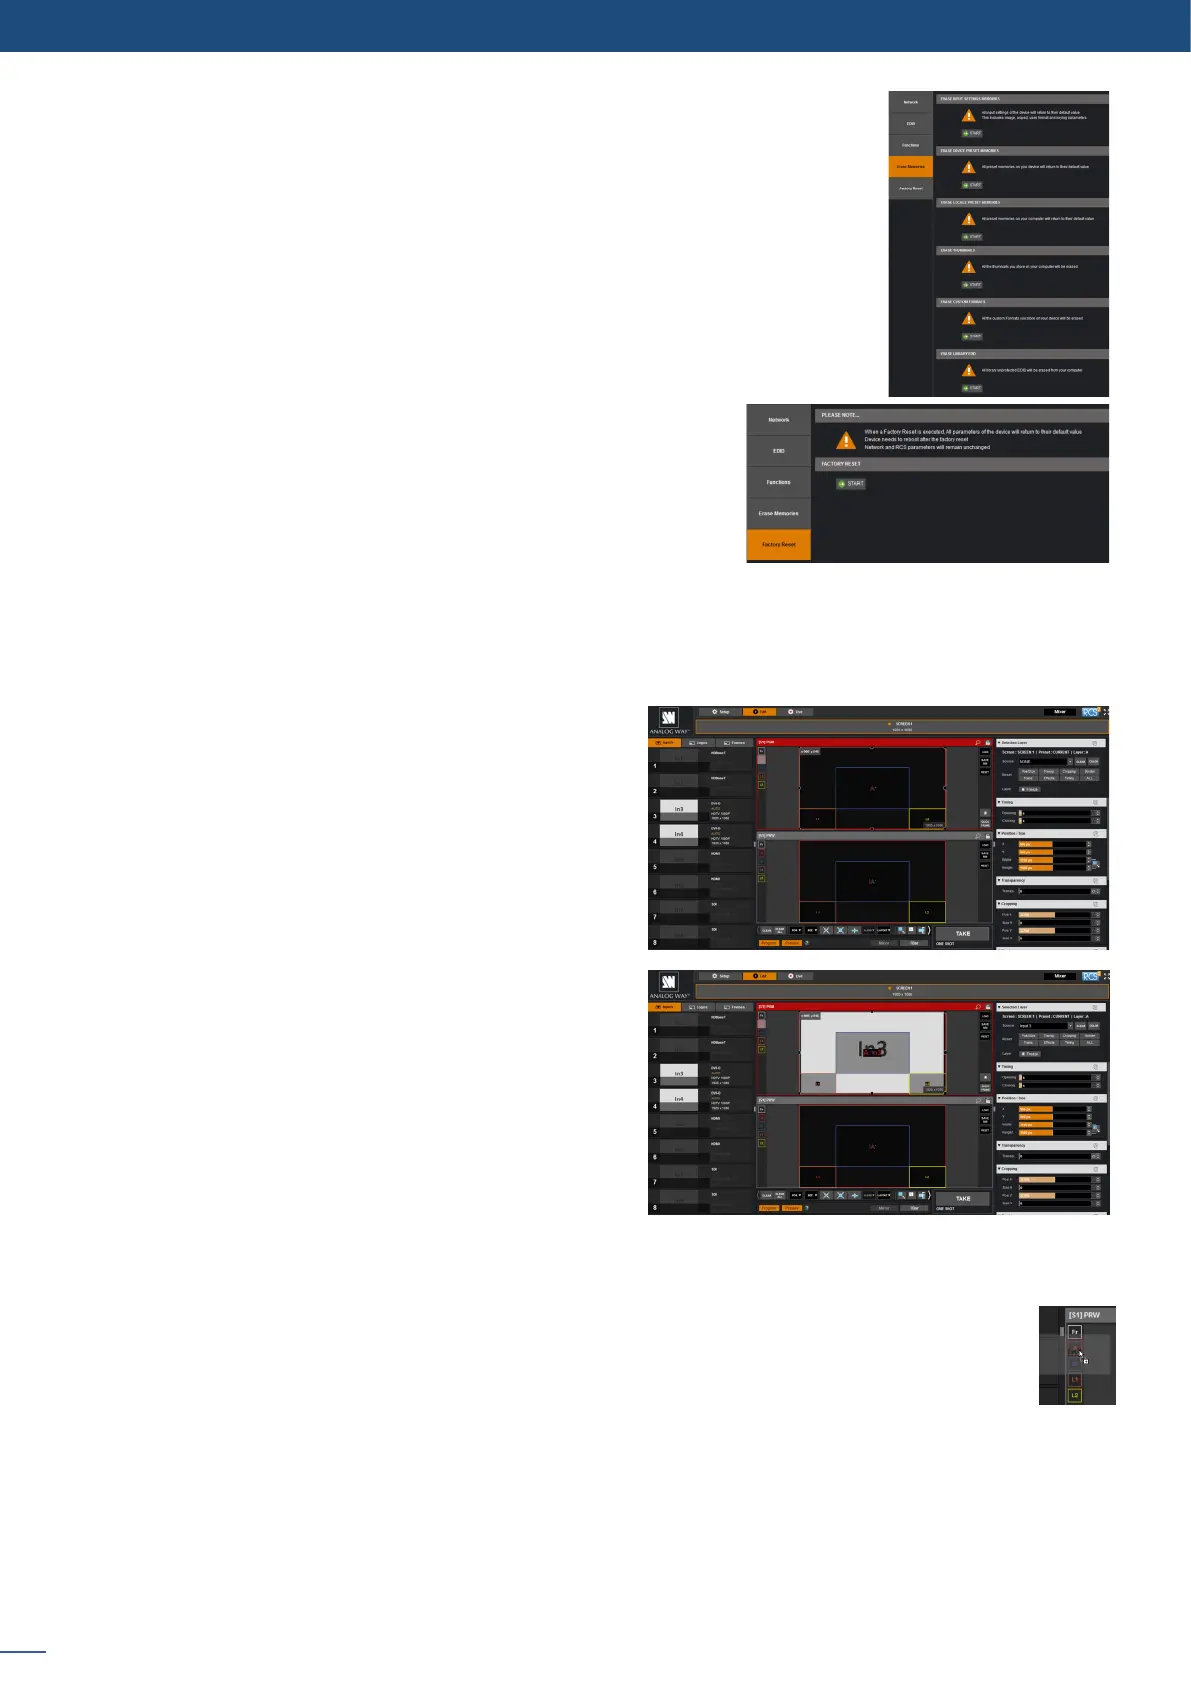
When you enter into the Edit menu, you
will encounter by default this window.
On this example, we have the Screen 1
Program and the Screen 1 Preview. The
following example can be applied for any
other output conguraons.
7.3.1 Layer management
7.3 Edit
To display an input into one of the
available layers A or B, simply drag and
drop the input from the le column to
the layer on the chosen screen. You can
assign or change the inputs directly on
Program as well as Preview.
To display a logo, open the logo list column (next to the source list) and then drag and drop the desired logo
onto the logo layer. The same procedure is used to display a Background Frame.
You can assign a source to a layer by dropping the selected source into the layer leer icon, located
on the le side of the layout window. This is parcularly useful when the desired layer is hidden or
blocked by other layers.
When a layer contains an input and is not empty, the RCS² displays the input number or a customizable
thumbnail icon that represents your input.
Please note: this thumbnail is not a live image.
Into this secon, you can erase individual sengs.
• Erase input sengs memory: all input sengs will return to their default value.
This includes image, aspect, user format and keying parameters.
• Erase thumbnail: all the thumbnails you store on your computer will be erased.
Click on start to erase all sengs (except network and RCS² parameters).
The unit will reboot itself aer the factory reset.