Note
Pin connectors and RF cables are not supplied with the node. Pin connectors must be
5/8-inch outside diameter with 24 threads per inch. RF cable must be 75 Ohm coaxial cable
compatible with the pin connector.
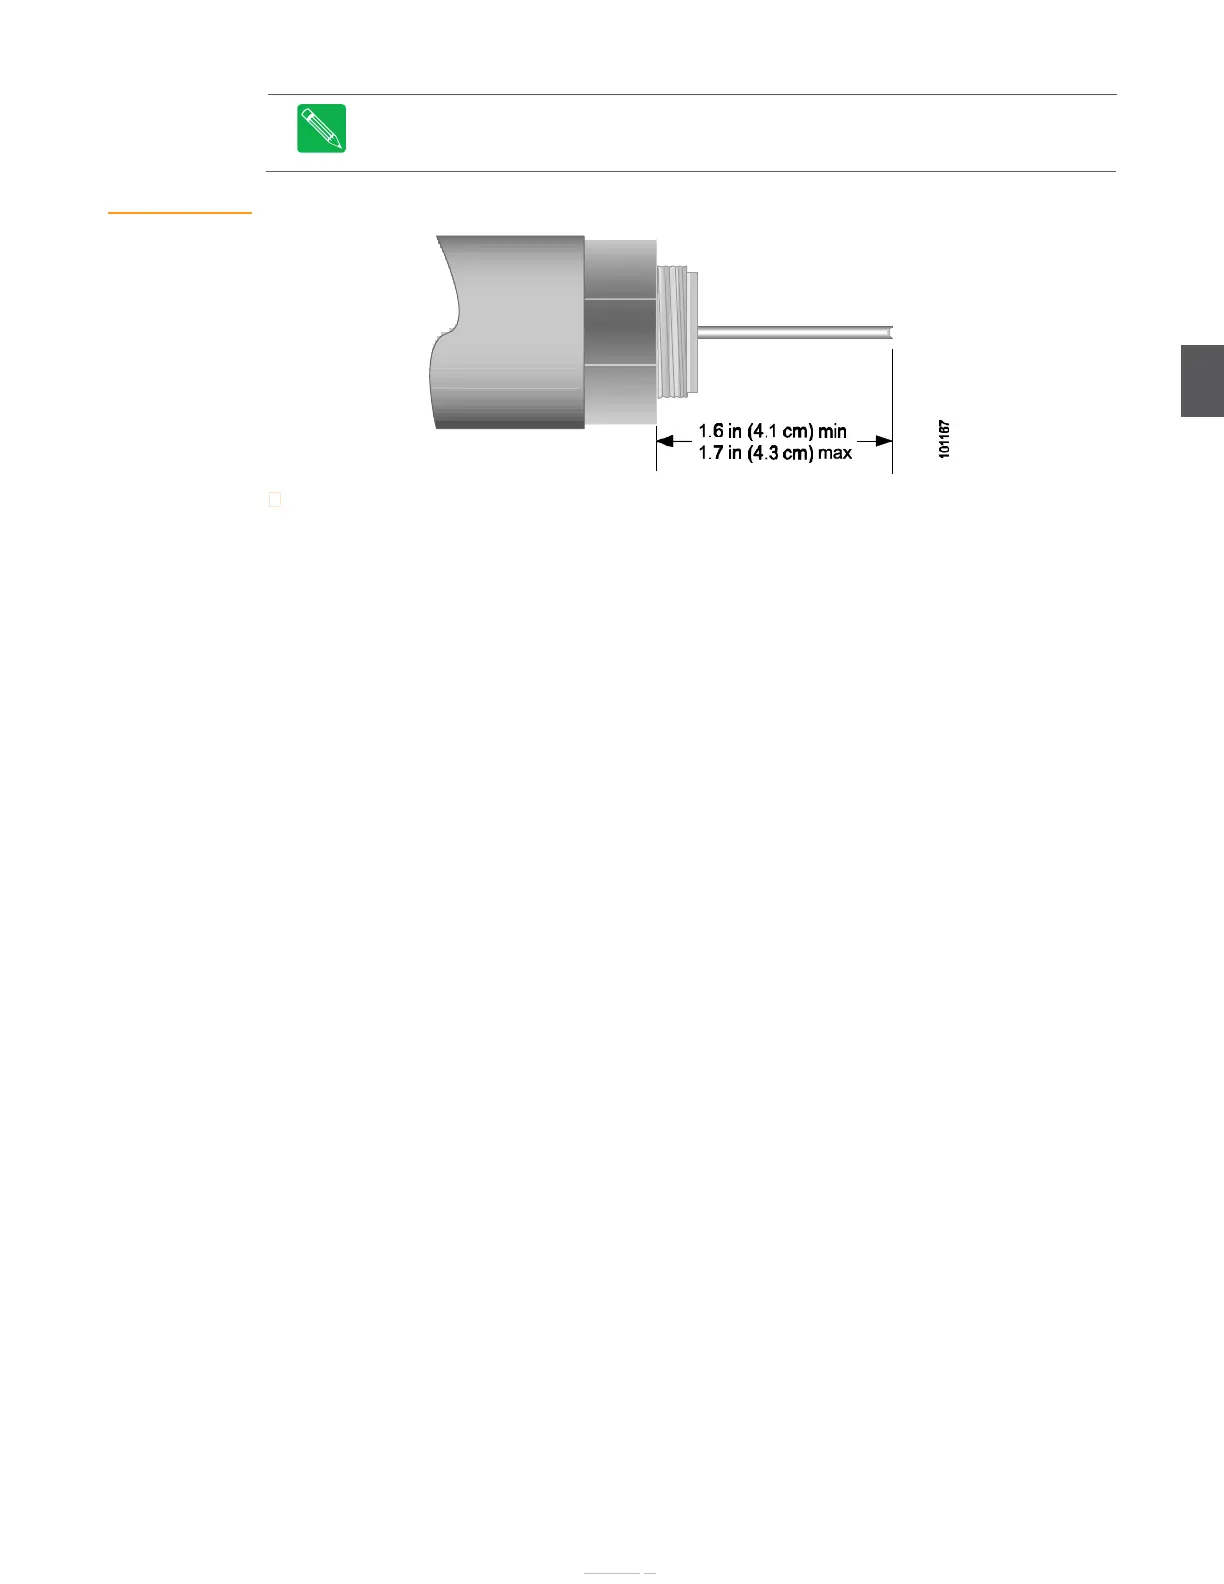
Figure 4.7
Coaxial Cable
Preparation and Pin
Length
To install RF cables:
1.
Using a ½-inch wrench (¾-inch on older nodes), remove port covers 1, 3, 4, and 6
(Figure 4.6 on page 4-6).
2.
Using a ½-inch wrench, loosen the eight housing bolts (Figure 4.21 on page 4-23) and swing
the lid away from the base.
The center conductor seizure nuts are located under the RF amplifier. The RF amplifier must
be removed for access to the seizure nuts.
Record the location of all RF connectors between the lid motherboard and the RF amplifier tray
(shrink tube color and corresponding RF connector port) before proceeding.
3.
Disconnect the RF cables and power cable from the RF amplifier.
4.
Disconnect the AC power cable(s) to the power supply(s) in the lid.
5.
Using a nut driver, loosen the eight captive screws holding the RF amplifier in the base.
6.
Pull the RF amplifier assembly up and out of the base and set it safely aside where it will
not be damaged.
With the amplifier assembly removed, the six seizure nuts are fully accessible.
7.
Using a 7/8-inch socket, turn the applicable seizure nuts counterclockwise to loosen them
(Figure 4.8).
Loosen and remove the seizure nuts. Do not loosen seizure nuts for ports 2 and 5. These ports
are for AC power input connections (see 4.5 Power Cable Connections on page 4-8).
RF connections are standard KS-type connectors. Measure the stinger to verify that it is 1.6
inches minimum (1.7 inches maximum) long, as shown in Figure 4.7.
8.
Insert an RF cable and tighten the RF connector to the base (Figure 4.8). Torque RF
connectors to the connector manufacturer’s recommended torque.
9.
Using a 7/8-inch socket, tighten the seizure nut, then torque it to 6.25 foot-pounds (8.5
newton-meters).
Repeat Step 8 and Step 9 for all remaining RF ports (not including ports 2 and 5).
For any unused RF ports, install a 75 Ohm line terminator on the port (not including ports 2
and 5).
 Loading...