CHAPTER 4 REFERENCE GUIDE
Page 4-16
091-00027-001 REV A Evolution Backup Display Pilot’s Guide
Page 4-17
091-00027-001 REV A
Evolution Backup Display Pilot’s Guide
WARNING
Always check and set the EBD BARO whenever the
mechanical altimeter is adjusted
Set the Barometric Pressure
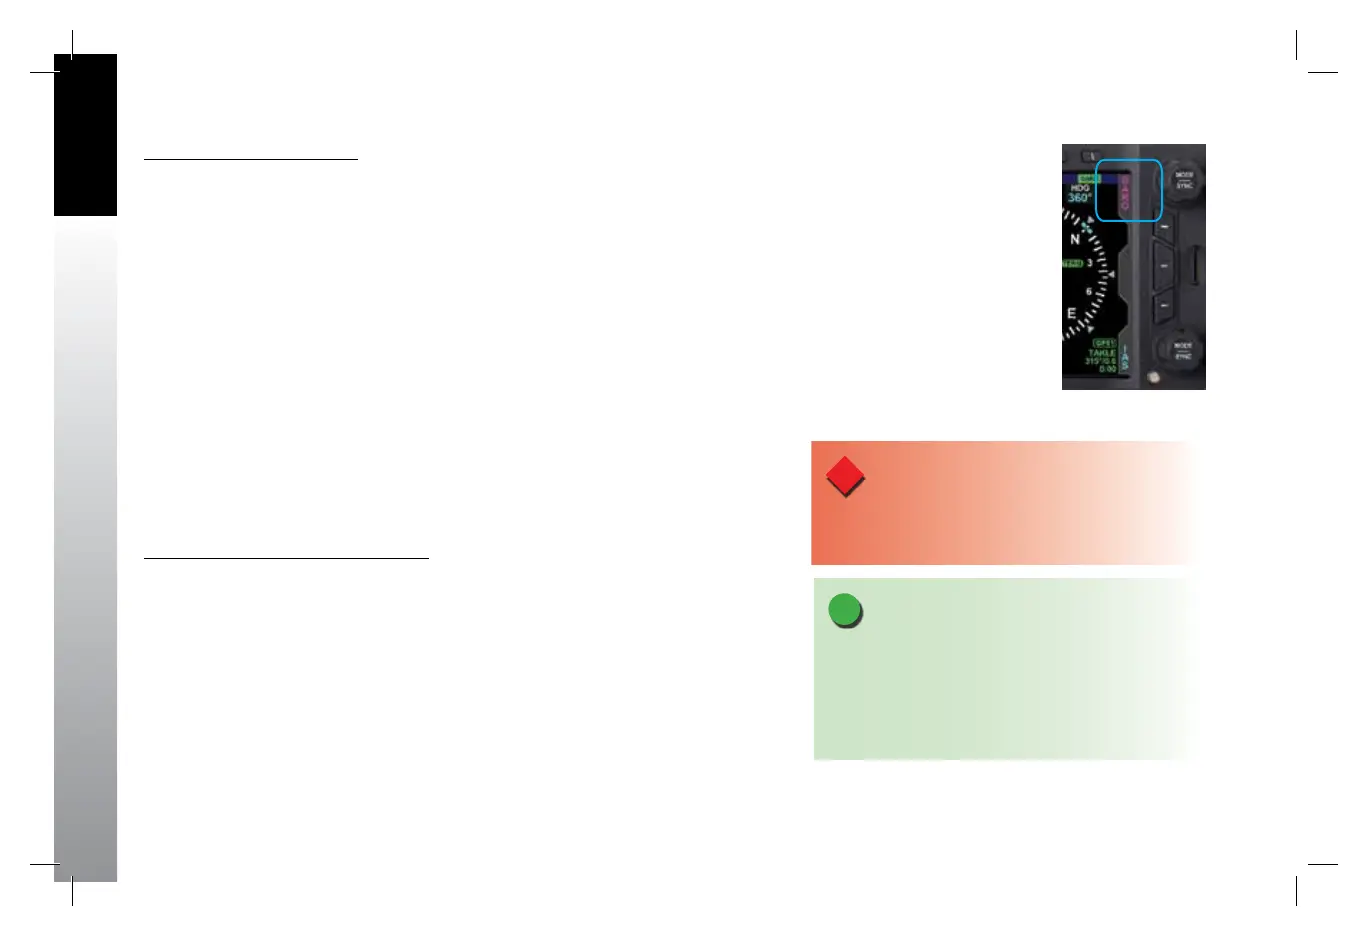
1. Press the BARO Hot Key.
The BARO label above the Top Knob and Barometric Pressure Setting Field appear in
magenta (Figure4-21).
2. Rotate the Top Knob to change the value of the Barometric Pressure
Setting Field.
3. Press the BARO Hot Key or any knob, button/key to exit.
If no action is taken, after 10 seconds of inactivity, the label, and eld are rendered in
cyan.
4.2.3.2. Selected Altitude Field
The Selected Altitude Field value is displayed at the top of the Altitude Tape. The
Selected Altitude Field range is 100 to 51,000 feet, in 100 foot increments. The
default value for the Selected Altitude value is 100 feet, or the previously set value.
Additionally, the Altitude Bug is displayed adjacent to the Altitude Tape and at the
Selected Altitude Field value when within the visible range of the current altitude.
Set Altitude Bug and Altitude Alerter
1. Press the Right Knob until ALT displays above the Right Knob.
The Selected Altitude Field and bug are enabled for editing, all rendered in magenta
(Figure 4-22).
2. Rotate the Right Knob (clockwise to increase, or counterclockwise to
decrease) to change the value of the Selected Altitude Field.
Once the correct value is selected, and after 10 seconds of inaction, the eld is
disabled, and the label, eld, and bug are rendered in cyan.
Figure 4-21
BARO Field Enabled
NOTE
Since the altitude tape display is limited to
approximately 400 feet, the altitude bug symbol is
shown on the altitude tape when the Selected Altitude
Field value is within the visible range of the current
altitude.
091-00027-001 Rev A EBD Pilots Guide V&H .indb 16 8/27/14 8:51 AM