TECHNICIANS' manual30 of 104
5.8.4 Gas system connection
To adjust the gas proceed as follows:
1. Turn on the gas system.
2. Remove the locknut (A) and loosen the adjustment screw
(B) by turning it twice.
3. Turn the regulator pin (C) in order to have the maximum
openingfortheowofgas.
4. Wait for the pressure in the heating unit to reach 1.4 bar
(see the heating unit pressure gauge).
5. Turn the regulator pin (C)clockwiseuntiltheburnerame
is barely visible (pilot ame) but sufcient to keep the
thermocouple active (see the data in the Gas table): check
theminimumpressureviaagaugelocatedonthetting
(D).
6. Wait until the heating unit pressure reduces to 1 bar (see
the heating unit pressure gauge).
7. Turn the adjustment screw (B) by screwing it in a clockwise
directionuntiltheameisatitsmaximum.
8. Tighten the locknut (A) to lock the regulator screw in place
(B).
9. Wait until the operating pressure in the heating unit -
which is shown on the machine's pressure gauge - reaches
the working value of around 0.11-0.13 MPa (1.1-1.3 bar).
If you would like to increase or decrease the operating pres-
sure in the heating unit, proceed as follows:
TO DECREASE PRESSURE
Set the minimum to 0.09 MPa (0.9 bar) and the maximum
to 0.13 MPa (1.3 bar) and you will obtain a pressure in the
heating unit of approx. 0.10-0.12 MPa (1.0-1.2 bar).
TO INCREASE PRESSURE
Set the minimum to 0.11 MPa (1.1 bar) and the maximum
to 0.15 MPa (1.5 bar) and you will obtain a pressure in the
heating unit of approx. 0.12-0.14 MPa (1.2-1.4 bar) [this
value is the maximum recommended pressure limit].
To check the pressure at the inlet of the injector, connect a
pressure gauge to the connection (D).
The gas system is useful for heating the water in
the heating unit. It does not, except in special
cases, substitute the electrical heating system.
Machines with levers can run with electric or gas.
C
D
A
B
6. COMMISSIONING
6.1 Safety precautions
Carefully read the instructions provided in chapter
"I. SAFETY PRECAUTIONS" on page 3.
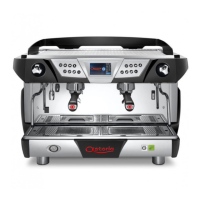
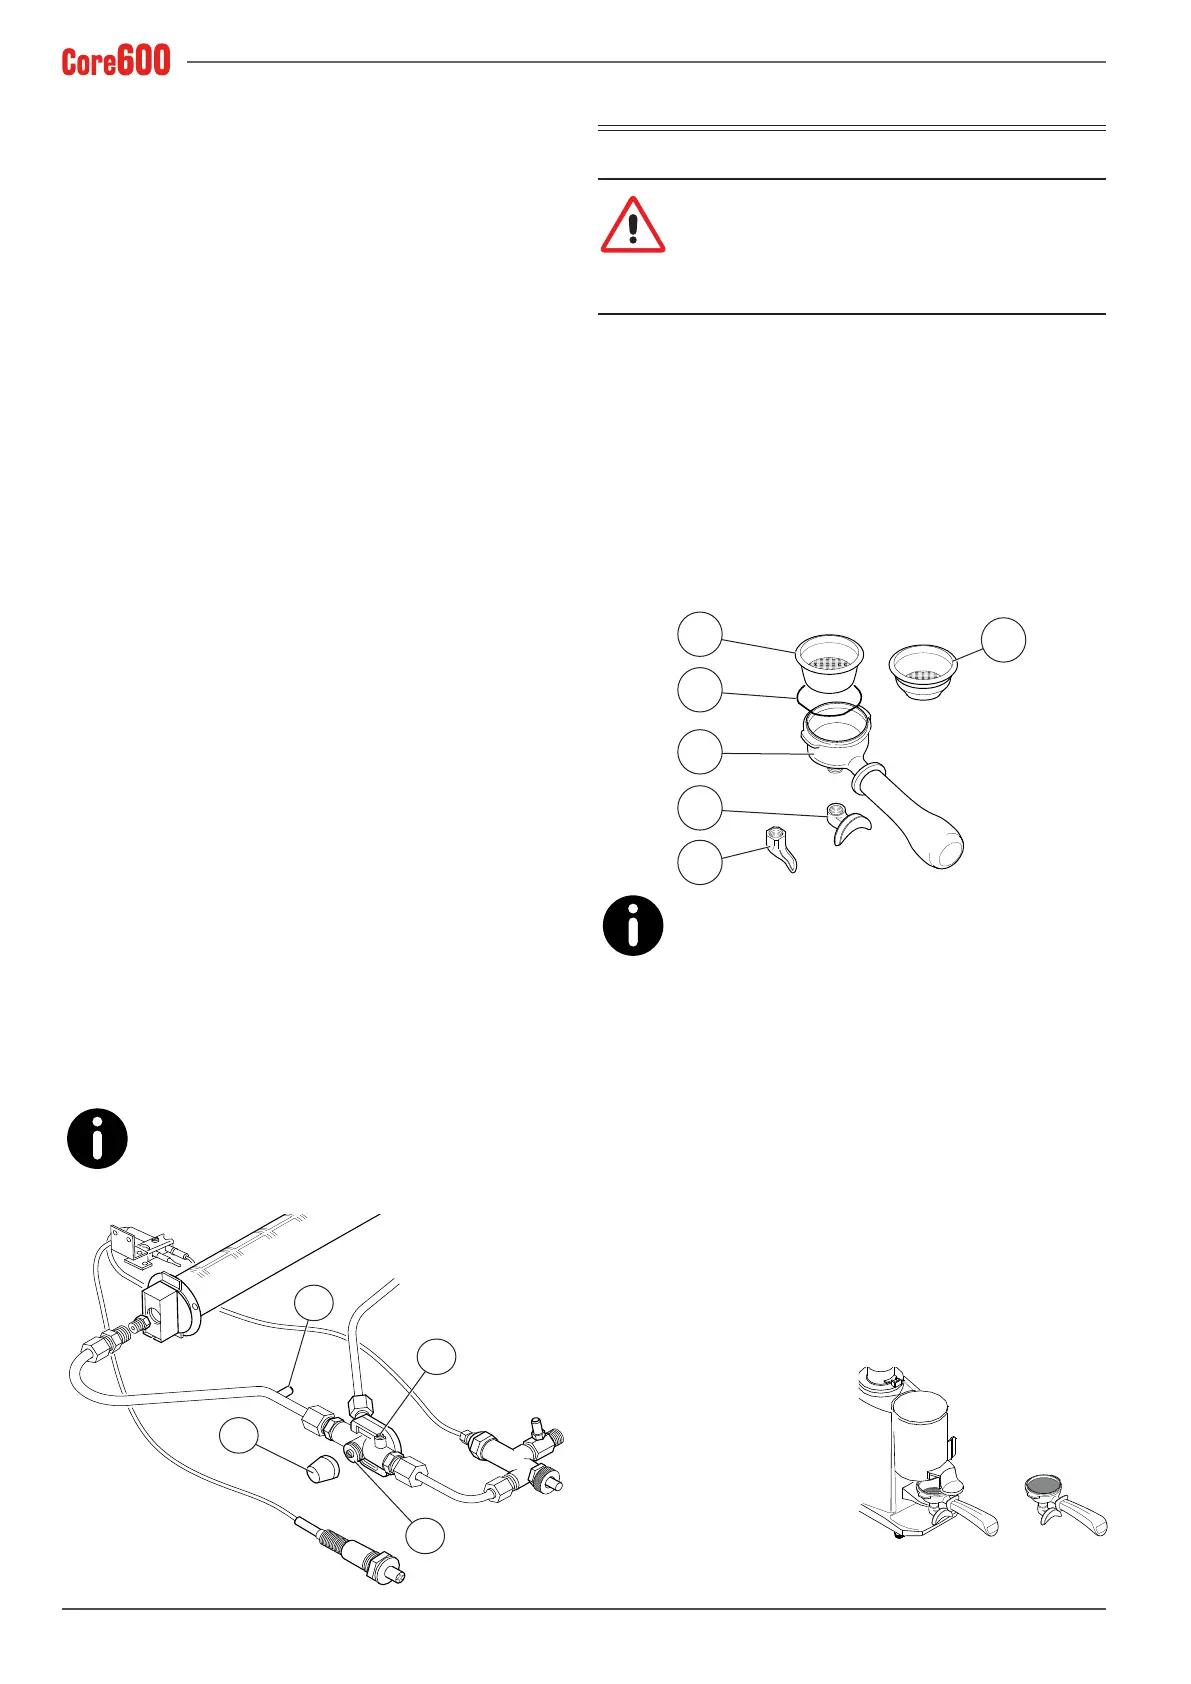
6.2 Preparing the lterholders
6.2.1 Filter holders
• Placethelter-holdingspring(2)inthehousingofthel-
ter holder (1).
• Take the (3) or (4)one-cuplterandpressitrmlyintothe
lterholder.
6.2.2 Spouts
Finishpreparingthelterholderbyttingthespoutforone
cup (5) or two cups (6).
5
4
1
2
3
6
Properly connect the single lter with the single
spout and the double lter with the double spout.
6.2.3 Grinding and dosing coffee
It is important to have a grinder-dispenser next to the ma-
chine so that the coffee can be ground on a daily basis.
To adjust the coarseness of the ground coffee, use the appro-
priate regulator located on the grinder-dispenser hopper.
The coffee must be ground and dispensed according to in-
structions provided by the manufacturer of the grinder-dis-
penser. The following points should also be kept in mind:
• To obtain a good espresso it is not recommended that you
store large amounts of coffee beans. Comply with the ex-
piry date indicated by the producer.
• Never grind large volumes of coffee, it is advisable to pre-
pare the amount that can be held in the dosing device
and if possible, use it by the end of the day.
• Do not buy pre-ground cof-
fee, as it perishes quickly.
If necessary, buy coffee
in small vacuum-sealed
packs.

 Loading...