TECHNICIANS' manual 31 of 104
6.2.4 External motor pump adjustment
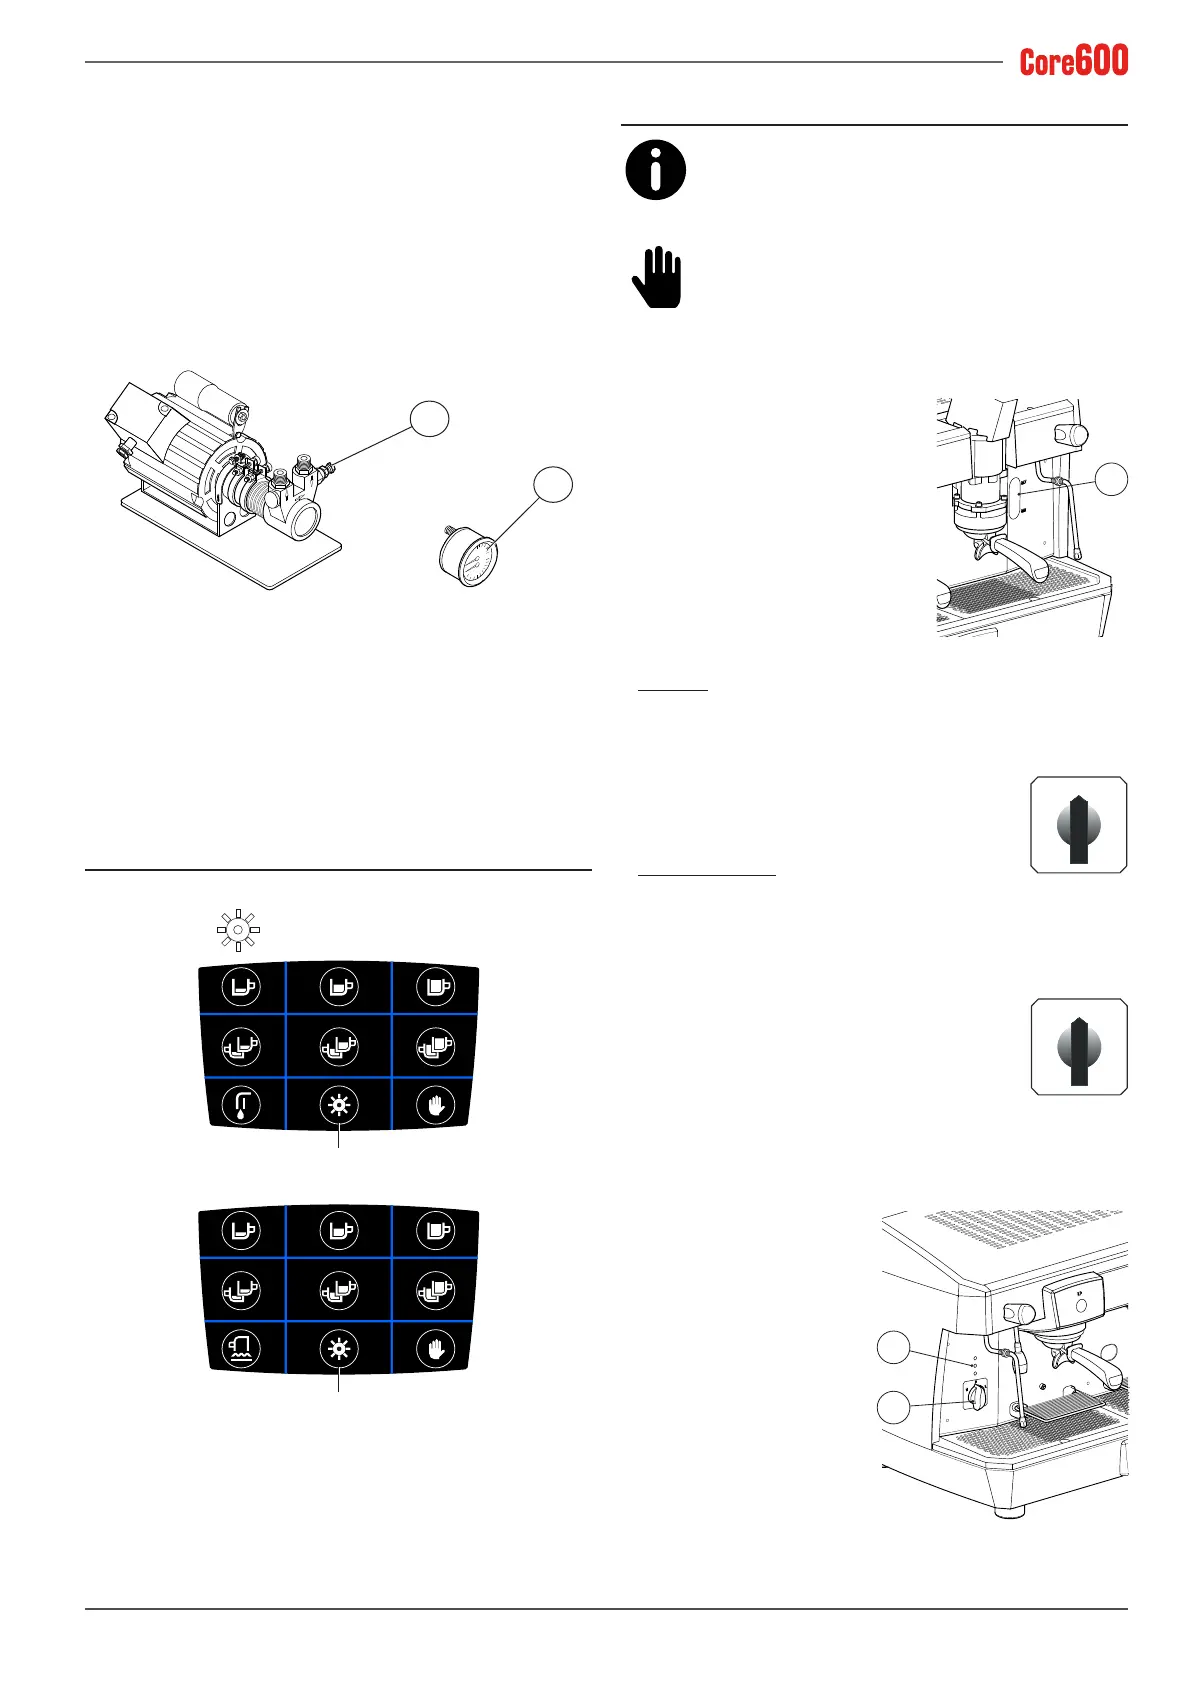
To adjust the operating pressure, proceed as follows:
• Press a coffee dispensing switch.
• Adjust the pressure by turning the screw located on the
pump (3) so as to obtain a value between 0.8 and 0.9 Mpa
(8 and 9 bar): tightening the screw increases the pressure,
and loosening it reduces the pressure. Check the pressure
by means of the pressure gauge (4) located on the front
of the machine.
• Switch off the dispensing switch.
3
4
6.2.5 Coffee grind
To adjust the coarseness of the ground coffee, use the appro-
priate regulator located on the grinder-dispenser hopper.
6.3 Lighting
To switch on or off the work surface lighting or cup warmer
light, press the
button on the corresponding pushbut-
ton panel.
Work surface LED
Cup warmer LED
6.4 Turning the machine on and off
During the machine's heating-up phase (roughly
20 minutes), the negative pressure valve will re-
lease steam for a few seconds until the valve closes.
Do not open the gas mains when the heating unit is empty.
If the machine is inactive for longer than a week,
the Technician must replace 100% of the water in-
side the hydraulic circuits.
6.4.1 Electric heating for the AL version
Before starting the machine, make
sure that the level of water in the
heating unit is higher than the min-
imum level indicated on the water
level window (1).
Ifthereisnowater(rstinstallation
or after heating unit maintenance),
theheatingunitmustbelledinad-
vance in order to prevent the heating
element from overheating.
Proceed as follows:
Switch
• Open the water mains valve.
• Using the manual ll function,ll the heating unit with
water until the optimal level is restored.
• Turn the switch to position “1” and wait for
the machine to warm up completely.
Power switch
• Open the water mains valve.
• Turn the power switch to position “1” (electricity is sup-
pliedtothepumptoautomaticallylluptheappliance's
heating unit and steam heating unit) and wait for the
heatingunit to be automatically lled with
water.
• Turn the main switch to position “2” (full
electricity is supplied, including to the heat-
ing element in the heating unit) and wait for
the machine to warm up completely.
6.4.2 Electric heating for the AEP and SAE
versions
Press the machine's power
switch (2).
The slow ashing warning
light (3) indicates that the
waterisbeinglledup.
A steady warning light indi-
cates that the standard water
level has been reached in the
heating unit.
1
1
0
1 2
0
3
2



 To Next Page