Copyright © 2007, 2008 AudioNote Kits
www.AudioNoteKits.com
audionotekits@rogers.com
Page 46
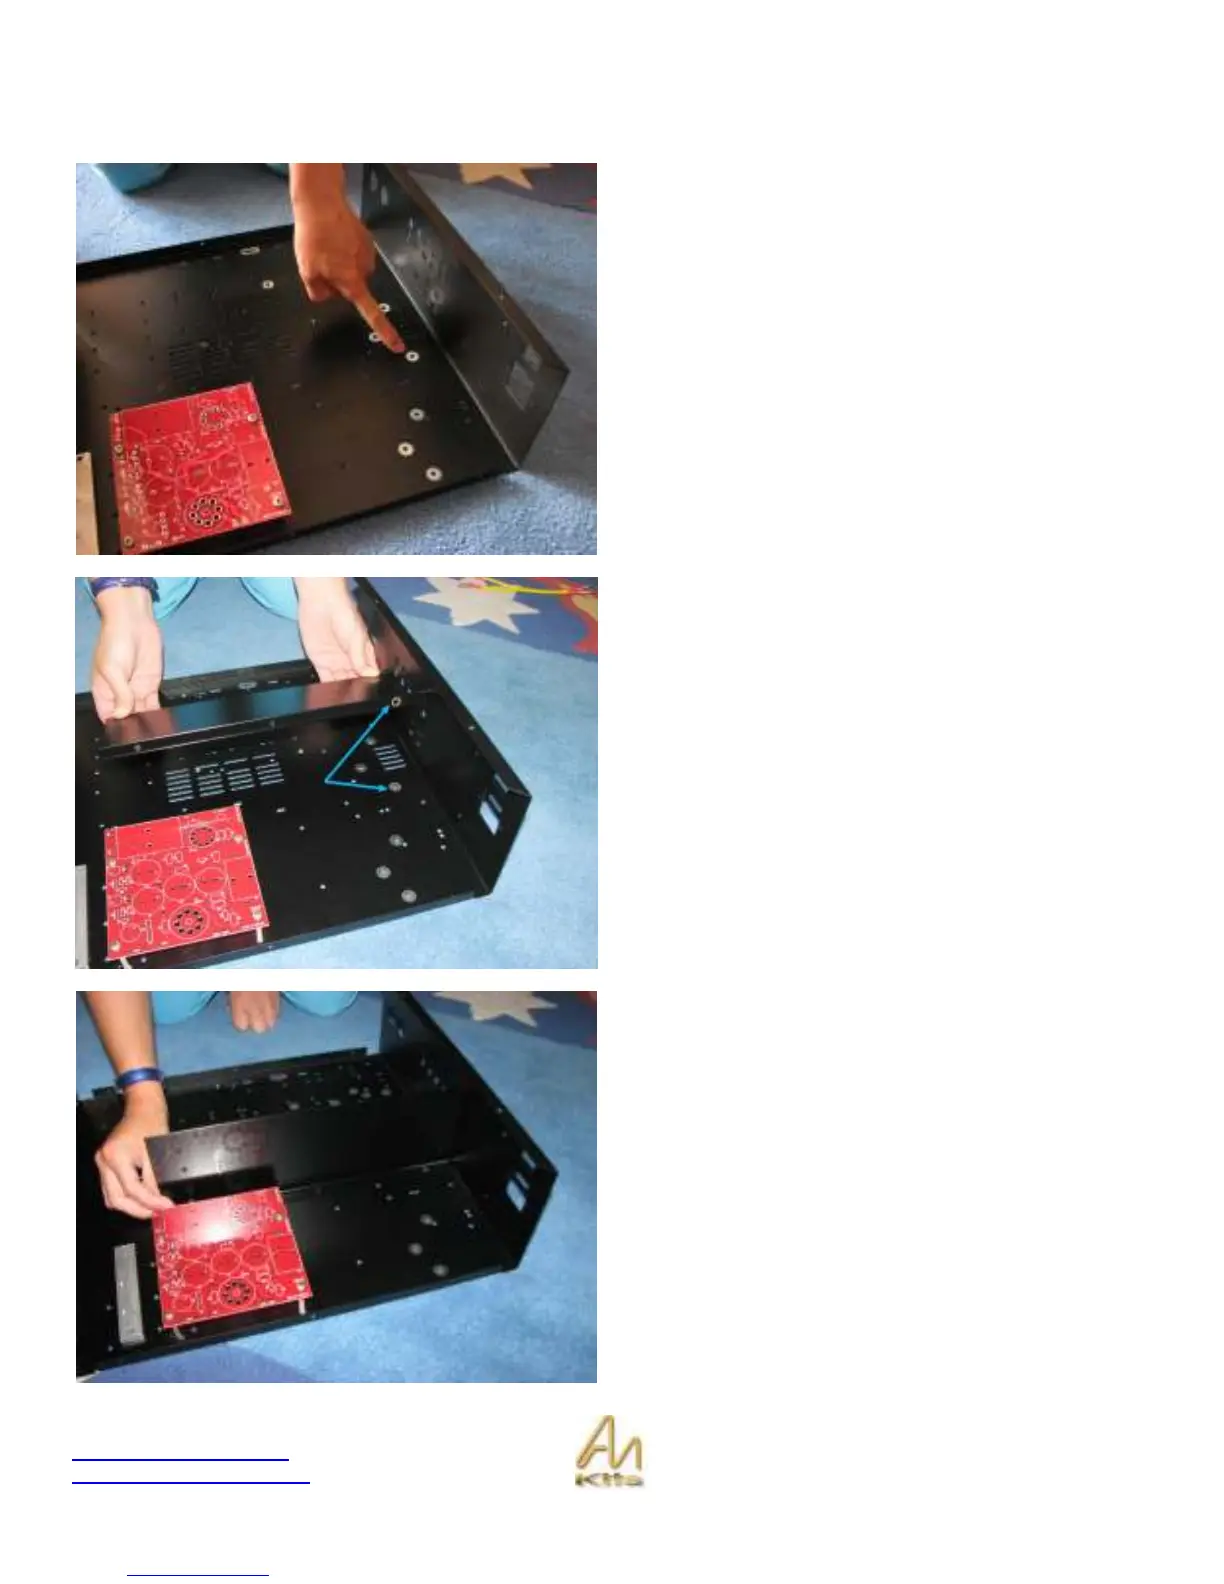
Section 5: Install the Screen
The next step is to install the metal screen.
It is important that a good electrical contact is maintained
between the chassis and the screen itself.
This picture shows the hole that will make that contact from
the chassis – note that the surrounding paint has been
removed.
As you can see here, the screen has a corresponding hole
where the paint has been removed.
These holes should mate and provide a good electrical
contact.
This picture shows the final position of the shield.
Use 3 M4 10mm screws and nuts to secure the screen in
place - insert screws from underneath the chassis.