Copyright © 2007, 2008 AudioNote Kits
www.AudioNoteKits.com
audionotekits@rogers.com
Page 72
Installing the Resistors
2
1K
R3, R4, R15, R16
2
1K2
R5, R6
1
2K2
R21
2
33K
R18, R19
2
39K2
R11, R12
2
47K
R1, R2
2
100K
R9, R10
2
270K
R7, R8
2
1M
R19, R20
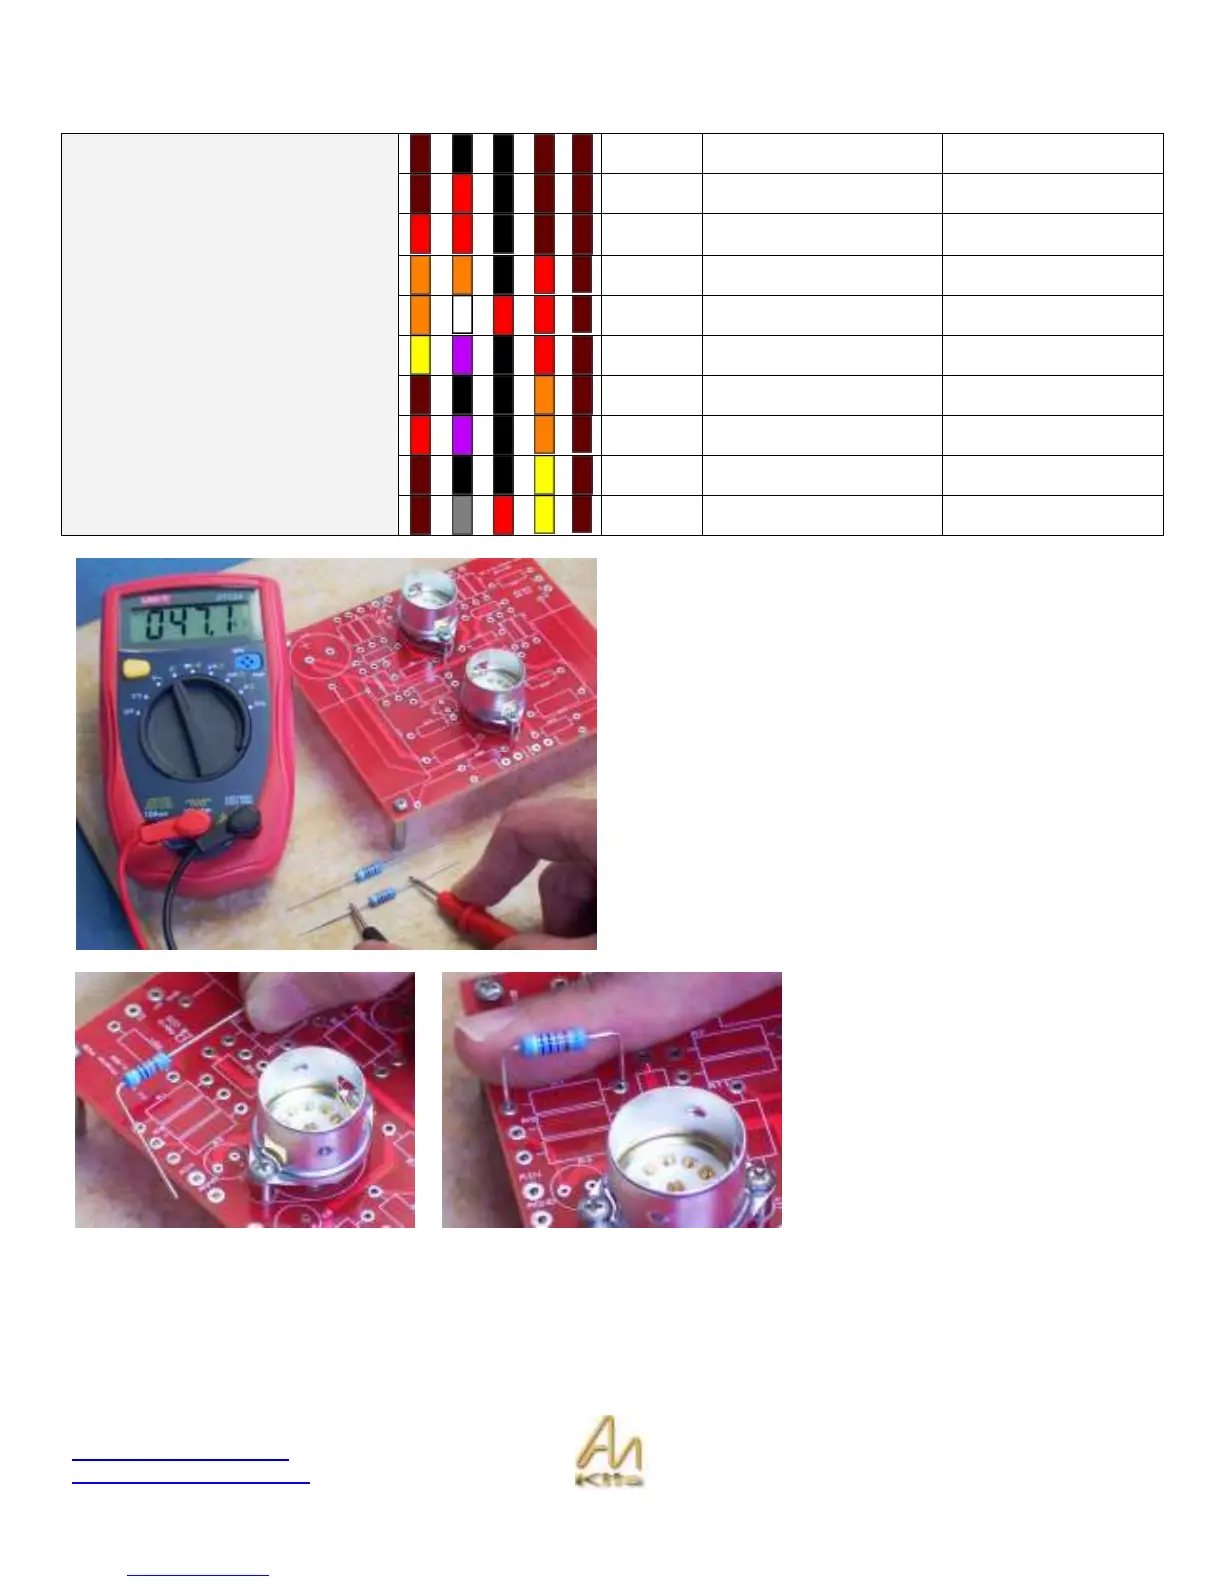
Resistors
2
1M82
R13, R14
You can check out the color code chart for the resistors or
use an ohmmeter to verify the value prior to insertion.
Lets start by installing R1 & R2, which are the 47K input
resistors.
Could be time to get out your schematic and see which
resistors you are installing – this is a good way to double
check your work.
Do a nice gentle bend on the resistor
so that it can be placed neatly through
the holes in the PCB in the correct
designation location.