Copyright © 2007, 2008 AudioNote Kits
www.AudioNoteKits.com
audionotekits@rogers.com
Page 60
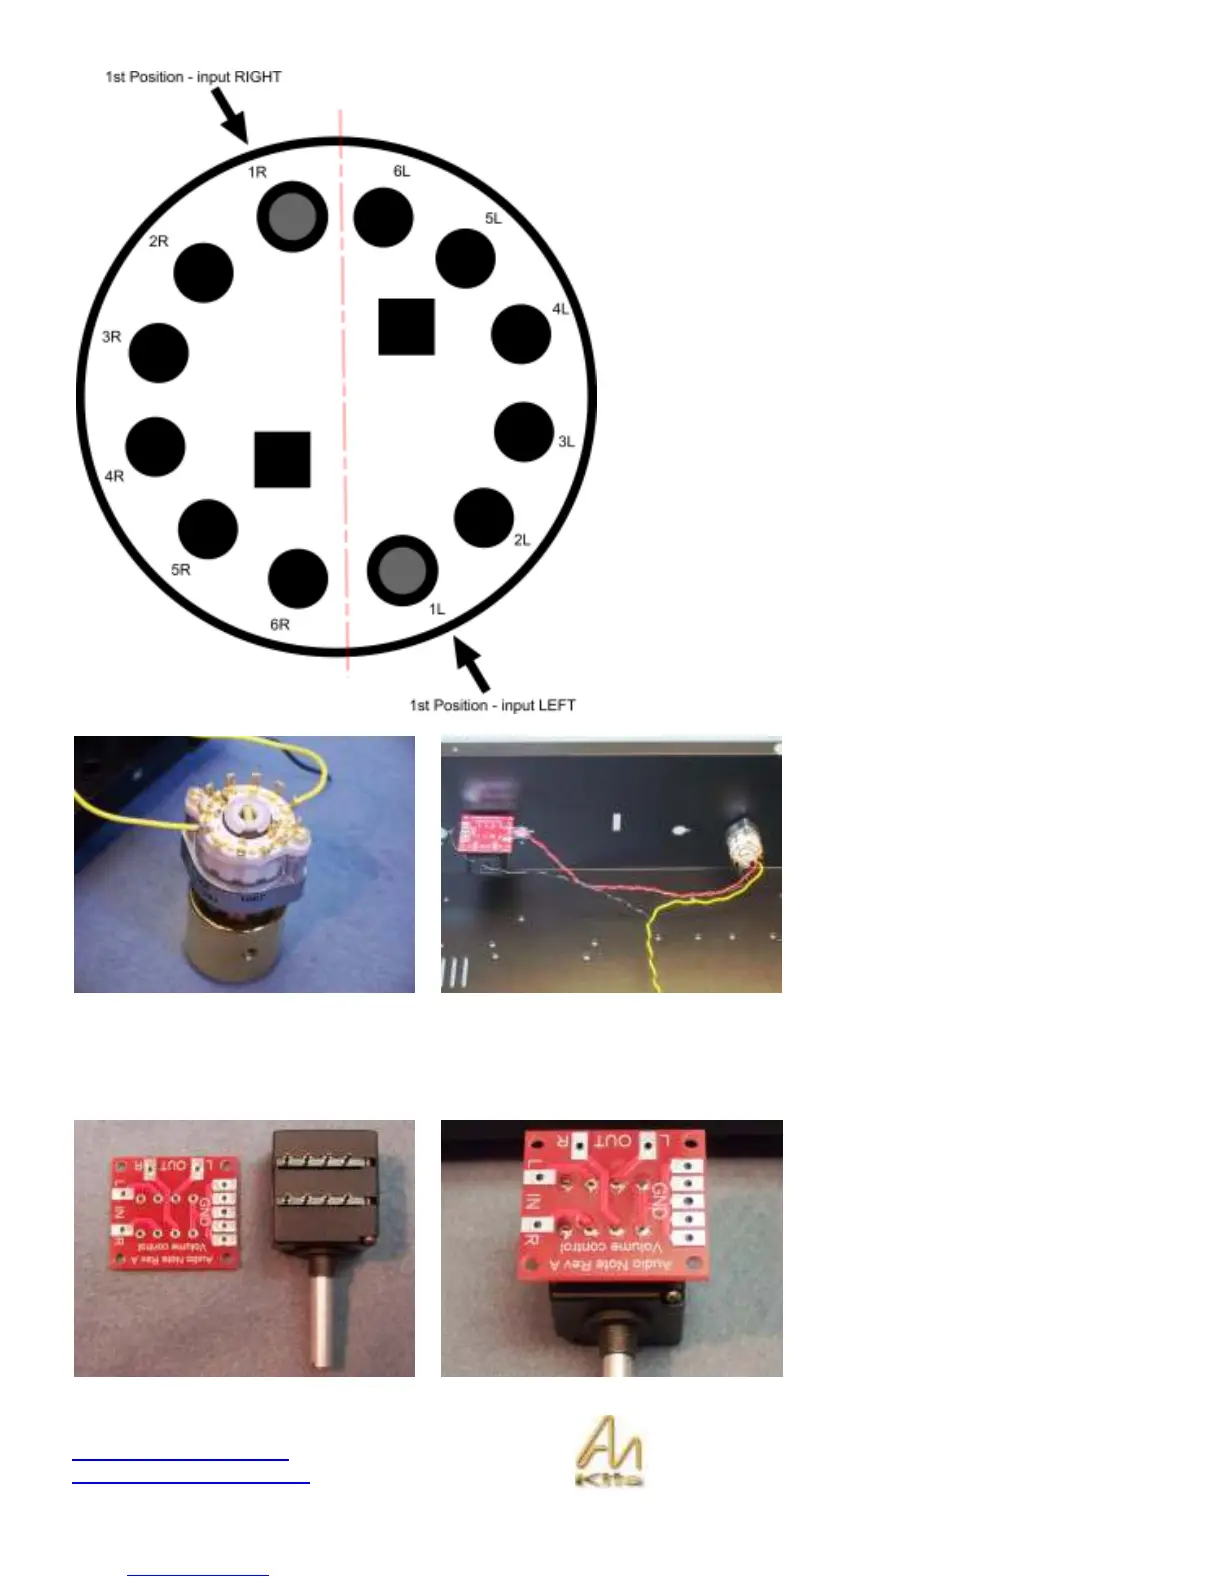
This diagram shows the pin layouts of the ELMA selector
switch.
The order that you wire your inputs is dictated by the order
shown on the front panel:
1. PHONO
2. CD
3. DAC
4. AUX
5. TUNER
6. LINE
Of source you may only wish to wire up the inputs that you
will be using - the choice is yours.
At this stage take the LEFT RCA (black) PTFE wire and
hold it in your hand – unravel the last 6 inches of twisted
pair so that you just have the colored wire – (the black wire
will be going somewhere else in a few minutes).
Here is the first line stage input
correctly wired into the ELMA selector.
Now you can position the ELMA switch
into the front of the chassis – the
switch is keyed and you will notice that
it will slot into position – you may want
to file off the paint very slightly from
the chassis in the small key hole but it
is not usually necessary - try fitting it
into position and then securing with
the nut.
Volume Pot Installation
The next step is to install our Volume
Pot.
If you are using the Noble Volume pot
then you can use the small PCB
provided for easy soldering. Make sure
the board goes on in the correct
orientation as per the pictures
opposite.