Copyright © 2007, 2008 AudioNote Kits
www.AudioNoteKits.com
audionotekits@rogers.com
Page 58
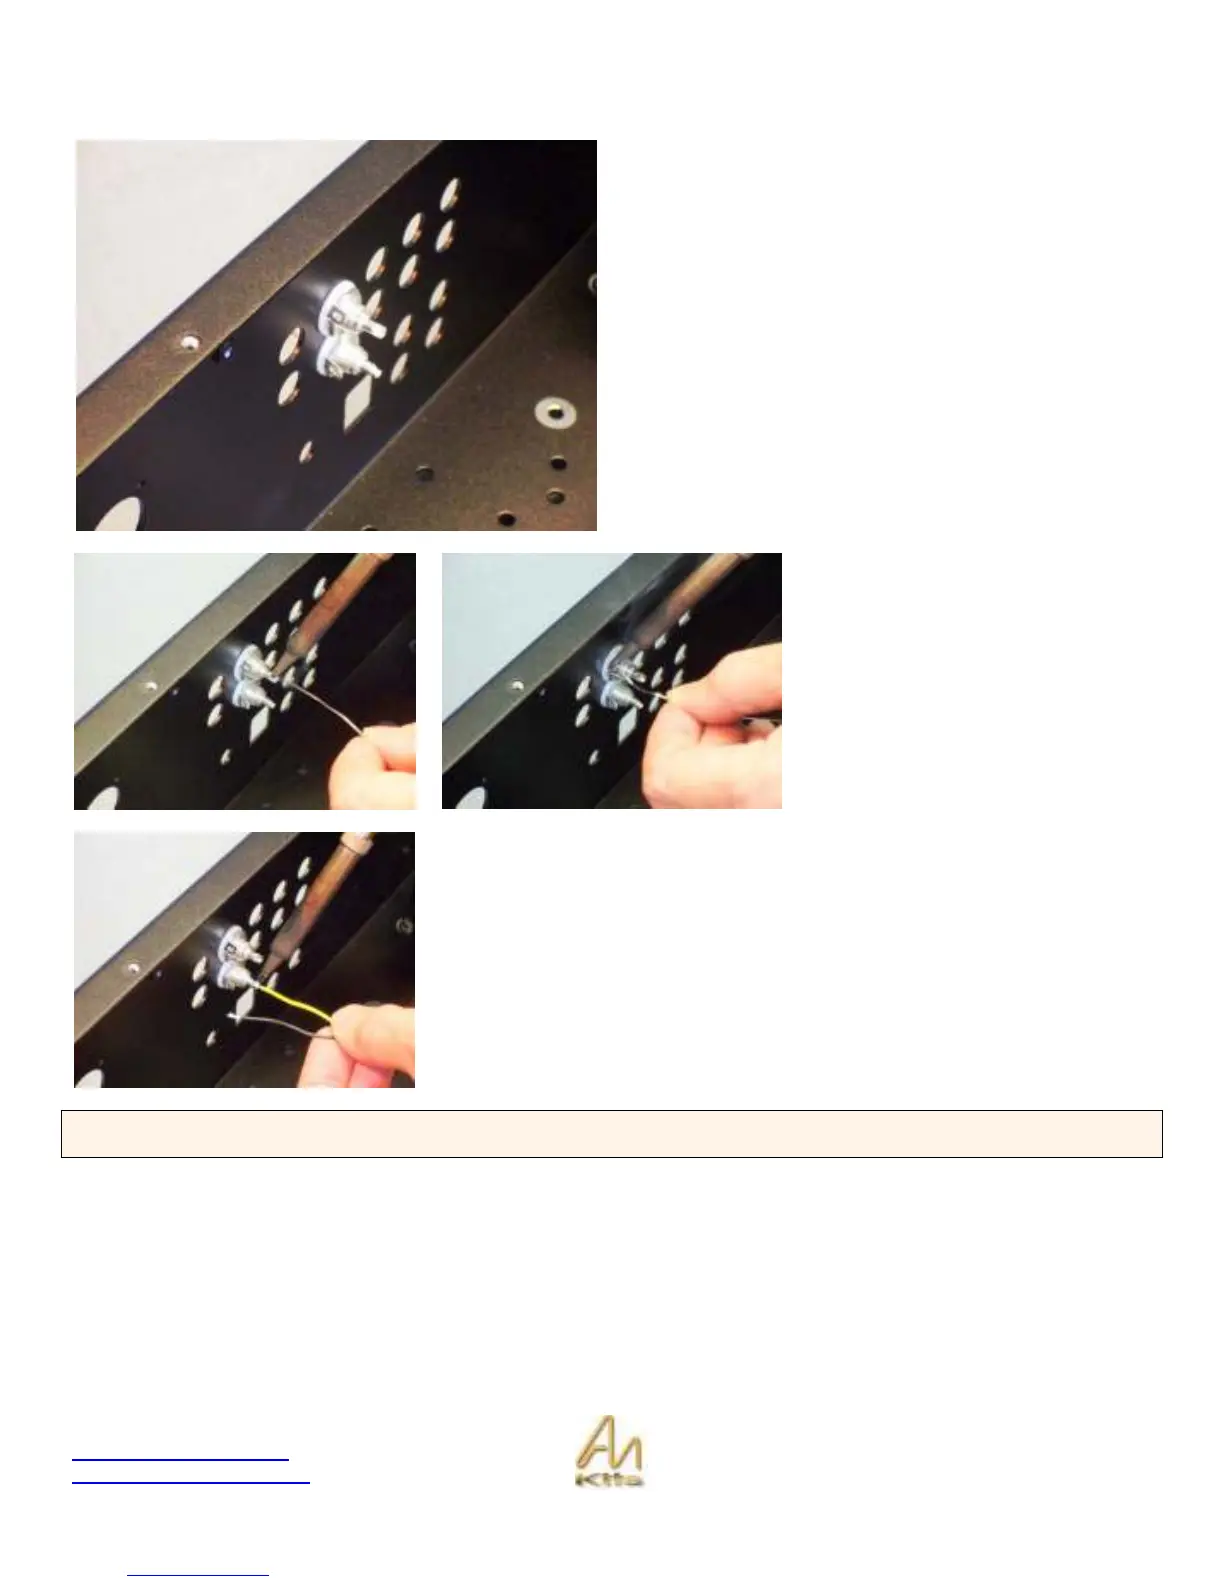
Step 1: Install the first set of RCA connectors. Install the BLACK RCA (left) on the bottom of the chassis and RED RCA
(right) on the top of the chassis.
Install the Black RCA on the top and the red RCA on the
bottom.
Note that we have used the second set of holes for our first
set of RCA’s – the reason for this is that this is the LINE
input – we reserve the first pair of holes for Phono input so
that it corresponds with the front faceplate.
The next step is to TIN the RCA
connectors – put a puddle of solder
into the main signal hole as shown in
the first picture.
Then tin the Ground post by adding
some solder to this.
Trim the ends of a length of twisted PTFE (you can select your own color) – you
can also tin the short end of the PTFE wire also.
Once the wire is tinned then all you need to do is heat up the puddle of solder on
the RCA and then insert the colored wire into position as shown opposite. Then
repeat for the ground with the black wire and thread it through the small hole in
the ground lead.
EXPLANATION: The twisted PTFE wire is a high quality silver-plated copper stranded wire. The Black wire is always the
ground signal and the colored wire is always the signal.