PROGRAMMING THE M2000 METER
The M2000 transmitter comes pre-programmed from the factory. Typically, you do not need to do any additional
programming. However, to take advantage of special features, you can program the meter for your specific needs. If you are
programming the meter, familiarize yourself with the Function Buttons and Displays, and follow the procedures outlined in
this manual.
Function Buttons
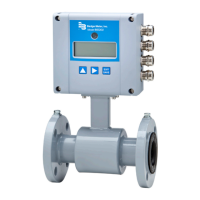
All M2000 meter programming is accomplished using the three function buttons located on the front of the transmitter:
Figure 26: Function buttons
OTE: N Throughout this manual, the buttons are referred to as: [↑] or [+] and [↓] or [–], depending on the context. The “Enter”
button is referred to as [E].
Consider the Up Arrow [+ | ↑ ] button as the “next step” or “scroll text up” button. During programming, press this
button to display the next menu selection or increment a numeral.
Example 1: Figure 27 shows the Start Menu. The selection arrow points to the Exit this Menu selection.
To scroll up to the next selection, press [↑] once. The menu text scrolls up to the next menu selection, Main Menu.
START MENU
>Exit this Menu
Main Menu
MORE:
↑
,
↓
ENTER:>
Press [↑]
START MENU
> Main Menu
Quick Setup
MORE:
↑
,
↓
ENTER:>
Figure 27: Scroll up
Example 2: Some procedures require you to enter a numeric value. Use the [+] button to increment the selected numeral.
Figure 28 shows the Low Flow Cutoff parameter display. Notice the cursor under the 2. In this case, press [+] once to increment
the numeral to the value of 3.00%.
LOW FLOW CUTOFF
% of 300.000 GPM
2.00%
CHG: +,- NEXT:E
Press [+]
LOW FLOW CUTOFF
% of 300.000 GPM
3.00%
CHG: +,- NEXT:E
Figure 28: Enter a numeric value
Consider the Down Arrow [ – | ↓ ] button as the “previous step” button. During a procedure, press this button to return
to the previous selection or decrement a numeral.
Programming the M2000 Meter
Page 27 March 2022 MAG-UM-01272-EN-21

 Loading...
