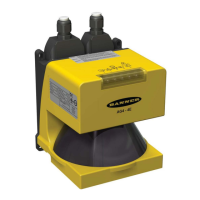
Banner AG4 Series Safety Laser Scanner
4. Open AG4Soft program
5. Connect the AG4-PCD9-xx serial cordset to the AG4-PC9USB-1 (or at the X2 connector on the AG4)
Note: If repeated communication loss occurs, check for secure connections, ensure AG4-PCD9-xx cordset (with RS232
communication) are used, and/or shorten the overall cable length.
Configuring the PC Serial Port
If necessary, with the AG4 connected, from the Windows™ ―Start‖ tab, click on Settings > Control Panel > System
(System Properties) > Hardware > Device Manager > Ports (COM & LPT)
Click on an available COM port (note the COM port number), select the appropriate Baud rate (bits per second), which
should match the Baud rate of the AG4 (default is 57600). Click on ―Port Settings‖ to verify both of these settings.
USB-to-Serial Adaptors
If using a USB-to-serial adaptor, do not connect the adaptor to the Scanner until after the PC has identified the new
piece of hardware. If the Scanner is ON and connected to the USB-to-serial adaptor when the USB connection is made
to the PC, the PC can misinterpret the data as a PC mouse (causing the mouse cursor to move rapidly around the PC
monitor). If this occurs, disconnect the Scanner from the adaptor and follow the instructions for ―Loss of Communication‖
above.
To identify the port the adaptor is connected to, from the Windows™ ―Start‖ tab, click on Settings > Control Panel >
System (System Properties) > Hardware > Device Manager > Ports (COM & LPT).
AG4-PCD9USB-1 USB-to-Serial Adaptor
If using the model AG4-PCD9USB-1, select ―Belkin USB-to-Serial Adaptor‖ and note the COM port to which the
device has been assigned. The Baud rate (bits per second) must match the Baud rate of the AG4; default is 57600. Click
on ―Port Settings‖ to verify both these settings. If PC Hardware Installation Wizard appears, follow its instructions to
install the device drivers.
When using the model AG4-PC9USB-1 USB-to-serial adaptor, keep total cable length to a minimum. Do not use the
AG4-PCD9USB-1 with the 10 meter AG4-PCD9-10 cordset. Do not exceed 5 m USB cable length if a USB
extension cable is used with the AG4-PCD9USB-1. Se Belkin website for further information on the AG4-
PCD9USB-1 (BELKIN p/n F5U257) and miscellaneous PC drivers.
4.4 Opening a Configuration File (“.rs” files)
Click on (highlight) the ―Configuration‖ Operating Mode tab, and then click on:
―Load configuration data from a file and transfer to scanner‖ (9) Operating Mode Icon to directly download
a saved configuration,
or
―Load Configuration data from file‖ (6) Operating Mode Icon to open a saved configuration to review or
manipulate the configuration, and then
Click on ―Transfer configuration data from PC to scanner‖ icon (11) Operating Mode Icon.
Note: If following the wizard walk-through, simply click on ―Transfer configuration data from PC to Scanner‖ (11)
Operating Mode Icon.
The same options are accessible from the top Menu Bar; click on Configuration > Load configuration data from a file
and transfer to Scanner, or click on File > Load configuration data from file and select an ―.rs‖ file to open and then
Configuration > Transfer from PC to Scanner.
Follow the prompts, review and accept the configuration, and then perform the appropriate checkout
procedure as described in Section 6 or return to Section 3.6.2 Initial Optical Field Verification.
From the “Protective/Warning Fields Definition” Operating Mode
Both configuration ―.rs‖ files and individual field ―.sf‖ files are accessible when the ―Protective/Warning Fields definition‖
Operating Mode tab is highlighted.
Buy: www.ValinOnline.com | Phone 844-385-3099 | Email: CustomerService@valin.com

 Loading...