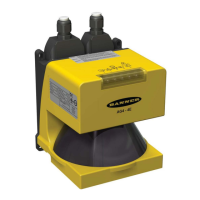
Banner AG4 Series Safety Laser Scanner
5.3 Electrical and Optical Noise
The Scanner is designed and manufactured to be highly resistant to electrical and optical noise and to operate reliably in
industrial settings. However, serious electrical and/or optical noise may cause a random OFF state of the OSSDs. In
very extreme electrical noise cases, a Lockout is possible.
If random nuisance noise problems occur, check the following:
Poor connection between the Machine Interface (X1) cable shield and earth ground;
Optical interference from adjacent safety laser scanners or other photoelectrics; or
Scanner input or output wires routed too close to ―noisy‖ wiring.
Note: Do not directly ground the Scanner housing. Make only those connections as described in Section 3.
All Scanner wiring is low voltage; running these wires alongside power wires, motor/servo wires, or other high-voltage
wiring can inject noise into the Scanner. It is good wiring practice (and may be required by code) to isolate Scanner wires
from high-voltage wires. The Banner model BT-1 Beam Tracker (see Banner catalog or website) is a very good tool for
detecting electrical noise. It can be used to detect electrical transient spikes and surges.
Checking for sources of electrical noise: Turn off the Scanner and cover the lens of the BT-1 with electrical tape to
block optical light from getting into the receiver lens. Press the ―RCV‖ button on the BT-1 and position the Beam Tracker
on the wires going to the Scanner or any other nearby wires. Noise caused by the switching of inductive loads should be
addressed by installing proper transient suppression across the load.
Checking for sources of optical noise: Turn off the Scanner. Then use a Banner BT-1 Beam Tracker to check for light
at the AG4 front screen (window) by press the ―RCV‖ button on the BT-1 and moving across the full length of the window
with the BT-1 lenses facing away from the AG4. If the BT-1’s indicator lights, check for light from other sources (e.g.,
other safety laser scanners) by ―tracking down‖ the emitted light, using the BT-1.
5.4 Servicing and Maintenance
5.4.1 Removing the Scanner from the Machine
If the Scanner is to be removed from the machine and stored for a period of time, it is recommended to restore the
Scanner to the default configuration settings (see AG4soft Software Instruction Manual).
5.4.2 Cleaning the Front Screen (Window) and Scatter Screens
Clean the Scanner’s front and scatter screens regularly, at a frequency depending on the surrounding environmental
conditions, and using the recommended materials. Use only the AG4-CLN.. cleaning kit specified in Section 2,
consisting of approved cleanser and cleaning cloths. Do not use scouring pads or cloths that can cause scratching (e.g.,
paper towels). Never use solvents that can damage the plastic materials. The cleaning procedure depends on the type
and degree of contamination; see Table 12.
Table 12. Cleaning the Scanner front screen
Particles, loose, scouring
Vacuum without touching or blow away softly, oil-free
Wipe free in one swipe with cleaning cloth
Particles, loose, non-scouring
Vacuum without touching or blow away softly
Wipe free in one swipe with cleaning cloth
Wet with cloth soaked in AG4 cleanser
Wipe free in one swipe with cleaning cloth
Particles, statically charged
Vacuum without touching
Wipe free in one swipe with cleaning cloth soaked with AG4 cleanser
Buy: www.ValinOnline.com | Phone 844-385-3099 | Email: CustomerService@valin.com

 Loading...