Note: If the device name is longer than eight characters, only the first eight characters are used in
the folder name. If the device has no name, the folder name is the
first eight characters of the
device serial number.
4. Disconnect the USB flash drive from the iVu BCR device.
5. Connect the USB
flash drive to a Windows PC that has Vision Manager installed.
6. Copy the device configuration file from USB flash drive to desired location on the PC.
For example, when debugging inspections for an iVu Color device, the image
files can be located at: C:\Users
\Public\Documents\Banner Vision Manager\iVu Series\iVu Color.
7. Make sure the bitmap (.bmp)
files to be used for debugging are located in "InspLog" subfolder at that location.
For example, C:\Users\Public\Documents\Banner Vision Manager\iVu Series\iVu Color\InspLog. To avoid confusion,
remove the bitmap (.bmp) or Inspection Log files (.log) files in the InspLog folder so that those files will not be used
for debugging. The iVu BCR Emulator automatically uses all .bmp and .log files sequentially according to filename.
8. Start Vision Manager and click Emulators.
9.
For the desired Emulator, click and select the path on USB flash drive to which the device configuration was
saved. For example, [USB:]\BANNER\myName.
10.
Click to connect to the Emulator.
The Emulator runs with the configuration on the USB flash drive using .bmp files in the InspLog folder. Inspections
occur depending the Trigger Mode settings.
11. Make the desired adjustments to the inspection or inspections.
12.
On the Home screen, click
to disconnect the Emulator.
All configuration changes are automatically saved to the CONFIG.CFG file on the PC.
13. Copy the modified device configuration file from the PC to the USB flash drive ([USB:]\BANNER\myName).
14. Disconnect the USB flash drive from the PC.
15. Connect the USB
flash drive to the iVu BCR device.
16. Restore the configuration to the iVu BCR device.
a) Go to Main Menu > System > Sensor Configuration > Load Configuration.
b) Select the configuration to restore.
c) Click Load to start the restore device configuration.
d) Restart the device when the restore is complete.
15.3 Vision Manager Error Codes
Error Code
Description Recommended Solution
10000 The sensor's feature set is too old
to work with this version of Vision
Manager.
• Update the sensor firmware to a version compatible with this
application
• Install an older version of this application
10001 The sensor's feature set is too new
to work with this version of Vision
Manager.
• Install an newer version of this application
• Downgrade the sensor firmware to a version compatible with
this application
10005 The sensor was not found at the
specified IP address. Network
PING results indicate no device
present at the
specified IP address.
• Verify the sensor is energized
• Verify the sensor communication cable is connected
• Verify all inline network equipment is energized, properly
configured and connected
• Verify all required network equipment cables are connected
• Verify the network adaptor is properly
configured
• Verify the sensor IP address is valid
• Verify the sensor subnet is valid
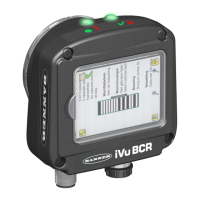
iVu Plus BCR Gen2 Series Sensor
184 www.bannerengineering.com - Tel: + 1 888 373 6767

 Loading...