14. Maintenance procedures
14.2 Check the small dust fi lt er
Necessary tools
7mm fl at screwdriver.
How to check the small dust filter?
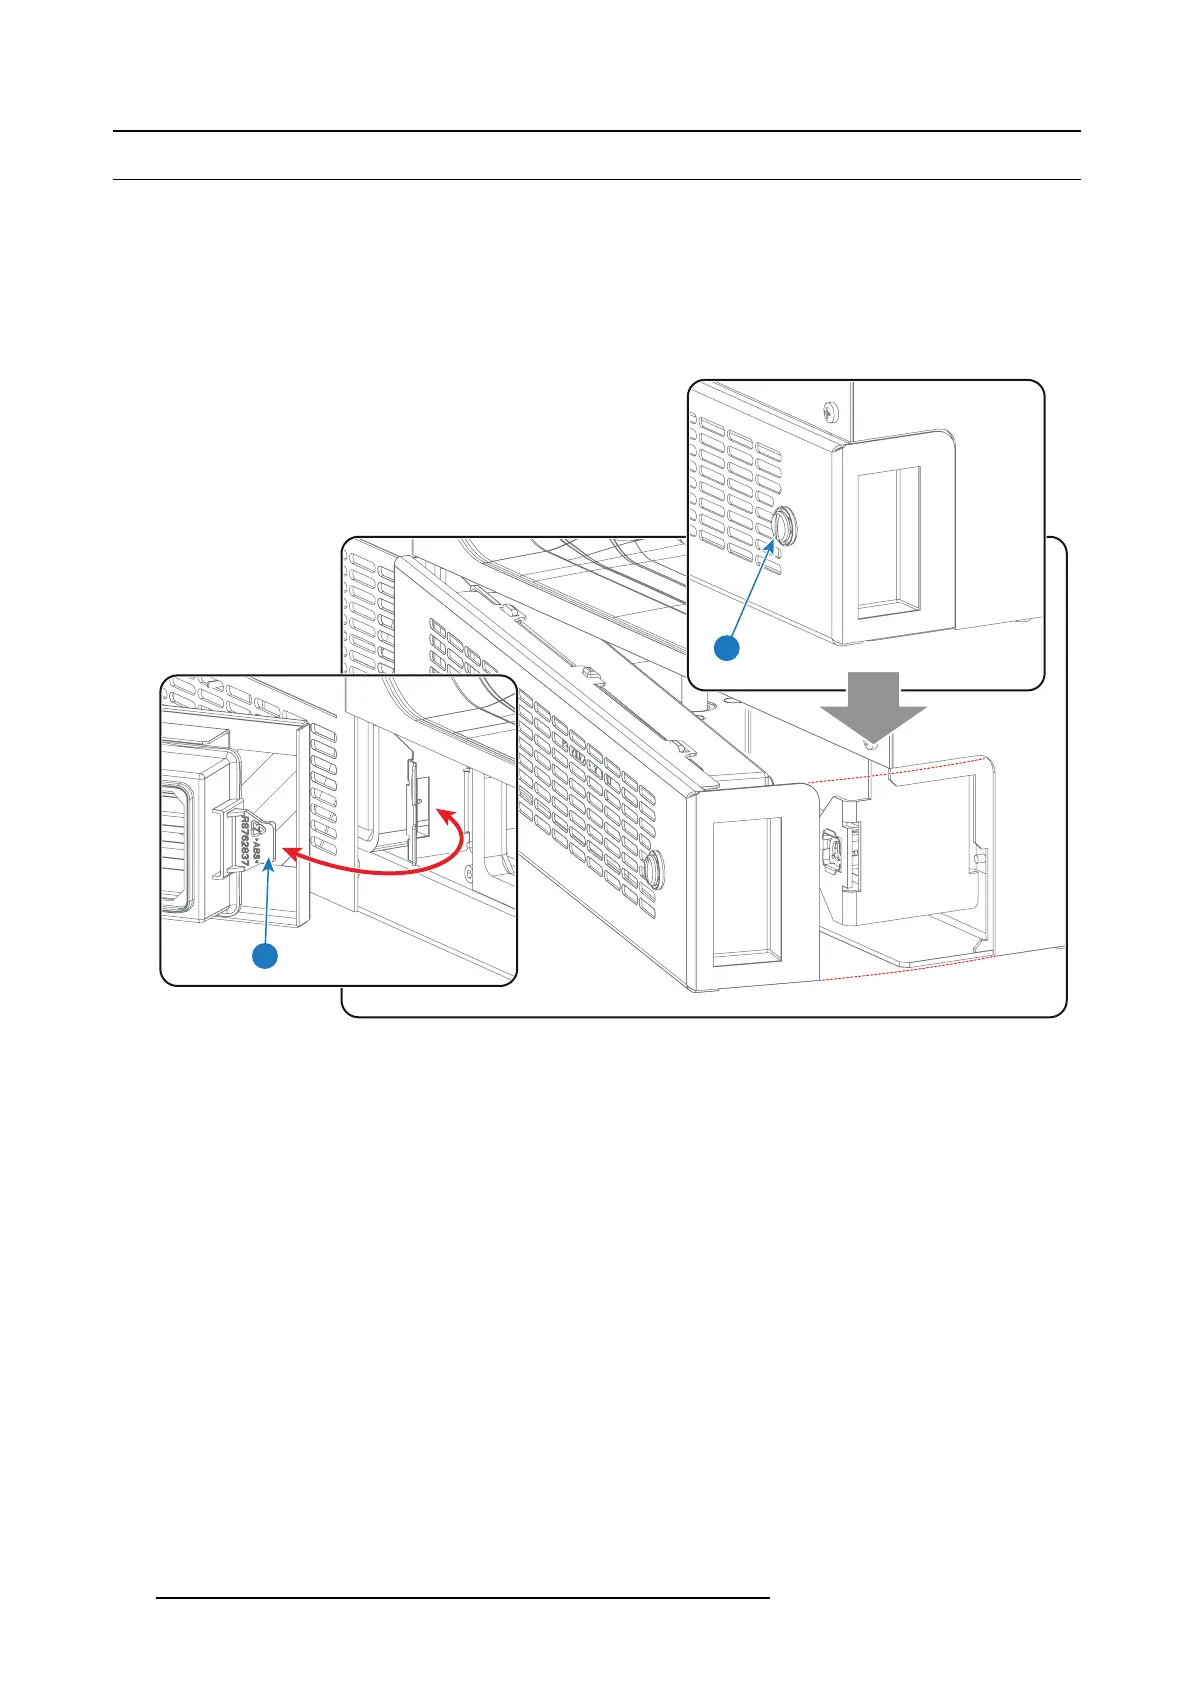
1. L oosen the captive sc rew (reference 1 ima ge 14-3) of the small dus t filter assem bly using a 7mm flat screw driver.
2. R emov e the dust filter assembly from the projector by pivoting the ass embly away from the projector as illustrated. Note that the
other side of the as sem bly contains a mounting lip (reference 2 image 14-3) which is engaged in the projector chassis.
1
2
Image 14-3
3. D etach the dust filter from the cover plate. Do this by pushing the two latches (reference 3 image 14-4) of the d ust filter inw ards.
4. C heck the “air in” side of the dust fi lt er for dust and/or grease.
In case the filter is contaminated with grease w ash and dry the dus t filter. S ee cleaning proc edure "Washing and drying the dust
filters", page 111.
In case the filter contains dust but doesn’t feel gr easy then vacuum clean the dust filter. See p rocedure "Vacuum cleaning of the
dust filters", page 110.
Note: Grease on the filter can build up after several m onths in an environment contaminated with greasy air. Note that areas
where popcorn is c onsumed are subject for greasy air.
Tip: Take into account that the time needed to dry t he dust filters may be 24 hours or more. For that, it’s recommended to
have a s econd set of dust filters which can be used while cleaning the first set.
5. Attach a clean dust filter to the c
over plate. Ensure that both latches (reference 4 image 14-4) of the dust filter are engaged.
Caution: UNDER NO CIRCUMSTAN CES SHOULD WET FILTE RS BE INSTALLED BACK INTO THE PROJECTOR. THIS
CAN HAVE SERIOUS SAFETY CONSEQUENCES AS W ELL AS JEOPARDIZE THE INTERNAL OPTICS OF THE
SYSTEM.
108
R5977692 DP2K-S SERIES 10/12/2012

 Loading...


