10. Scheimpflug
Scheimpflug adjustment steps:
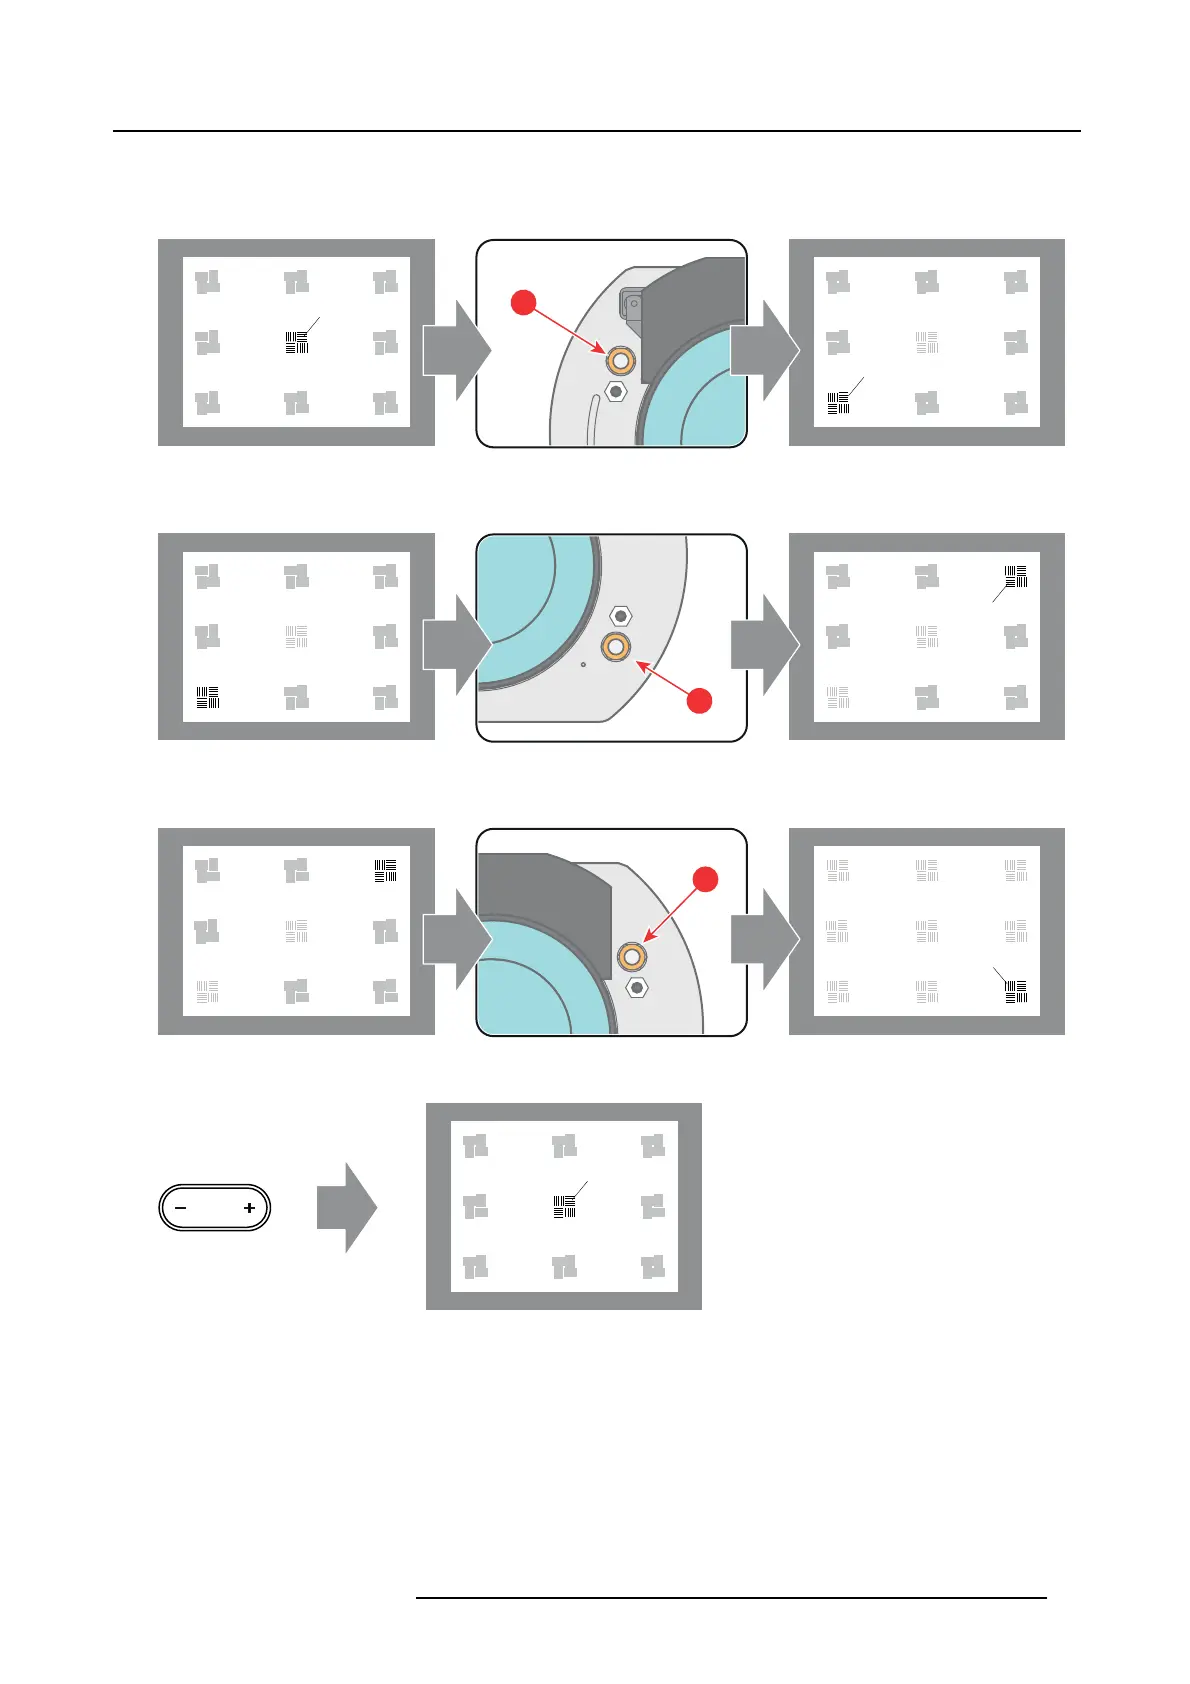
1. Sharpen the image at the bottom left cor ner of the screen by turning the uppe r left Scheimpflug adjustment nut (reference 1
image 10-6). As a result the focus in the center will fade a bit but that’s nor mal.
F
F
1
Image 10-6
2. Sharpen the image at the top right corner of the screen by turning the lower right Scheimpflug adjustment nut (reference 3 im-
age 10-7).
F
3
Image 10-7
3. Sharpen the image at the bottom right corner o f the screen b
y turning the upper right Sc heimpflug adjustment nut (reference 2
image 10-7).
F
2
Image 10-8
4. Optimize the focus of the p rojected image in the center of the screen us ing the motorized focus control (Local Ke ypad).
F
FOCUS
Image 10-9
5. R epeat from step 1 until the projected focus pattern is as sharp as possible in the center, left, right, top and bottom of the screen.
6. Proc eed with the procedure "Fixation of the Lens H older front plate", page 62.
R5977692 DP2K-S SERIES 10/12/2012
61
 Loading...


