2. Getting to know the projector.
Broadcast ad dress
Projector will always execute the command coming from a RC U programmed w ith that broadcast address.
2.10.1 Contro lling the projector
Why a projector address?
As more than one projector can be installed in a room, eac h pr ojector should be separately addressable with an RCU or com puter.
Therefore each projector has its own address.
Set up an indiv idual Projector Address
The set up of a projector address can be done via the software.
Projector controlling
Every projector requires an indiv idual address between 0 and 255.
When the address is set, the projector can be controlled now:
• with the RCU: only for addresses between 0 and 31.
• with a computer: for any address between 0 and 255.
Broadcast Address
Every projector has a broadcast (common) address ’0’ or ’1’. The default address is ’0’.
The choice between ’0’ and ’1’ can be selected in the G UI: “System S ettings” → “Comm unication” →“IR Control “.
Placing new batteries in the remote control or plugging the rem ote to a projector via XLR cable will autom ati-
cally reset the address back to its default value ’0’.
2.10.2 Displaying and Programming addresses into the RCU
Displaying the Projector Address on the Screen.
1. Press the Address button to see the projector a ddress (proximately 2 s econds).
The projector ’s address is displayed on the LCD status screen.
How to Program an Address into the RCU?
1. Press the Address button until the Button pressed indicator lights
up continuously (proximately 5 seconds).
2. Enter the address w ith t he digit buttons within the time the indicator lights up (also proximately 5 seconds).
Note: That address can be any value between 0 and 31.
Tip: A few examples:
To enter address 3, press "3" digit button on the RCU to set the RCU’s address to 3 and wait until the button pressed
indicator is out. Alternatively, you can also pr ess “0” and “3”. Th is way, he button pressed indicator goes out immed iately.
To enter address 31, then press “3” and “1” on the digit button on the RCU and th e button pressed indica tor g oes out
immediately.
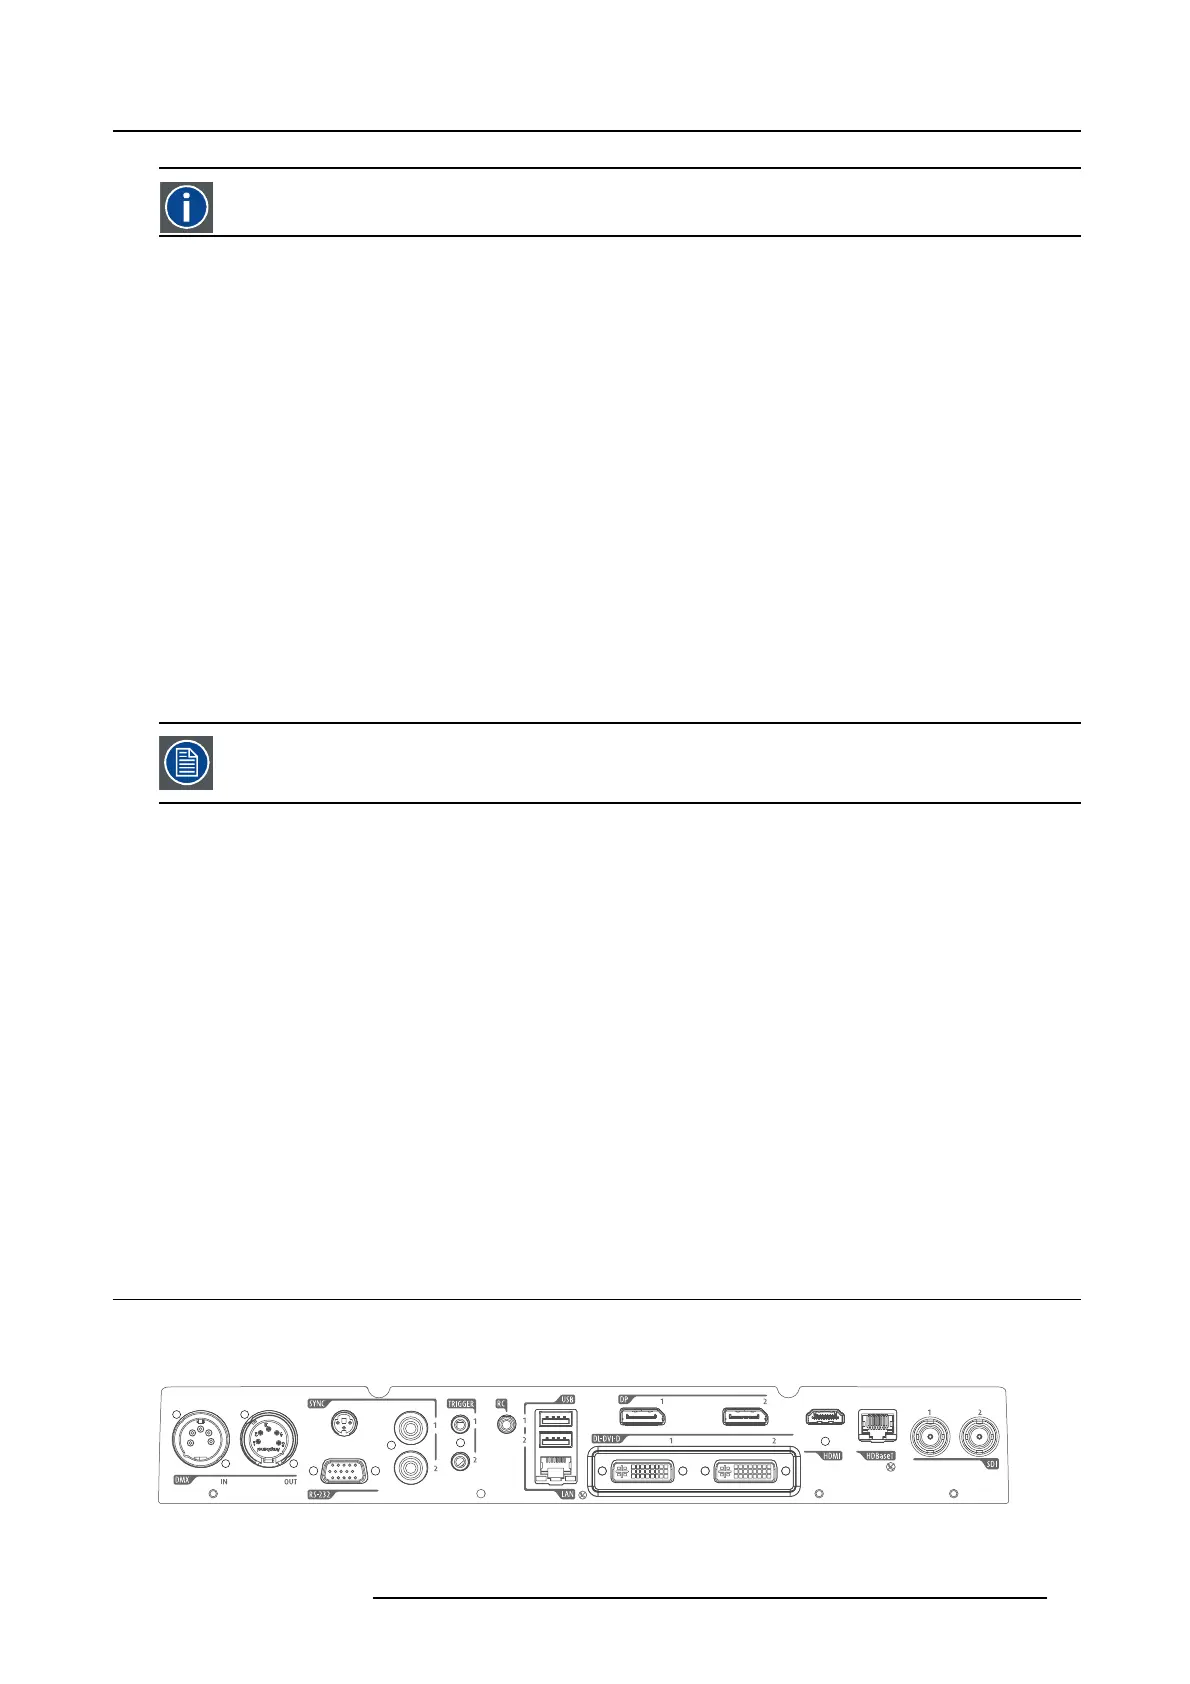
2.11 Connector panel
General
The source input pa nel is located at the back of the projector. For s ource specifications, s ee table below.
Image 2-8
601–426 F70 SERIES 16/06/2017 23