4. Lamp & Lamp House
WARNING: Alw ays wear protective clothing (welder ’s jacket) w hen handling x enon lamps.
WARNING: Alwa ys wear clean leather gloves w ith w rist p rotectors when handling xeno n lamps.
This procedure assumes that the anode support assembly and the side cover are already removed from the
Lamp House due to the removal of the xenon lamp.
Necessary tools
• Torque wrench with a 2,5 mm Allen socket.
• Torque Allen key
• 1,5 mm Allen wrench.
• 22 mm open-end wrench.
• Torque wrench with a 22 mm hex agon socket.
• Torque wrench with a 5 mm A llen socket.
How to install the xenon lamp in the manua l S/M Lamp House?
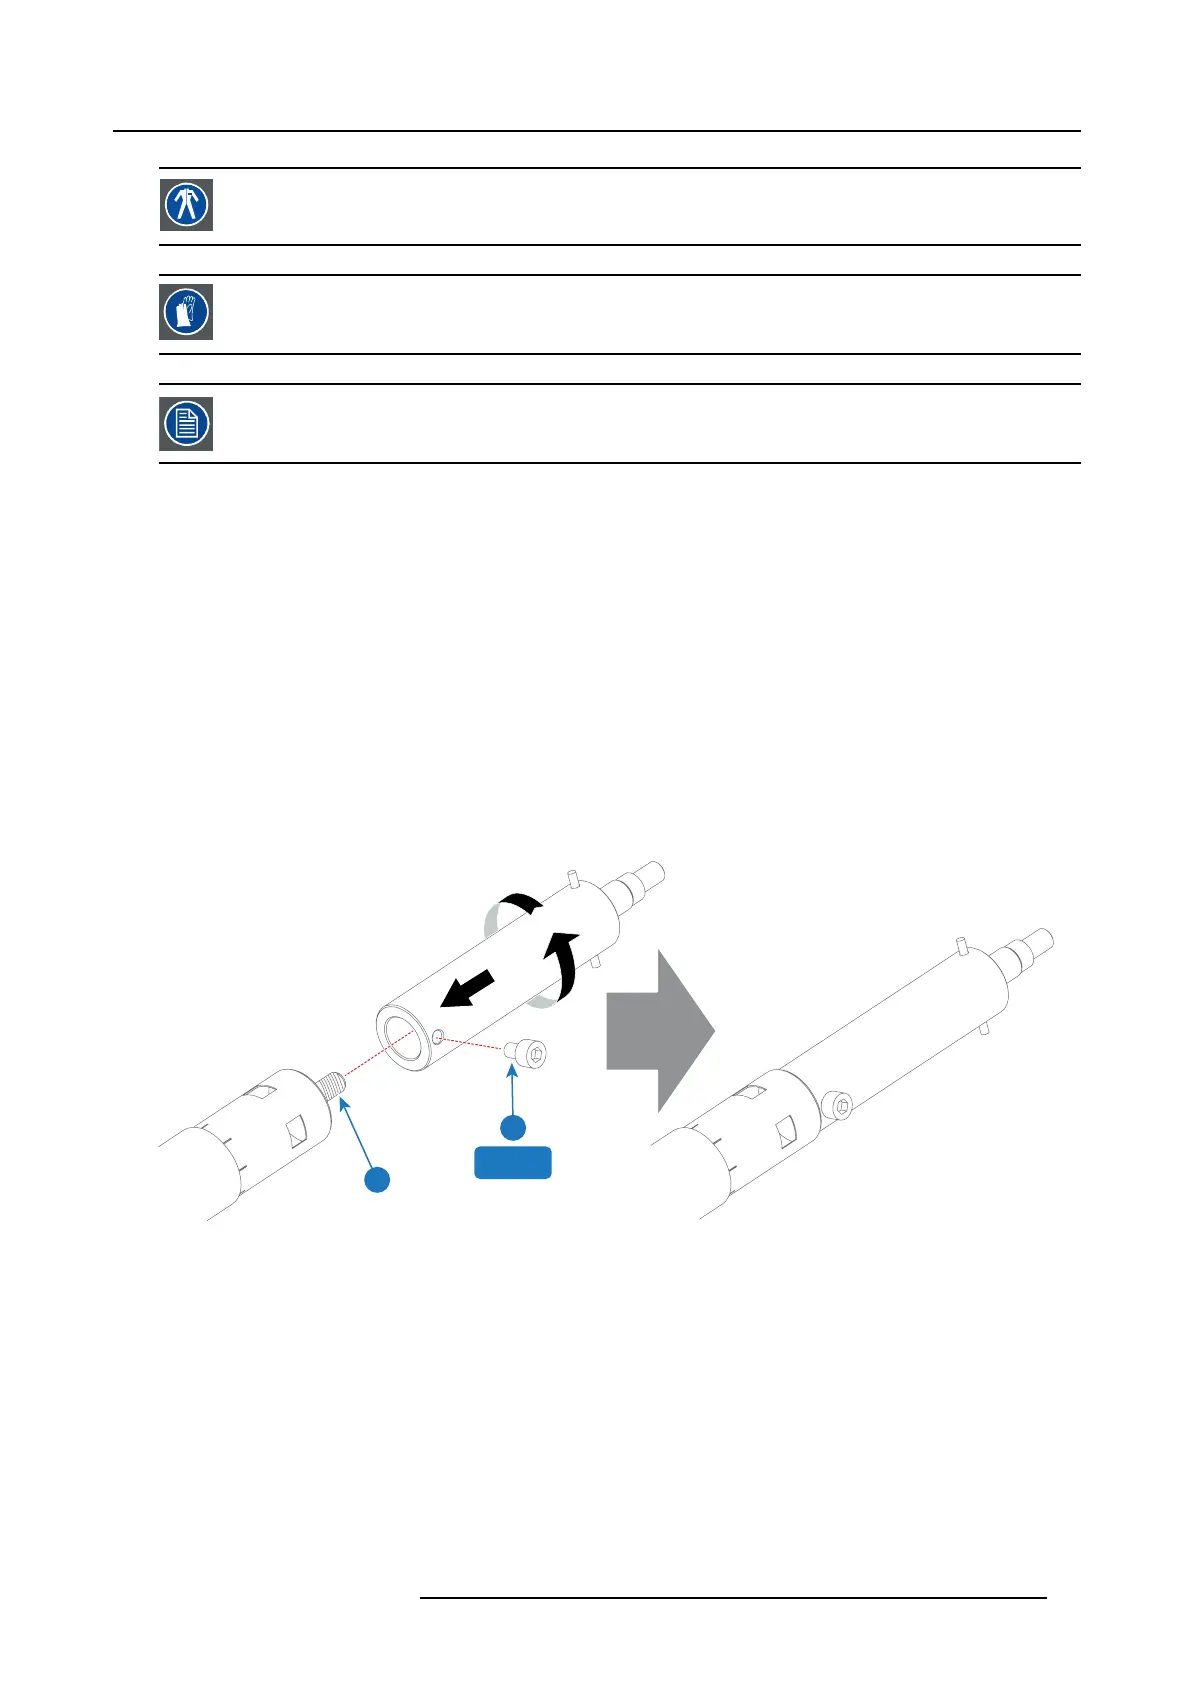
1. Install the lamp cathode adapter on the cathode of the xenon lamp. Note that som e xenon lamps have a cathod e pin with screw
threat (reference 10 image 4-15). Screw the adaptor on the anode pin as far as possible. Make sure that there is full contact
between the adapter flat surface and the lam p base. Fasten the set screw (reference 9 image 4-15) of the cathode adapter with
a torque of 2.5Nm ( 1.84 lbf*ft). Use a torque wrench with a 5mm Allen socke t.
Caution: Ensure that the adaptor is clean. Periodically clean the adapter. Remove oxide from silver plated adaptor with
standard househo ld metal polish (E .g. Brasso).
Warning: Install the cathode adapter prior to rem oving the protective container or protective cloth from the xenon lam p.
10
9
2.5Nm
Image 4-15
2. Install t he anode wire lug (reference 6 im
age 4-16) upon the a node socket as illustrated. Use an 8mm Allen torque key set to
9Nm (6.64lbf*ft) to secure the bolt (reference 8 image 4 -16). Place a flat washer (reference 7 image 4-1 6) between the bolt and
thewirelug.
Warning: Make sure that there is no tension on the
anode wire of the xenon lamp.
R5905067 DPXK-19B/23B/P 17/09/2012
35
 Loading...


