R5912128 /03 SP4K-B46
4.3 Power input configuration of the projector
About the power input.
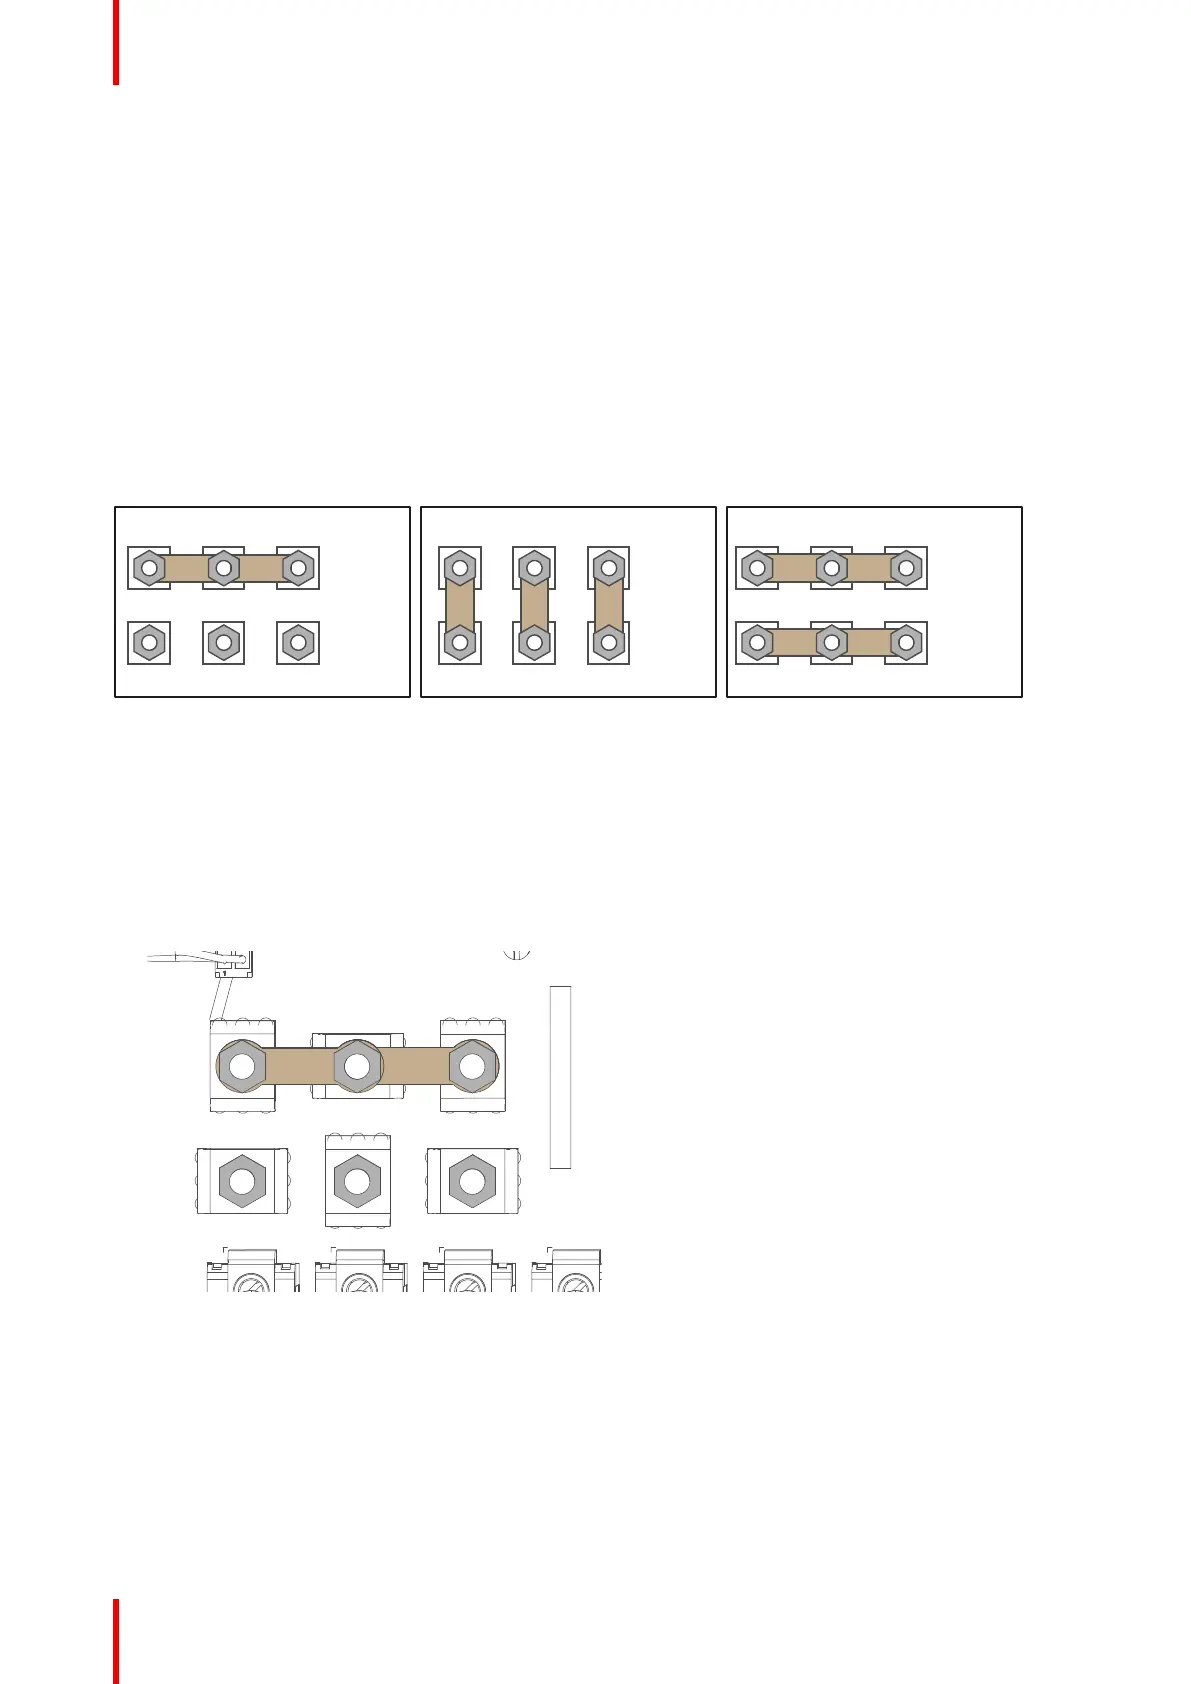
The power input of the projector can be configured in one of three different configurations, depending on the
local power supply:
• In a Y configuration (3W+N+PE) for a three phase power supply of 200-240 V / 346-415 V. In this
configuration, 346-415 V is measured between the lines while 200-240V is measured between the lines
and the neutral.
• In a Δ configuration (3W+PE) for a three phase power supply of 200-240 V. In this configuration, 200-240
V is measured between the lines.
• In a mono phase configuration (L1+N+PE) for a mono phase power supply of 200-240 V. In this
configuration, 200-240 V is measured between L1 and the neutral (N) or L2.
Before operating the projector, place the links in the correct position depending on the local power supply.
W2
U1
U2
V1
V2
W1
Δ
MONO
W2
U1
U2
V1
V2
W1
W2
U1
U2
V1
V2
W1
Y
Image 4–6 From left to right: Y configuration, Δ configuration and mono phase configuration
Required tools
• Nut driver 10 mm
• Torque wrench with 10 mm hexagon socket
How to switch configurations
1. Loosen the top nuts on all the Υ / Δ / mono configuration pins. (U1, U2, V1, V2, W1 and W2). Use a 10 mm
nut driver.
Image 4–7
2. Take off the four mounted links (A, B, C and D).
3. Mount the links as illustrated, depending on the configuration:
1. Y configuration: Connect the upper pins with each other. Place two links between each pin (do not
remove them).
Physical installation projector