46 support@solowavedesign.com
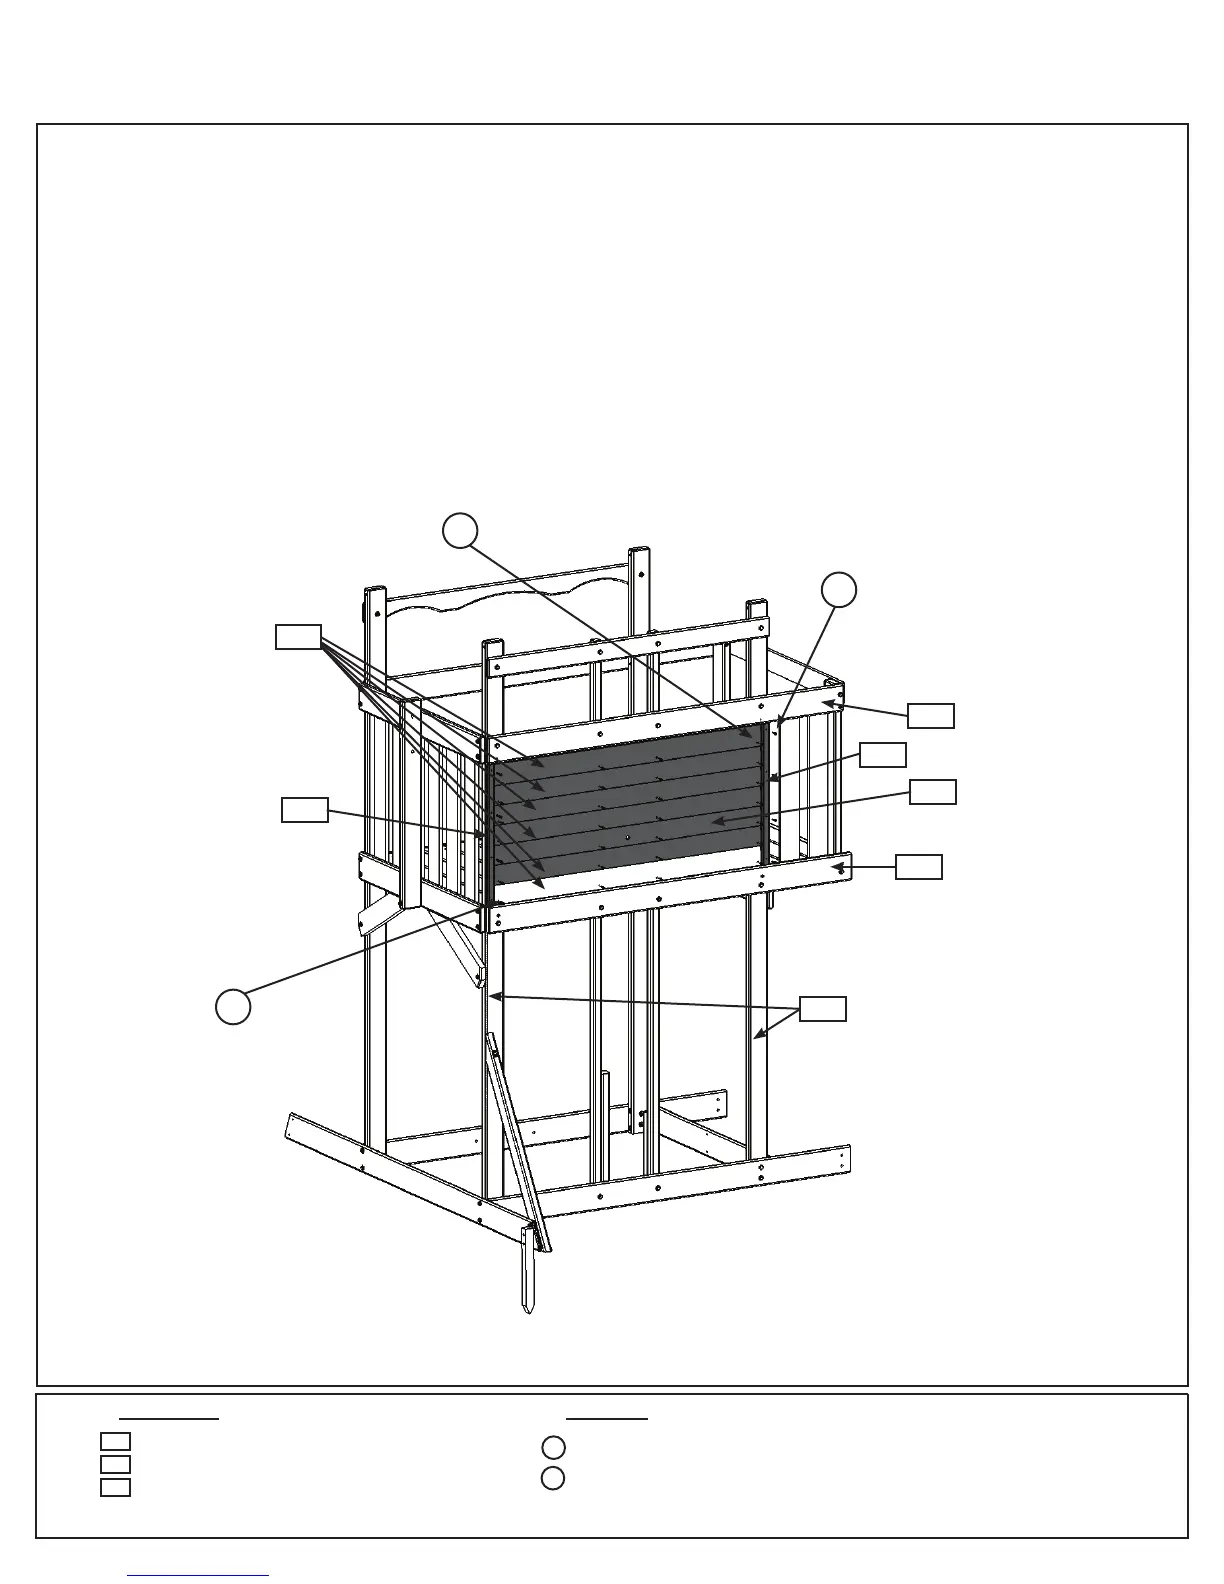
B: Place1(2118)FrontTrimtighttothetopof(2124)FrontFloorandushtotheoutsideedgeof(2153)Poston
theSwingWallside.Attachto(2153)Postwith4(S2)#8x1-1/2”WoodScrews.(g.16.3)
C:Tighttotopof(2124)FrontFloorandtightto(2118)FrontTrimattach2(2128)Sidingtoboth(2153)Posts
with4(S0)#8x7/8”TrussScrewsperboard.(g.16.3)
D: Install(2162)Siding-Clockfollowedby4more(2128)Sidingmakingsuretherearenogapsbetweenboards.
Attachtoboth(2153)Postswith4(S0)#8x7/8”TrussScrewsperboard.Thetopofthelast(2128)Sidingshould
betighttothebottomof(2125)MiddleFront.(g.16.3)
E:Tighttothesidingandtopof(2124)FrontFloorattachasecond(2118)FrontTrimto(2153)Postwith4(S2)
#8x1-1/2”WoodScrews.(g16.3)
Step 16: Upper Front Wall Assembly
Part 2
28 x #8 x 7/8” Truss Screw
8 x #8 x 1-1/2” Wood Screw
Wood Parts Hardware
6 x Siding 3/8 x 3-1/2 x 49-1/8”
1 x Siding - Clock 3/8 x 3-1/2 x 49-1/8”
2 x Front Trim 1 x 2 x 23-3/8”
2128
2118
S0
2162
S2
Fig. 16.3
x4perboard
2153
Front Wall
2124
S2
S0
2118
Swing Wall
2125
x4perboard
S2
x4perboard
2128
2162
2118