EasyManuals Logo

Blackmagicdesign Studio Camera User Manual

Blackmagicdesign Studio Camera
650 pages
To Next Page IconTo Next Page
To Previous Page IconTo Previous Page
Page #45 background imageLoading...
Page #45 background image
BlackmagicMicro Studio Camera 4K and set the camera as camera number 1.
4 Connect the joystick and button to the shield
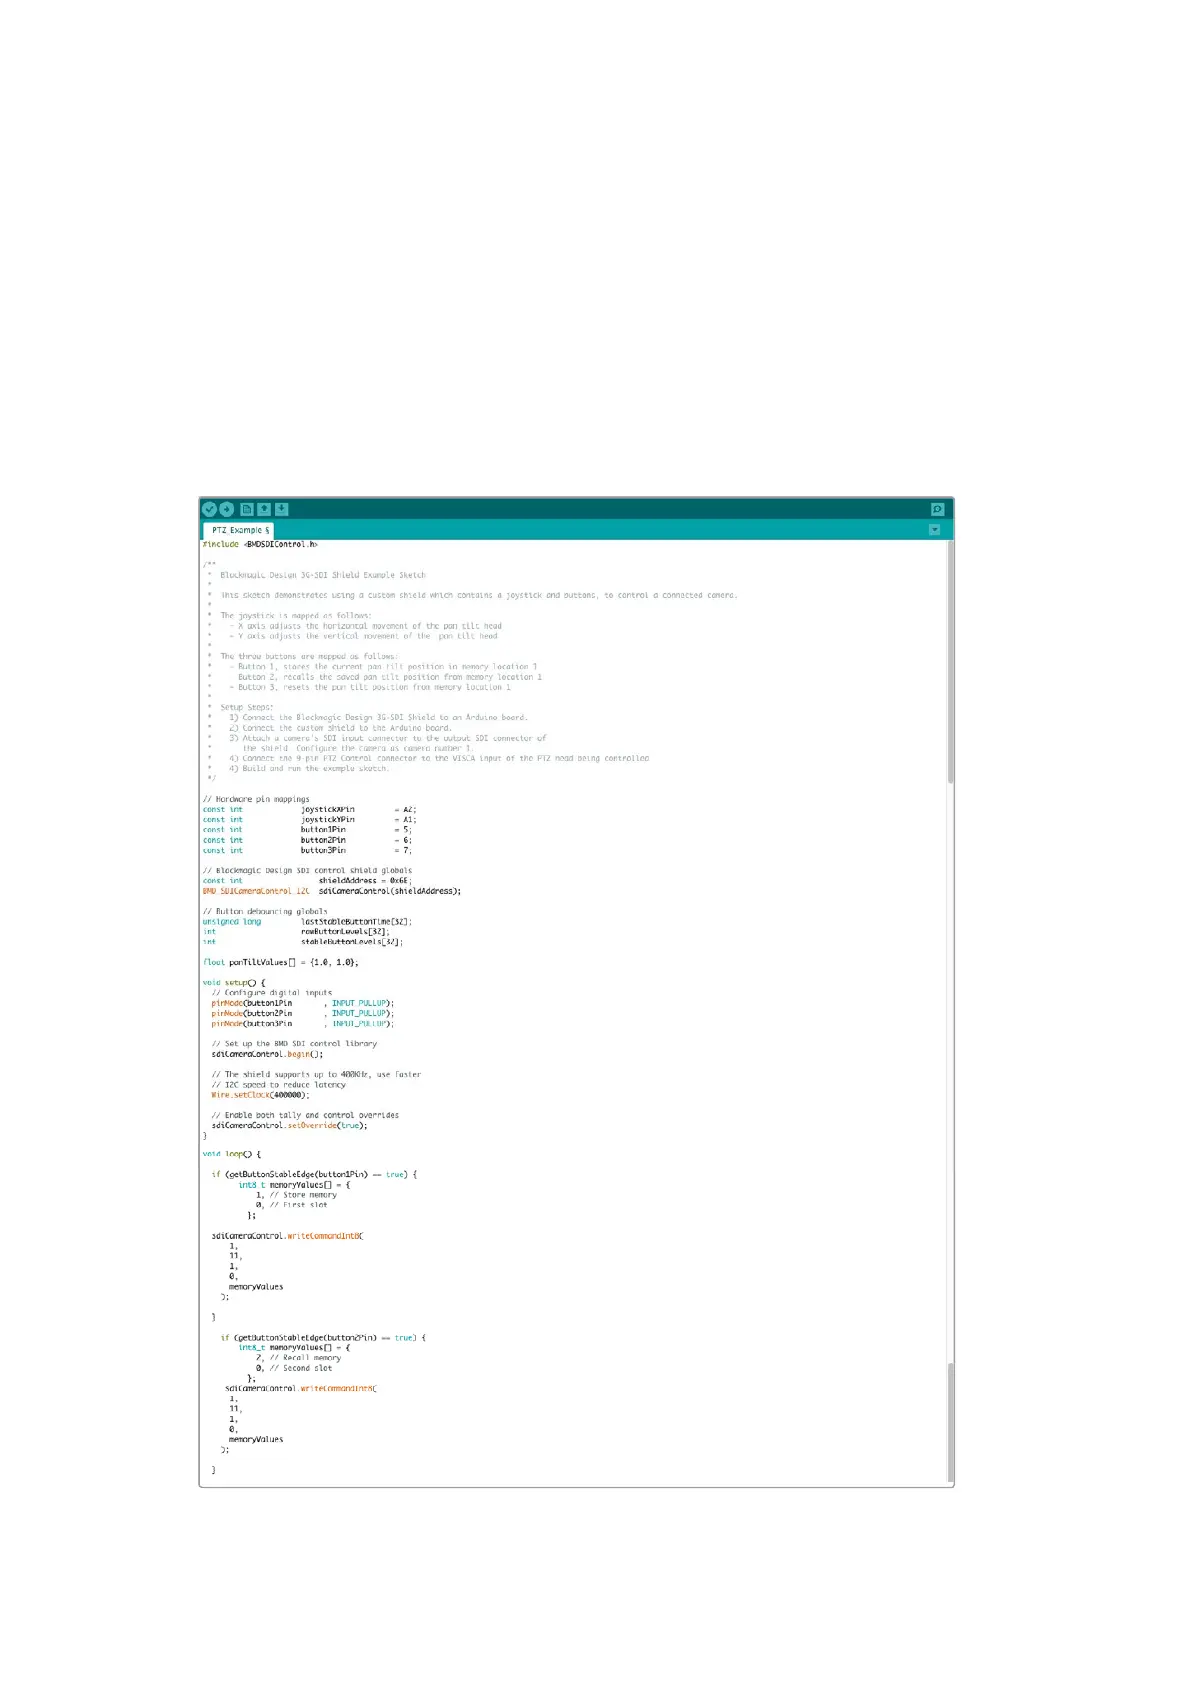
The joystick is mapped as follows:
X axis adjusts the PTZ head’s pan.
Y axis adjusts the PTZ head’s tilt.
Pressing the joystick button tells the PTZ head to store the current X,
Ypositionin memory.
Pressing the switch recalls the stored position.
Controlling your Arduino
The following sketch demonstrates a simple example of using a joystick and button with
anArduino board and the Blackmagic 3G-SDI Arduino Shield, to control a PTZ head via a
Blackmagic Micro Studio Camera 4K.
45PTZ Control over SDI 45

Table of Contents

Questions and Answers:

Question and Answer IconNeed help?

Do you have a question about the Blackmagicdesign Studio Camera and is the answer not in the manual?

Blackmagicdesign Studio Camera Specifications

General IconGeneral
Power12V DC
Frame Rates23.98, 24, 25, 29.97, 30
Audio Input2 x XLR
Video OutputHDMI, 6G-SDI, 3G-SDI
Power Input12V DC
ConnectionsXLR

Related product manuals