22
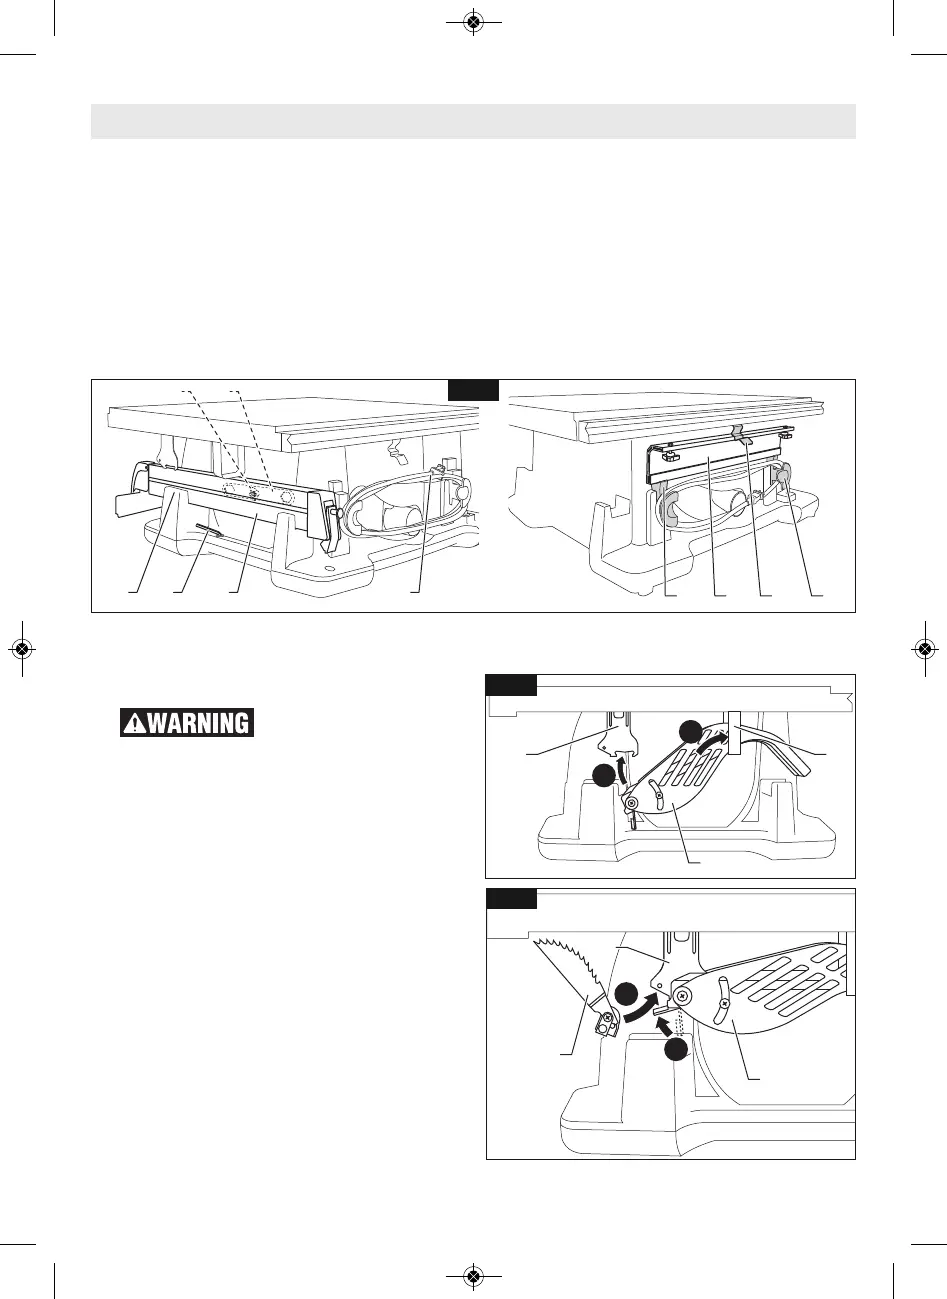
SMART GUARD SYSTEM STORAGE
Use of all the compo-
nents of the Smart Guard
System, including Main Barrier Guard, Anti-
Kickback Device, and Riving Knife is highly
recommended to provide protection against
accidents and injury.
When not in use, the main barrier guard and
anti-kickback device can be stored under the
right side table extension.
A. Slide the main barrier guard assembly
19a (upside down) up and back into the
strap support 20b at the rear right side
of the saw (Fig. 17).
B. Pivot the rear of the guard up and into
the front mounting bracket 20a
(Fig. 17).
C. Lock the main barrier guard assembly
19a into place in the same manner as
you would attach it to the riving knife
(Fig. 18).
D. Attach the anti-kickback device 19b to
the front mounting bracket in the same
manner that it attaches to the riving
knife (Fig. 18).
RIP FENCE AND THIN WORKPIECE
FENCE STORAGE
• When not in use, store rip fence 18 in
rip fence storage 11 on the right side
panel of the saw (Fig. 16).
• Store the blade wrench 14 in its dedi-
cated area, secured with a wing nut 14a
(Fig. 16).
• Wrap the power cord 28 around the
cord wrap 16 (Fig. 16).
• Mount the 5mm hex wrench 15 in its
dedicated storage location on the right
side of the base (Fig. 16).
• To store the thin workpiece fence 25, lift
the clip 26 and place the fence on the
“shoulders” of the red cord wraps 16 as
shown. Release the clip 26 to secure the
fence 25 in place.
Storage, Transportation, and Mounting