35
Basic Table Saw Operation
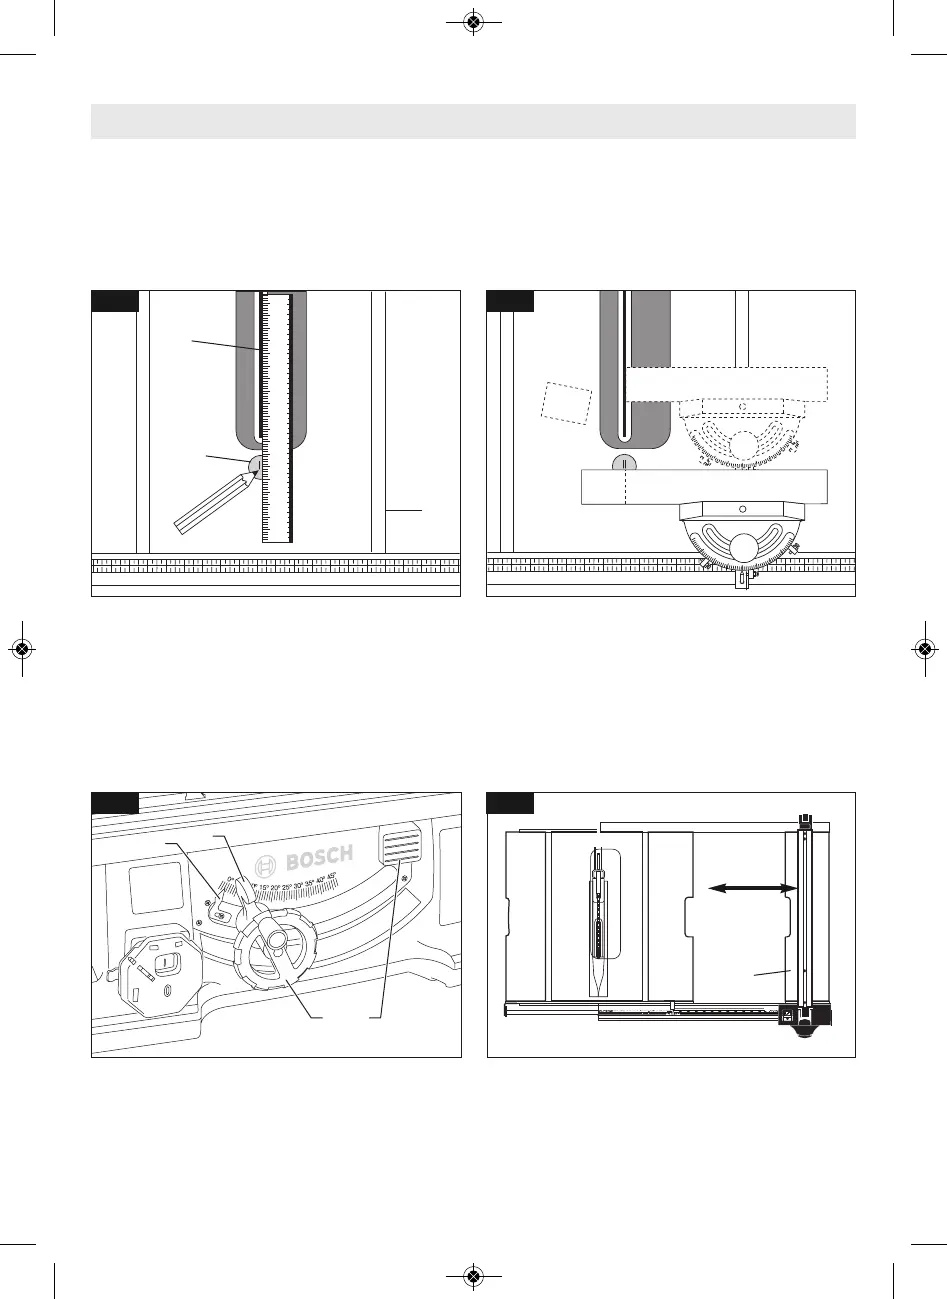
Fig. 51
Fig. 50
1
3
2
PRE-CUT LOCATOR
Allows you to mark and locate exactly where
the blade will enter the workpiece.
Always make sure table saw is turned off and
unplugged.
Set blade 1 at 90 degrees square to table.
Using a straight edge and a soft pencil, place
straight edge 2 against both sides of blade
and mark lines on locator 3 (Fig. 50). These
lines indicate the “path” of the cut (kerf)
made by the blade.
When cutting the workpiece, line up mark on
workpiece with the line on the disc (Fig. 51).
Fig. 52 Fig. 53
5
BLADE BEVEL CONTROL
Loosen blade bevel lock handle 1 counter-
clockwise (Fig. 52), slide the elevation wheel
2 until pointer 3 is at desired angle and
tighten blade tilt lock handle 1 clockwise.
EXTENDING TABLE EXTENSION
To extend the table, raise the table extension
lock handle 4 (Fig. 52) and slide table exten-
sion 5 to desired width (Fig 53). To secure
table setting, lower the lock handle 4.
1600A01Z1U.qxp_4100XC 10/31/19 1:21 PM Page 35