41
Non-Thru Cutting
Add 8" (203mm) high flat facing board to the
rip fence, the full length of the rip fence (Fig.
60).
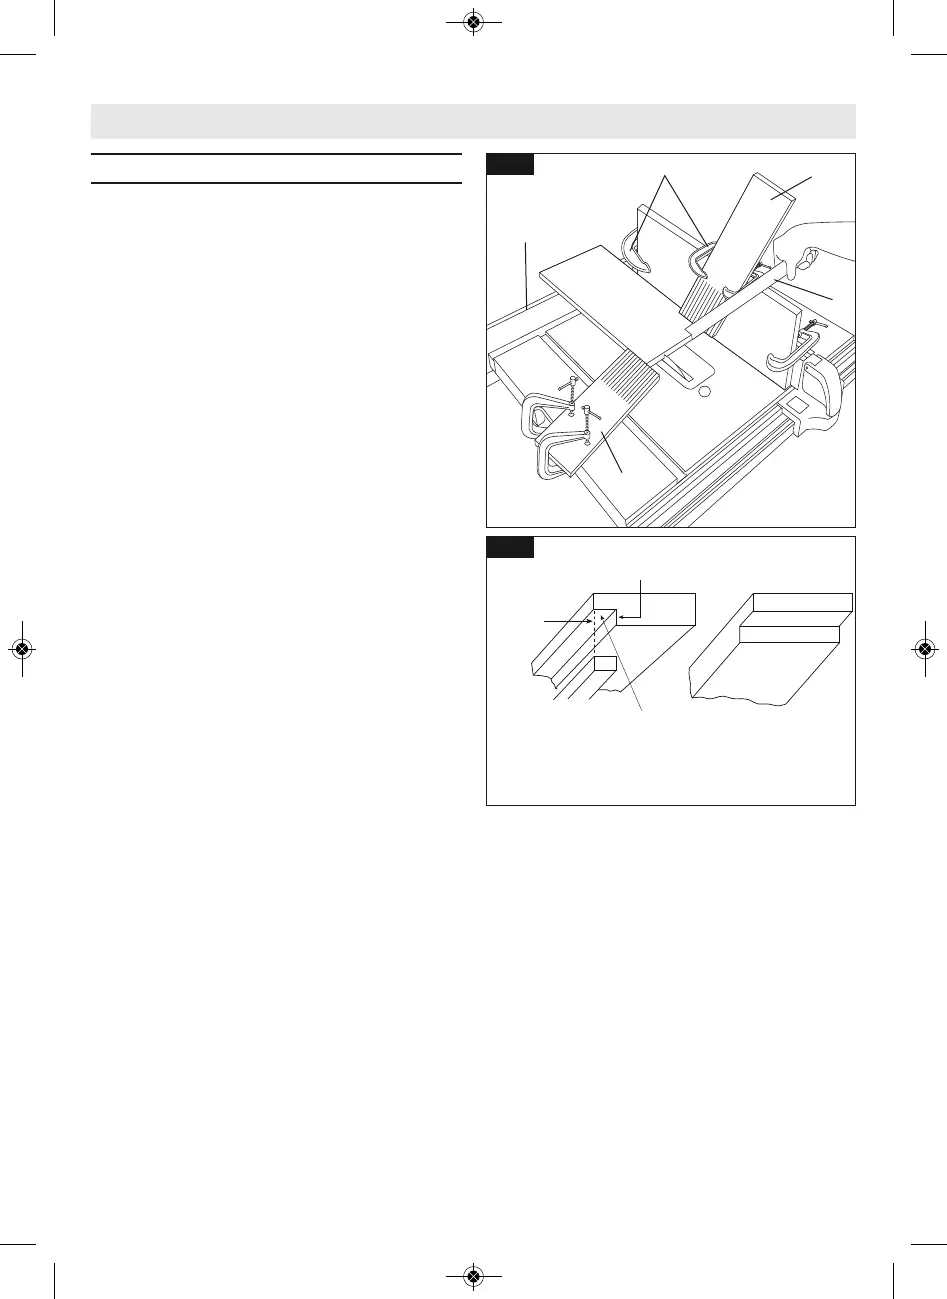
Use featherboards for all “Non Thru-Sawing”
operations (when sawblade guard must be
removed). Featherboards 1 are used to keep
the work in contact with the rip fence and
table as shown, and to stop kickbacks.
Mount featherboards 1 to rip fence and table
as shown, so that leading edges of feather-
boards will support workpiece until cut is
complete, and the workpiece has been
pushed com pletely past the cutter (saw-
blade, dado head, molding head, etc.) with a
push stick 22, as in ripping.
Before starting the operation (switch saw
“OFF” and set cutter below table surface):
A. Install featherboards so they exert pres-
sure on the work piece; be positive they
are securely attached.
B. Make sure by trial that the feather-
boards will stop a kick back if one
should occur.
Featherboards are not employed during non
thru-sawing operations when using the miter
gauge.
Replace the smart guard system as soon as
the non thru-sawing operation is complete.
RABBETING
RABBETING is known as cutting out a section
of the corner of a piece of material, across an
end or along an edge (Fig. 61).
Making a RABBET requires cuts which do not
go all the way through the material. Therefore
the smart guard system must be removed.
A. Remove blade guard.
B. For rabbeting along an edge (long way
of workpiece) as shown, add facing to
rip fence approximately as high as the
workpiece is wide. Adjust rip fence and
blade to required dimensions; then
make first cut with board flat on table,
follow set-up Fig. 60. Make second cut
with workpiece on edge. Follow all pre-
cautions, safety instructions, and oper-
ation instructions as for ripping or rip
type operations, including feather-
boards and push stick, etc.
C. For rabbeting across an end, for work-
piece 10-1/2" (267mm) and narrower
make the rabbet cut with the board flat
on the table. Using the miter gauge fit-
ted with a facing, follow the same pro-
cedures and instructions for
crosscutting making suc cessive cuts
across the width of the workpiece to ob-
tain the desired width of cut. DO NOT
use the rip fence for rabbeting across
the end.
D. INSTALL SMART GUARD SYSTEM IMME-
DIATELY UPON COM PLETION OF RAB-
BETING OPERATION.
Rabbet cuts can also be made in one pass of
the workpiece over the cutter using the dado
head or molding head.
22
1
1
“C” CLAMPS
WORK
SUPPORT
Fig. 60
RABBETING ALONG
THE EDGE
RABBETING ACROSS
THE END
RABBET
FIRST CUT
SECOND CUT
Fig. 61
Basic Table Saw Operation