44
of cut is maintained.
RETURNING SAW TO NORMAL THRU-
CUTTING
After completing your dado cutting, be sure
to return the inner and outer washers to the
original positions (see page 20 for details). It
is important that the original equipment
washers are in the proper positions so that
the saw blade always aligns with the perma-
nently installed riving knife (Fig. 63).
ADJUSTABLE OR WOBBLE DADO SETS
To reduce the risk of in-
jury, do not use ad-
justable or “wobble” dado sets on this saw.
Adjustable dado sets can be easily set to po-
sitions that may interfere with working com-
ponents of this saw.
INSTALLING A MOLDING HEAD SET
To reduce the risk of in-
jury, always disconnect
plug from power source before changing
blades.
To reduce the risk of in-
jury, always use the
Bosch Molding Table Insert No.TS1009.
Never make molding head cuts without this
insert. Do not use molding head sets larger
than 7" (178mm) diameter and with cutters
wider than 1” (25mm). Never set molding cut-
ters to any bevel angle other than the vertical
0° angle. Follow all warnings and instructions
shown here and those that accompany your
molding head set. Failure to comply with
these warnings may result in serious bodily
injuries.
To reduce the risk of in-
jury, never pass your
hands over the cutting molding head cut-
ters. Molding cuts are non-thru (blind) cuts.
Many times the cutters can not be seen dur-
ing cutting. See page 41 for instructions on
non-thru sawing. The work piece must be
held against the saw's rip fence as it is being
fed. An auxiliary fence should be attached to
the saw's rip fence (see page 34). Never make
freehand cuts. Whenever possible, use push
sticks and push blocks for molding cutting
(see page 33). Use feather boards and hold-
downs, attached to the table or rip fence
(See page 41). IMPORTANT: Follow all in-
structions and warnings that come with your
molding head set.
A Molding Head Set may be used to add a
variety of decorative edges to a wood work
piece. These edges are commonly seen on
trim moldings and furniture.
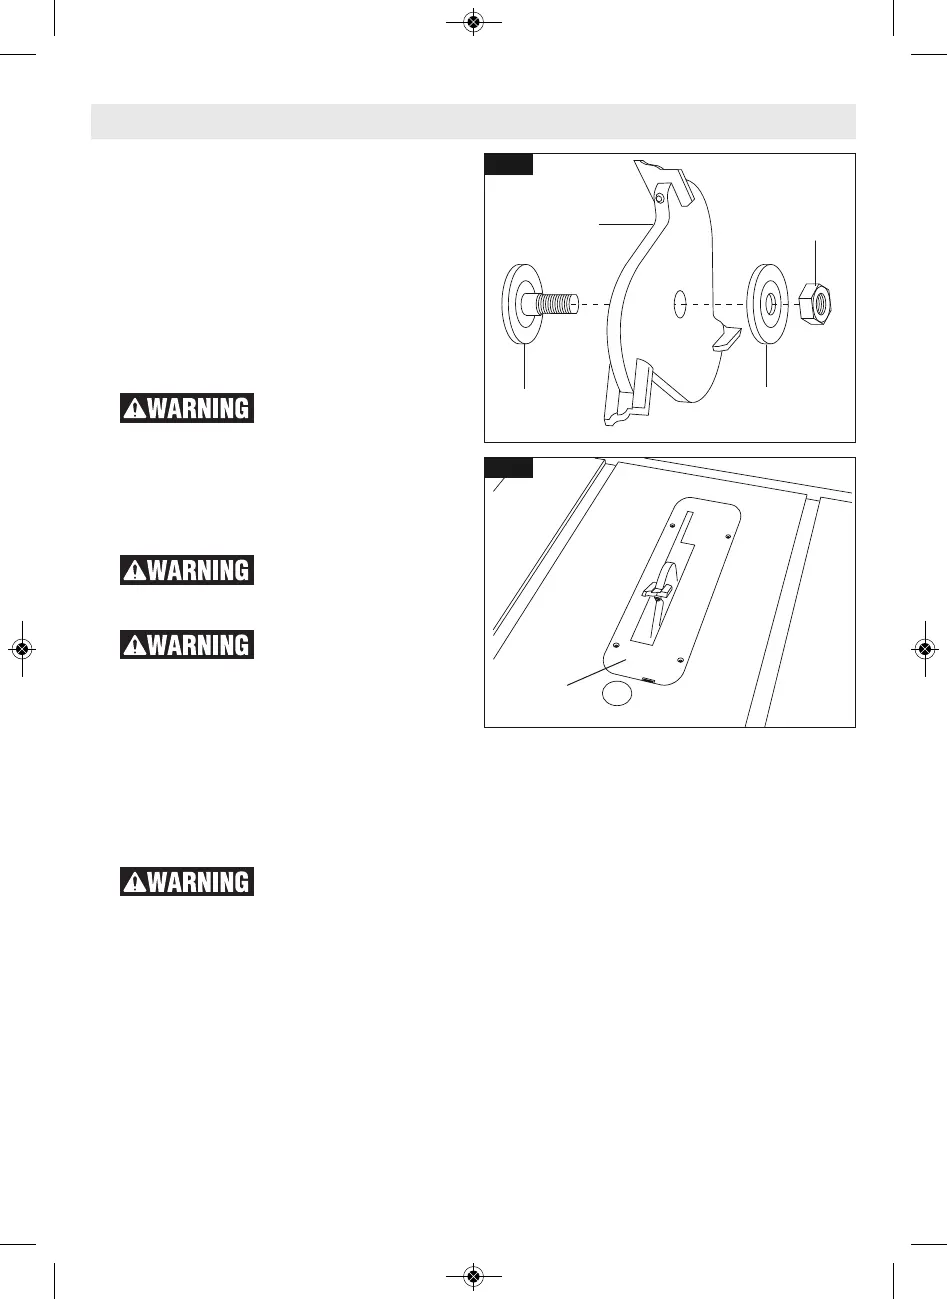
NOTE: Leave the inner washer in its original
sawing position. Install molding head, then
outer washer, and then arbor nut. Check that
all cutters and the arbor nut are securely
tightened. Some molding head sets come
with an additional thick washer/spacer; this
part is not used on the 4100XC table saw.
A. Disconnect plug from power source.
Raise saw blade to maximum height.
B. Remove the barrier guard assembly and
anti-kickback device (see page 17 and
18). Lower and lock the riving knife in
its lowest position.
C. Remove standard table insert plate.
D. Remove the arbor nut and only the
outer blade washer and saw blade (see
MOLDING
HEAD
OUTER
WASHER
ARBOR
NUT
MOLDING
TABLE INSERT
INNER BLADE
WASHER
Fig. 65
Fig. 66
Basic Table Saw Operation