Fig. 34
ON
OFF
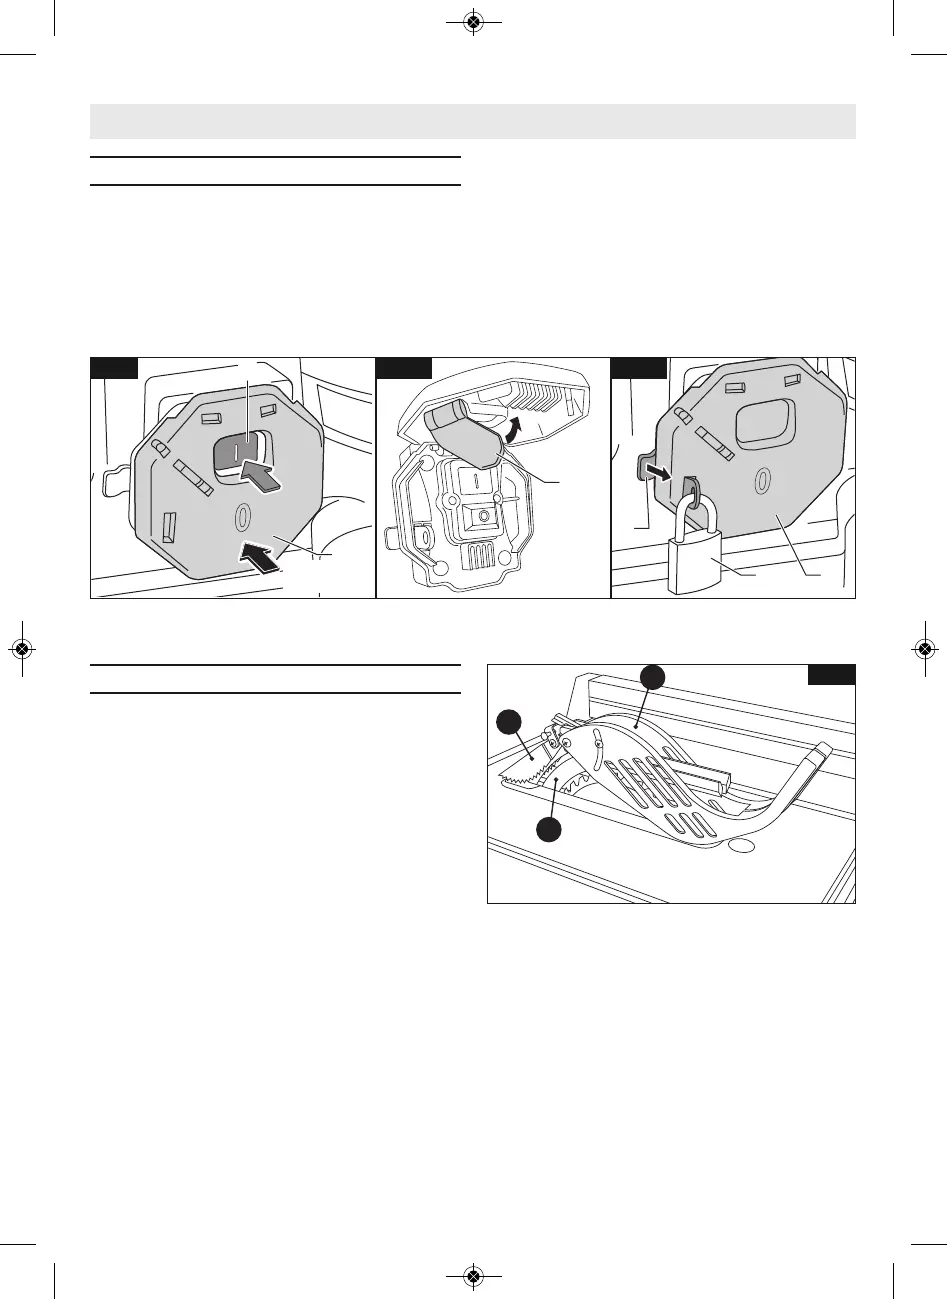
Power Switch
To turn saw on: press the green ON (I) button
1 (Fig. 34).
To turn off power: push the red OFF (0) stop
paddle 2 (Fig. 34).
To prevent unauthorized use, lock the
switch as follows:
- Lift the primary Stop paddle 2 (Fig.
35a).
- Swing the lock out flap 3 and (Fig. 35a).
- Close the Stop paddle 2, pull out the
locking hasp 4 and secure the switch
with a padlock 5 (Fig. 35b).
Padlock (not
provided with the table saw) must have
a 3/16" or 1/4" (4.5 or 6 mm) diameter
shackle.
Using the Smart Guard System
The Bosch Smart Guard has been designed
for modularity, enabling the use of multiple
combinations of the three main components
– 1 Riving knife / splitter, 2 Main barrier
guard, and 3 Anti-kickback device (Fig. 36).
Additionally, the riving knife can be quickly
adjusted to three positions depending on the
application requirement: through cut (high),
non-through cut (middle), and dado (lowest).
The three primary components of the Smart
Guard blade guarding system are designed
for rapid attachment, adjustment, and/or re-
moval without the need for additional tools.
Any Smart Guard components that need to
be removed to complete a cut should be im-
mediately reinstalled when finished. See
pages 17–18 for detailed installation instruc-
tions. Always remember that the best acci-
dent prevention is the operator’s use of com-
mon sense and alertness at all times when
using the table saw.