EasyManuals Logo

Bosch DIVAR 3000 User Manual

Bosch DIVAR 3000
94 pages
To Next Page IconTo Next Page
To Previous Page IconTo Previous Page
Page #21 background imageLoading...
Page #21 background image
Powering up
For units with an external power adapter
1. Switch on all equipment connected to unit.
2. Connect the DC power cord of the power adaptor to the 12 VDC connector on the unit.
3. Connect the AC power cord to the power adaptor.
4. Connect the power adaptor to an AC power outlet.
5. Turn on the unit power ON/OFF switch on the rear of the unit.
For units with 230 VAC input
1. Switch on all equipment connected to unit.
2. Connect the power cable to the unit.
3. Connect the power cable to the AC power outlet.
4. Turn on the unit power ON/OFF switch on the rear of the unit.
Startup wizard
The Startup Wizard opens automatically when you start your system for the first time. The
wizard will guide you through five setup screens (use the buttons <Default>, <Cancel>,
<Previous>, <Next> to enter values and navigate through the screens):
1. Screen 1
Select your language.
Click <Next>.
2. Screen 2
Assign a User name and password.
Optionally, assign a security question and answer (useful if you forget your password).
Click <Next>.
3. Screen 3
Enter the system time and date.
If required, assign the daylight saving time (DST) fields.
Click <Next>.
4. Screen 4
Leave DHCP selected as default to automatically assign the external network details for
the recorder (or) de-select DHCP and assign network details manually.
Optionally scan the QR code to download the mobile app.
Click <Next>.
5. Screen 5
Click <Search> to search for any connected IP cameras (analog cameras connected to
hybrid recorders and IP cameras connected to PoE ports will be automatically assigned).
Select the required cameras in the Search list and add by clicking <Add> (or double click
a camera). Selected cameras appear in the Device list (if required, Edit or Delete any
connected cameras in the Device list).
Click <Finished>.
6. Confirm the setup by clicking <Save>.
Notice!
Use <Cancel> to automatically install all factory defaults and exit the Startup wizard.
5.3
5.4
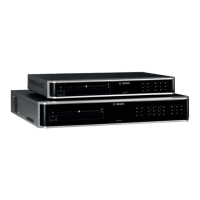
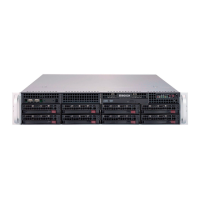
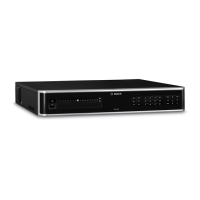
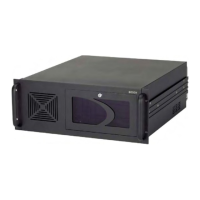
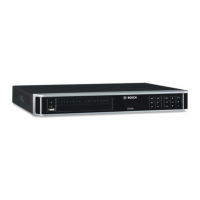
DIVAR 2000 / DIVAR 3000 / DIVAR
5000
Installation | en 21
Bosch Security Systems Operation Manual 2016.09 | v1.0 | AM18-Q0717

Table of Contents

Questions and Answers:

Question and Answer IconNeed help?

Do you have a question about the Bosch DIVAR 3000 and is the answer not in the manual?

Bosch DIVAR 3000 Specifications

General IconGeneral
AC input voltage100 - 240 V
AC input frequency50 - 60 Hz
Power consumption (max)20 W
Storage temperature (T-T)0 - 93 °C
Operating temperature (T-T)0 - 40 °C
Storage relative humidity (H-H)0 - 95 %
Operating relative humidity (H-H)-40 - 70 %
Sustainability certificatesRoHS
CertificationEMC, LVD, UL, cUL, CAN/CSA, BIS, RCM, ACMA EMC, CE, FCC
On/off switchYes
Product colorBlack, Silver
Rack capacity-
Bit rate24000 Kbit/s
Display modesLive view
Playback modesFast play, Forward, Frame by Frame, Reverse, Slow play
Input bandwidth320 Mbit/s
Number of users128 user(s)
Recording modesManual, Schedule, Stop
Output bandwidth256 Mbit/s
Maximum resolution3840 x 2160 pixels
Alarm input channels16
Video input channels16 channels
Alarm output channels3
Supported resolutions3840×2160, 1920×1080, 1280×1024, 1280×720, 1024×768, 970x576, 704x576, 352x576, 352x288, 176x144, 960x480, 704x480, 352x480, 352x240, 176x120
Video recording modes720p, 1080p
Video formats supportedH.264, H.265, M-JPEG
RS-232 ports1
Audio RCA inputs4
Networking standardsIEEE 802.3
USB 2.0 ports quantityUSB 2.0 ports have a data transmission speed of 480 Mbps, and are backwards compatible with USB 1.1 ports. You can connect all kinds of peripheral devices to them.
Ethernet LAN data rates10, 100, 1000 Mbit/s
Ethernet LAN (RJ-45) ports2
Supported network protocolsHTTP, HTTPS, TCP/IP, IPv4/IPv6, UPnP, RTSP, UDP, SMTP, NTP, DHCP, DNS/DDNS, IP Filter, PPPoE, FTP
Copper ethernet cabling technology10BASE-T, 100BASE-T, 1000BASE-T
Wi-FiNo
HDD capacity- GB
HDD interfaceSerial ATA
Maximum storage capacity6 TB
Mobile operating systems supportedAndroid, iOS
Weight and Dimensions IconWeight and Dimensions
Depth323 mm
Width375 mm
Height53 mm
Weight4130 g

Related product manuals