3-8
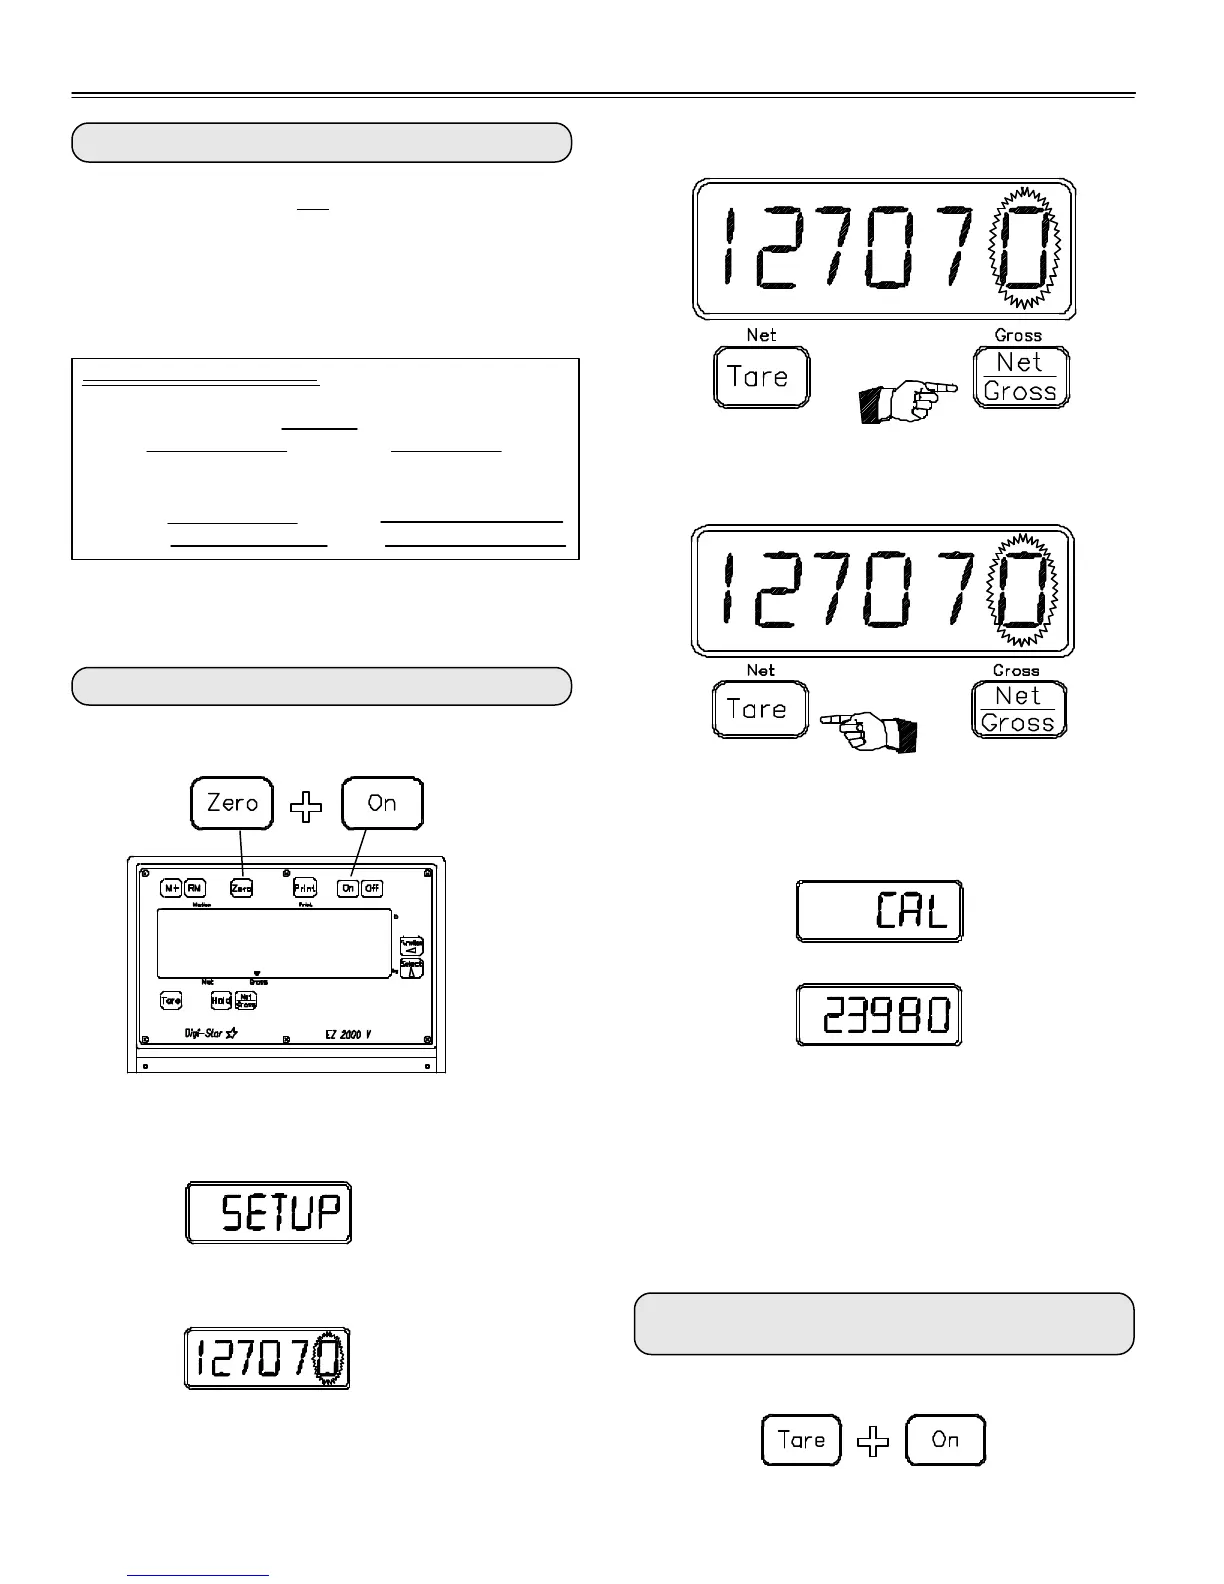
NOTE: Press the [ZERO] key for additional help information during Setup and Calibration.
Step 2 Press the [TARE] key to select which digit is
flashing.
Step 1) Press the [NET/GROSS] key to cause the
"flashing" digit to count upward.
Scale Information Sheet:
Load Cells: Number=
Type = Output =
mV/V
Original New
SETUP# SETUP#
CAL# CAL#
To Change the Setup/Calibration Numbers:
Press and hold the [ZERO] key, then press the [ON] key,
to enter Short Form Setup & Calibration.
1: Connecting EZ Indicator to Other Load Cells:
You will need the number and type of loadcells used in the
new scale system. You will also need the
current "SETUP" and "CAL" as described above. Once
you have written down this information, contact your
nearest Scale Service Center for new "SETUP" and
"CAL" numbers.
The first message displayed is "SETUP"
Next, the actual "SETUP" number is displayed.
If the correct "SETUP" number is displayed, press [ON]
to advance to the "CAL" number.
When the correct "SETUP" number is displayed, press
the [ON] key to advance to the "CAL" number.
This displays the "CAL" message,
followed by the "CAL" number.
The "CAL" number is not a weight. It is a reference value
the indicator uses to determine the weight. This number
directly affects the accuracy of the scale system.
Change the "CAL" number using the same method
described in Steps 1 & 2. When the display shows the
correct number, press the [ON] key. This causes the
number to be stored permanently in the indicator and
returns the indicator to the weighing mode.
To Exit the Short Form Setup & Calibration at
Anytime:
Press and hold the [TARE] key, then press the [ON] key.
Follow the instructions "To Change the Setup / Calibra-
tion Numbers" shown below.
250955
• 04-01-02
3150