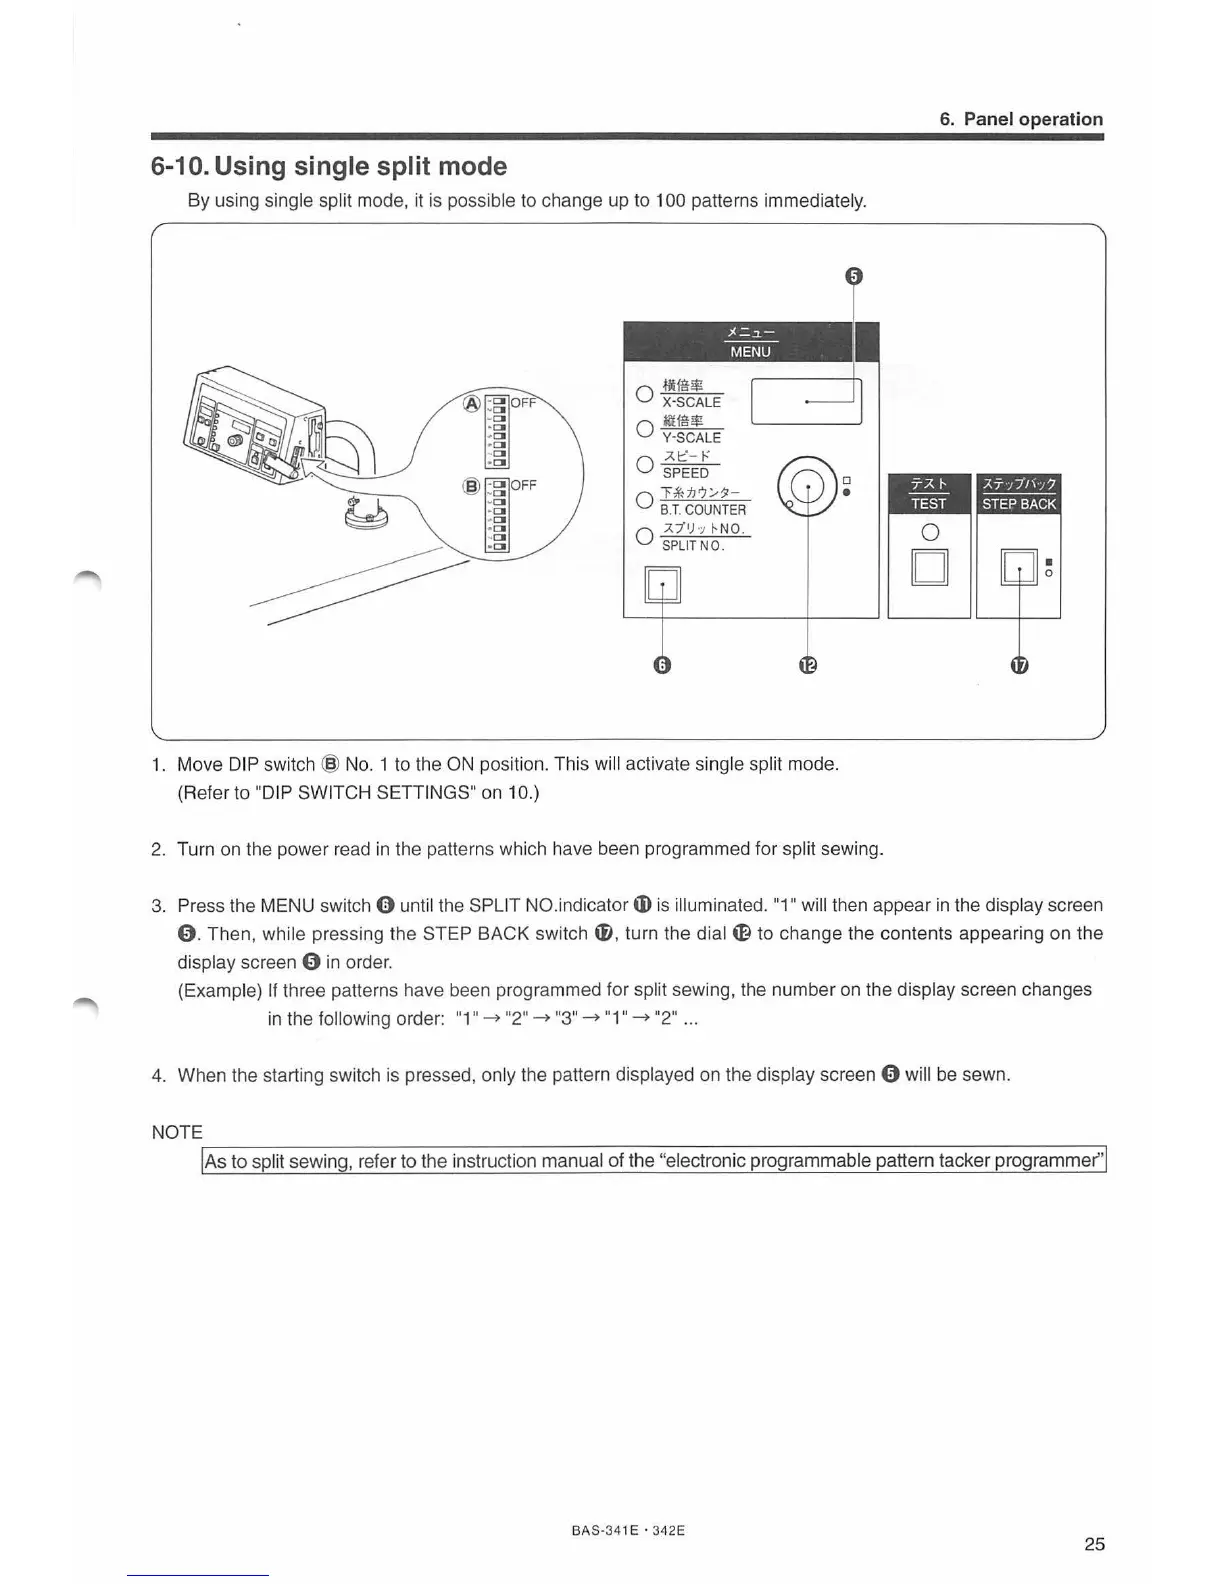
6-10. Using single split mode
By using single split mode, it is possible to change up to 100 patterns immediatel
y.
0
·llUUl
X·SCALE
0
li:tff!$
Y·SCALE
;l.t"-
1-"
0 SPEED
;/.=~
MENU
0
r #dl'J/:$1-
s.T.
COUNTER
0 ;1."/'h
~N
O.
S
PLIT
NO.
1. Move
DI
P swi
tch
@
No.
1 to the
ON
position. This will activate si
ng
le split mode.
(Refer to
"D
IP SWI
TCH
S
ET
TINGS"
on
10.)
I
2.
Tu
rn
on
the
power read
in
the patterns which have been programmed for split sewing.
6. Panel operation
3. Press the MENU switch 0 until the
SP
LI
T NO.indicator m
is
i
ll
uminated.
"1
II
will then appear
in
the display screen
0.
Then, while pressing the STEP BACK switch
f),
turn the
dial~
to change the contents appeari
ng
on the
display screen
0 in order.
(Example)
If three patterns have been programmed for
sp
lit sewing, the number
on
the display screen changes
in
the following order:
"1"-
"2" - "3" - "1" - "
2"
...
4.
When the starting switch
is
pressed, only the pattern displayed
on
the display screen 0 will
be
sewn.
NOTE
'I
A_s_t_o_s_p-l
it_s_e_w-
in
_g_,-r-ef_e_r -to_t_h_e-
in
_s_t-
ru
-c-tio_n_
m_a_n_u_a_l
o-f-
t-he-"e-
l
e_c
_t-
ro-n-
i
c-pr_o_g-ra_m_
m
_a_b_
l
e_p_a_tt_e_rn-ta_c_k-er_p_r_o_g_ra_
m_m
_e---,r"l
BAS·3
41
E • 342E
25