9.
Standard adjutsments
9-13. Checking the
input
voltage
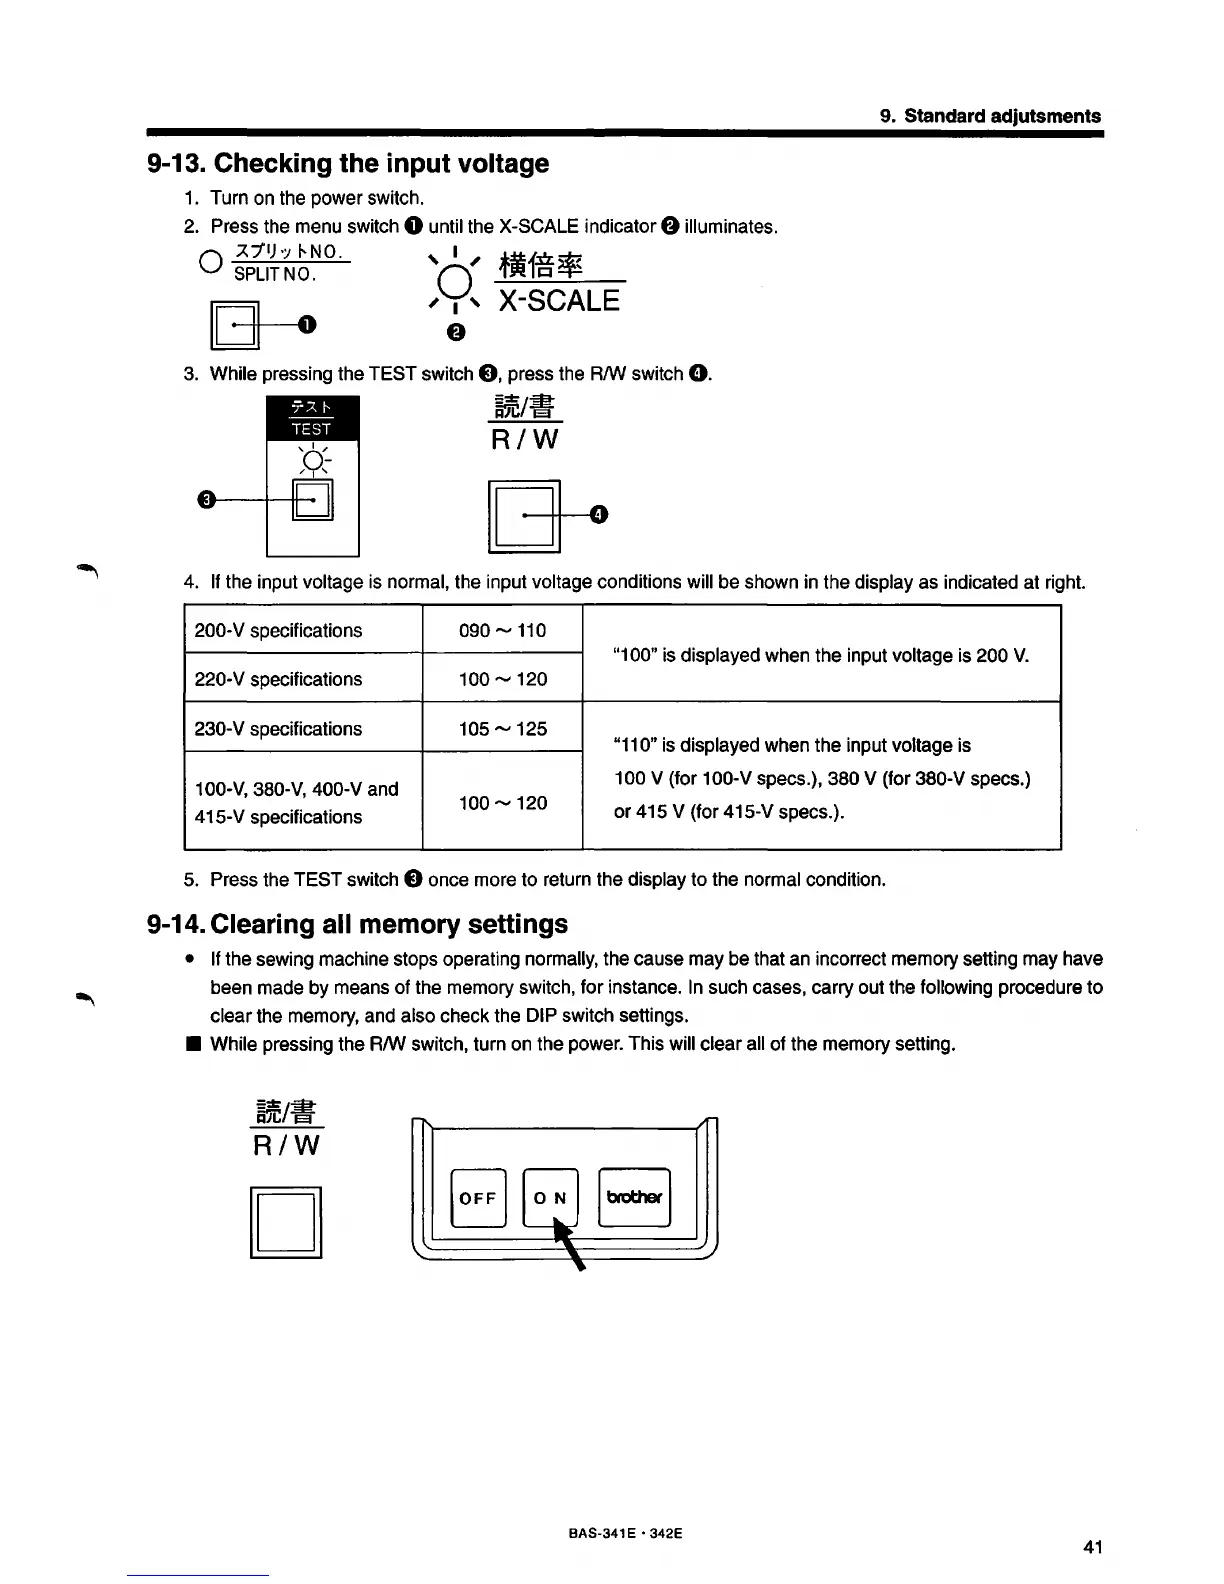
1. Turn on the power switch.
2. Press the menu switch
0 until the X-SCALE indicator 8 illuminates.
Q
7..1'1)·:;
1--NO.
' I '
i~ln*
SPLIT
NO.
0 'rJtt
1-=:~
~
[[3--o
,
~'
X-SCALE
3. While pressing the TEST switch
8,
press the R/W switch
0.
~jC/if
R/W
4. If the input voltage is normal, the input voltage conditions will be shown in the display as indicated at right.
200-V specifications
090.....,
110
"1
00" is displayed when the input voltage is 200
V.
220-V specifications
100.....,
120
230-
V specifications
105.....,
125
"11
0" is displayed when the input voltage is
100-V, 380-V, 400-V and
100 V (for 100-V specs.), 380 V (for 380-V specs.)
415-V specifications
100.....,
120
or
415 V (for 415-V specs.).
5. Press the
TEST
switch 8 once more to return the display to the normal condition.
9-14. Clearing all memory settings
• If the sewing machine stops operating normally, the cause may be that an incorrect memory setting may have
been made
by
means of the memory switch, for instance.
In
such cases, carry out the following procedure to
clear the memory, and also check the DIP switch settings.
• While pressing the R/W switch, turn on the power. This will clear all of the memory setting.
~~
R/W
D
1\
'
/r-
EJ
0~
------
EJ
..
..
_/
~
BAS-341 E • 342E
41