20II-
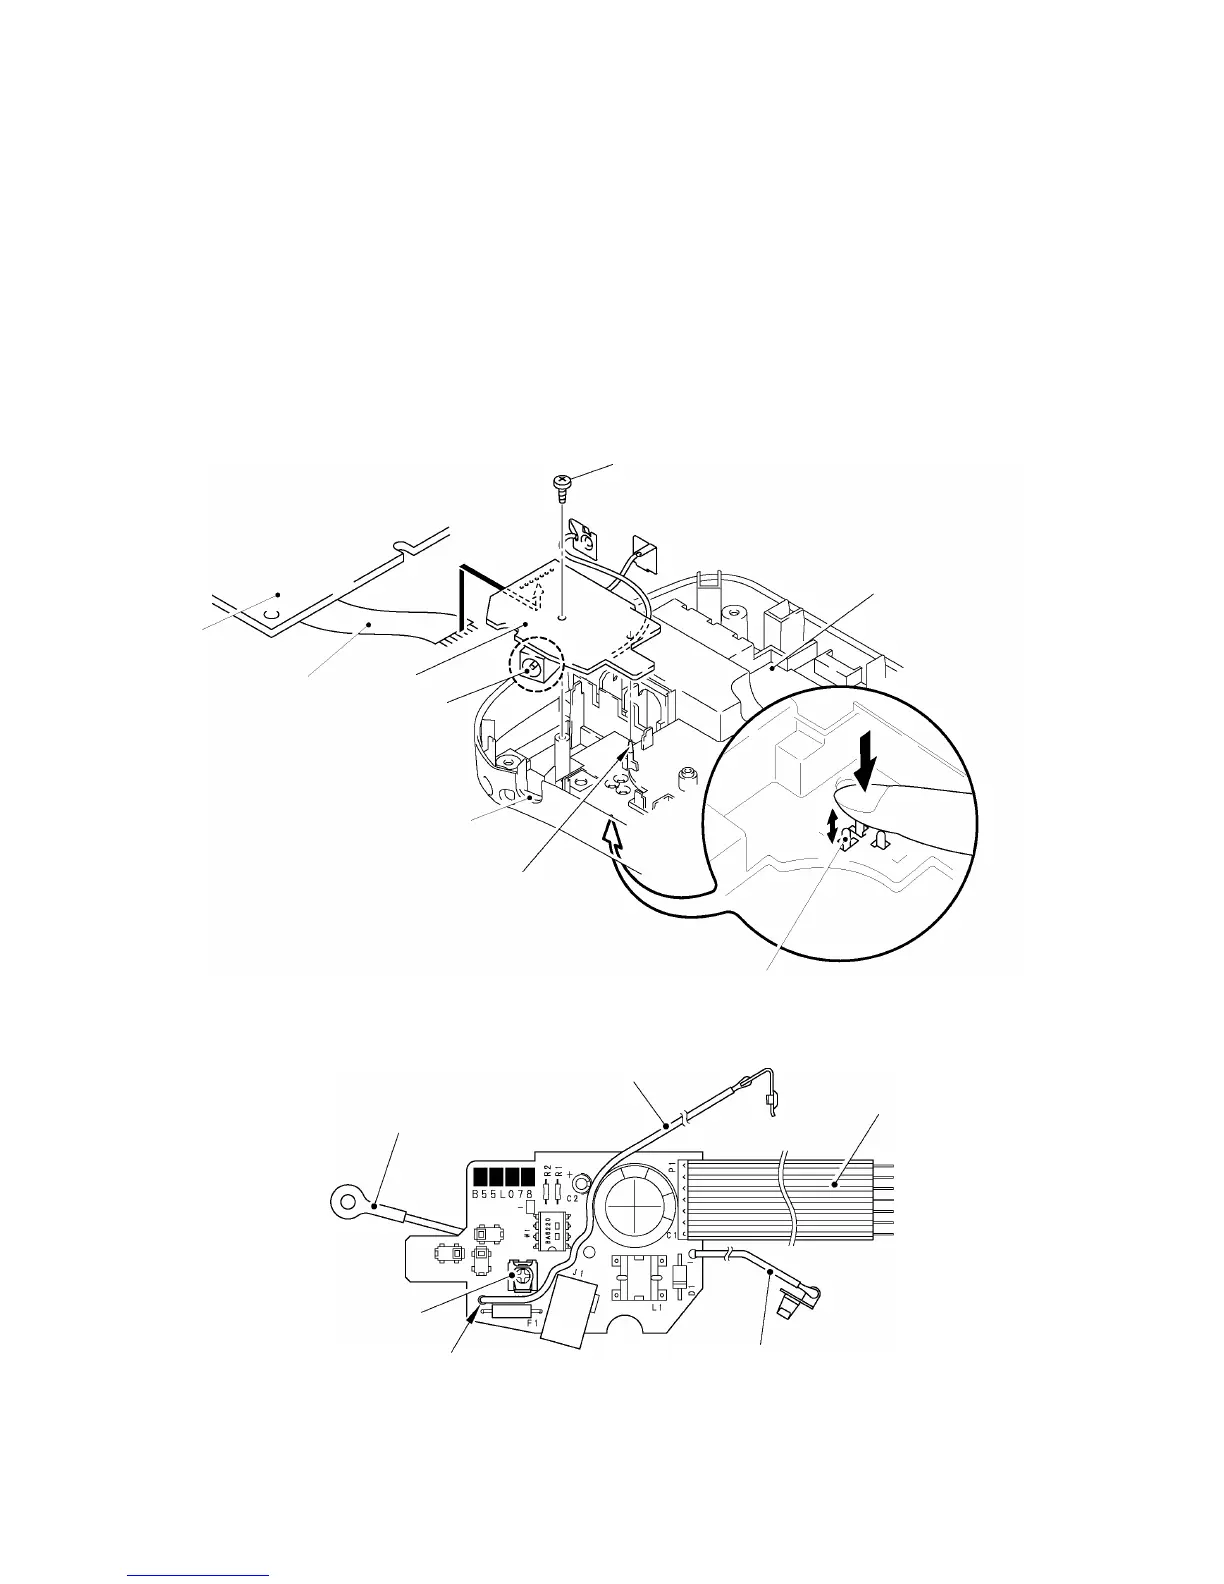
[ 3 ] Installing the sub PCB
(1) Relay harness is solder connected to the sub PCB.
(2) After pushing the “A” section of battery terminal (+) of sub PCB ASSY, perform the wiring.
(Refer to Fig. 2.2-20)
(3) Set the sub PCB into the locating pin and AC jack groove, and tighten the screw, confirming
that each of the sensor switch actuators is fitted into the hole of the bottom cover certainly
and moves up and down freely.
Tightening torque: 0.29 N
.
m (3 kg
.
cm)
Note1: Make sure that the battery terminal does not run on the VR1.
Note2: The AC jack is not provided for PT-1180. Therefore the form of the bottom cover is slightly
different from the figure below, and the AC jack groove is also not provided.
Fig. 2.2-19 Installing the Sub PCB
Fig. 2.2-20 Details of Battry Terminal (+)
Screw
Sensor switch (Actuator)
Battry terminal (+)
Relay harness
“A”
VR1
Battery terminal (-)
FG harness
Main PCB
Pin
Bottom cover
Relay harness
AC jack groove
AC jack
Sub PCB

 Loading...