22II-
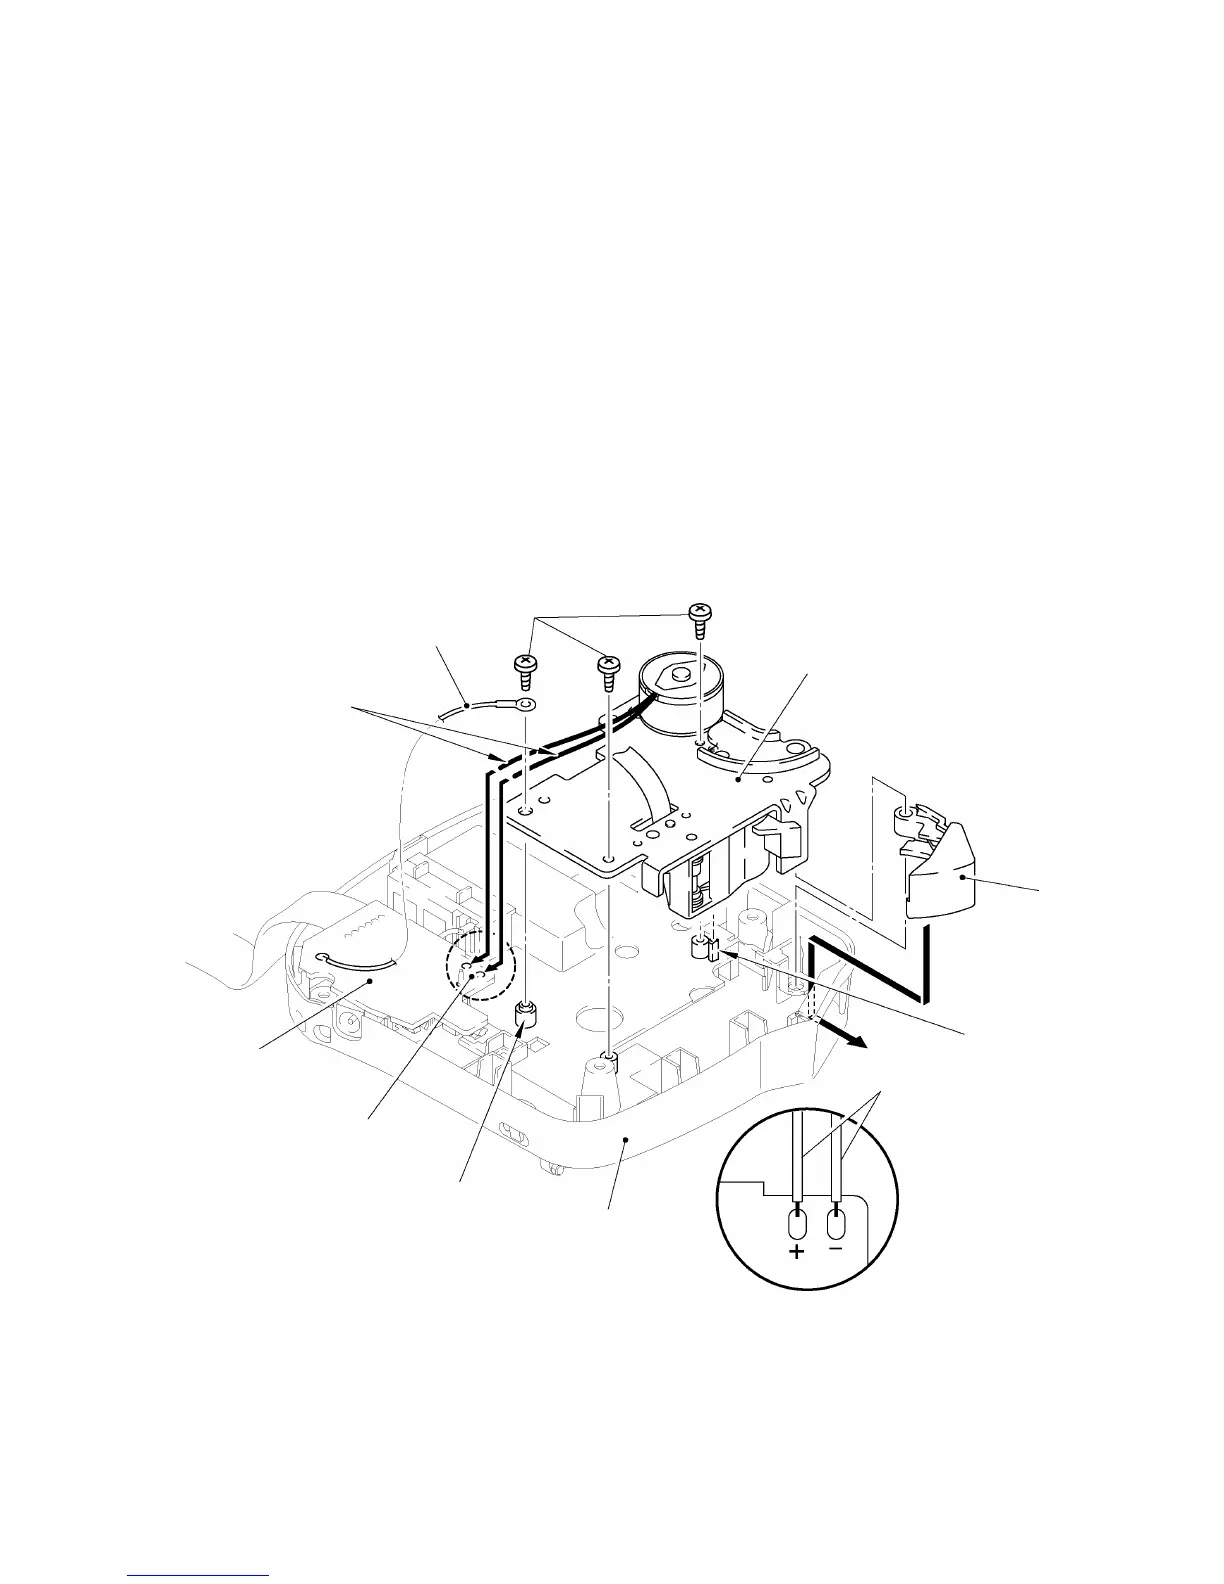
[ 6 ] Installing the frame ASSY
(1) Install the cutter lever into the bottom cover.
(2) If the frame ASSY has been disassembled, assemble the components by referring to the
next page.
(3) The frame ASSY is set by matching the locating pin and the locating boss of the bottom
cover.
(4) The main frame is installed on the bottom cover with 3 screws. The FG harness of sub PCB
Assy is secured to the frame Assy, at this point, with screws of “A”.
Note: Install the frame ASSY so that the FG harness terminal (metallic section) does not contact
with sub PCB.
(5) Solder the motor harness to the sub PCB.
Note: Be careful to the direction of the motor harness (+), (-) and not to stick out from the
designated place when soldering.
Tightening torque: 0.39 N
.
m (4 kg
.
cm)
Fig. 2.2-23 Installing the Cutter Lever and the Frame ASSY
Screws
Black
Red
Bottom cover
“A”
Locating pin
Cutter lever
Locating boss
Frame ASSY
Soldering
Motor harnesses
Motor harnesses
FG harness
Soldering
Sub PCB

 Loading...