122
ELECTRICAL AND IGNITION
CONNECTOR SERVICING
CONNECTOR
SERVICING
DEUTSCH Connectors
IMPORTANT: Electrical Grease is reco m-
mended. Incorrect grease applica tion can cause
electrical or warning system problems.
To disconnect th e connector, press the latch and
pull the connectors apart.
To connect the connector, confirm that the seal is
in place . Cle an o ff any old gre ase and dirt fro m
connectors. Apply a light coat of Electrical Grease
to sea l o nly. Push connectors to gether until
latched.
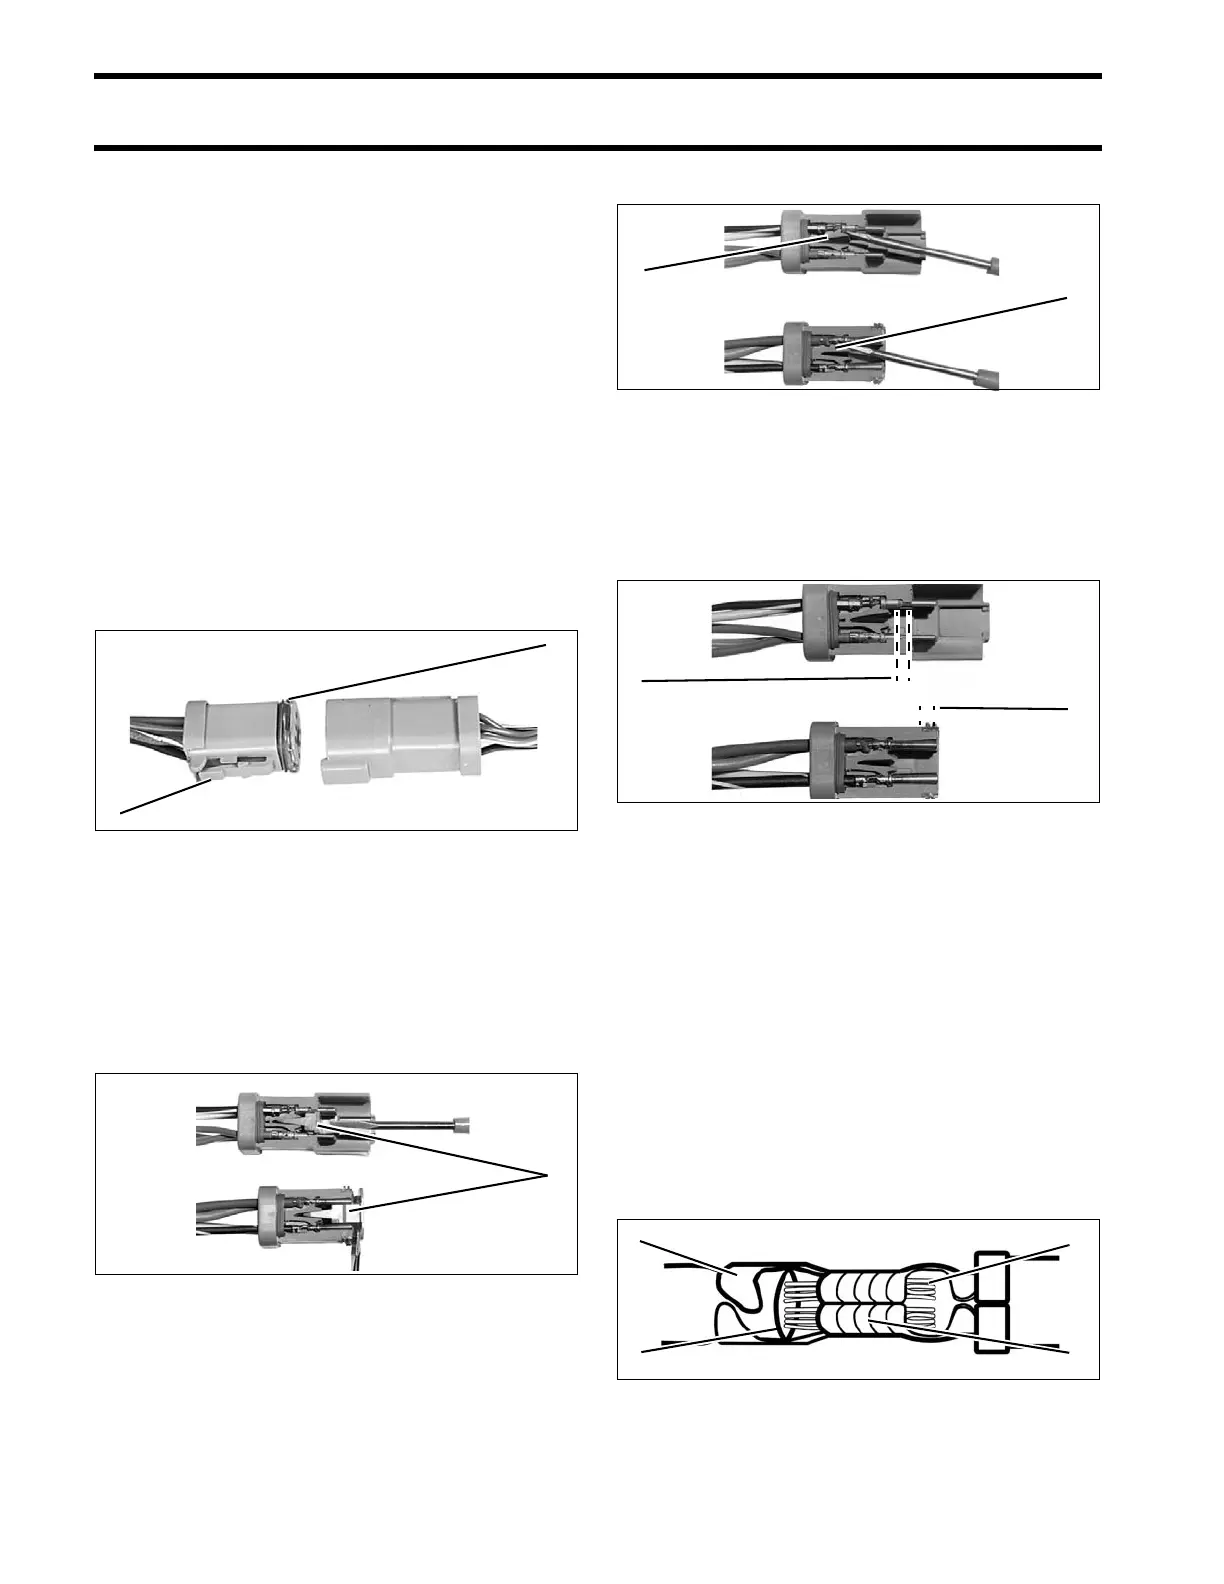
Terminal Removal
Use hook-end of Co nnector Se rvice T ool,
P/N 342667, to pull out wedge from receptacle, or
use other end of tool to pry ou t wedge fro m plug.
Use need le-nose p liers to remo ve wed ge fro m
3-pin receptacle.
Release terminal latch and gently pull on wire.
Terminal Installation
Push terminal through seal until it locks into place.
Fill conn ector with Electrical Grease to 1/32 in.
(0.8 mm) below ledge or end of plug.
Push we dge in until latched. W edge in 2-pin
receptacle is not symmetrical; position latch shoul-
ders next to terminals.
Crimping Terminals
Strip insulation back 3/16 in. (5 mm). Place termi-
nal in 18-g auge notch of Crimping Pliers,
P/N 322696. Position end of wire strands in termi-
nal past wire crimp area, and position end of insu-
lation past insulation crimp area. Ca pture all wire
strands in crimp; leave no loose stran ds. Crimp
wire s ecurely. Do not s older. Cri mp insulation in
14/16-gauge notch of crimping pliers.
1. Latch
2. Seal
42079A
1. Wedge 42327
1. Terminal latch (receptacle)
2. Terminal latch (plug)
423293
1. Ledge of plug
2. End of plug
42330
1. End of wire strands
2. Insulation crimp area
3. End of insulation
4. Wire crimp area
DRC6205