128
ZTKS0156 / Z31820 / Rev.: 03
Disassembling
Bottom of the Cryostat
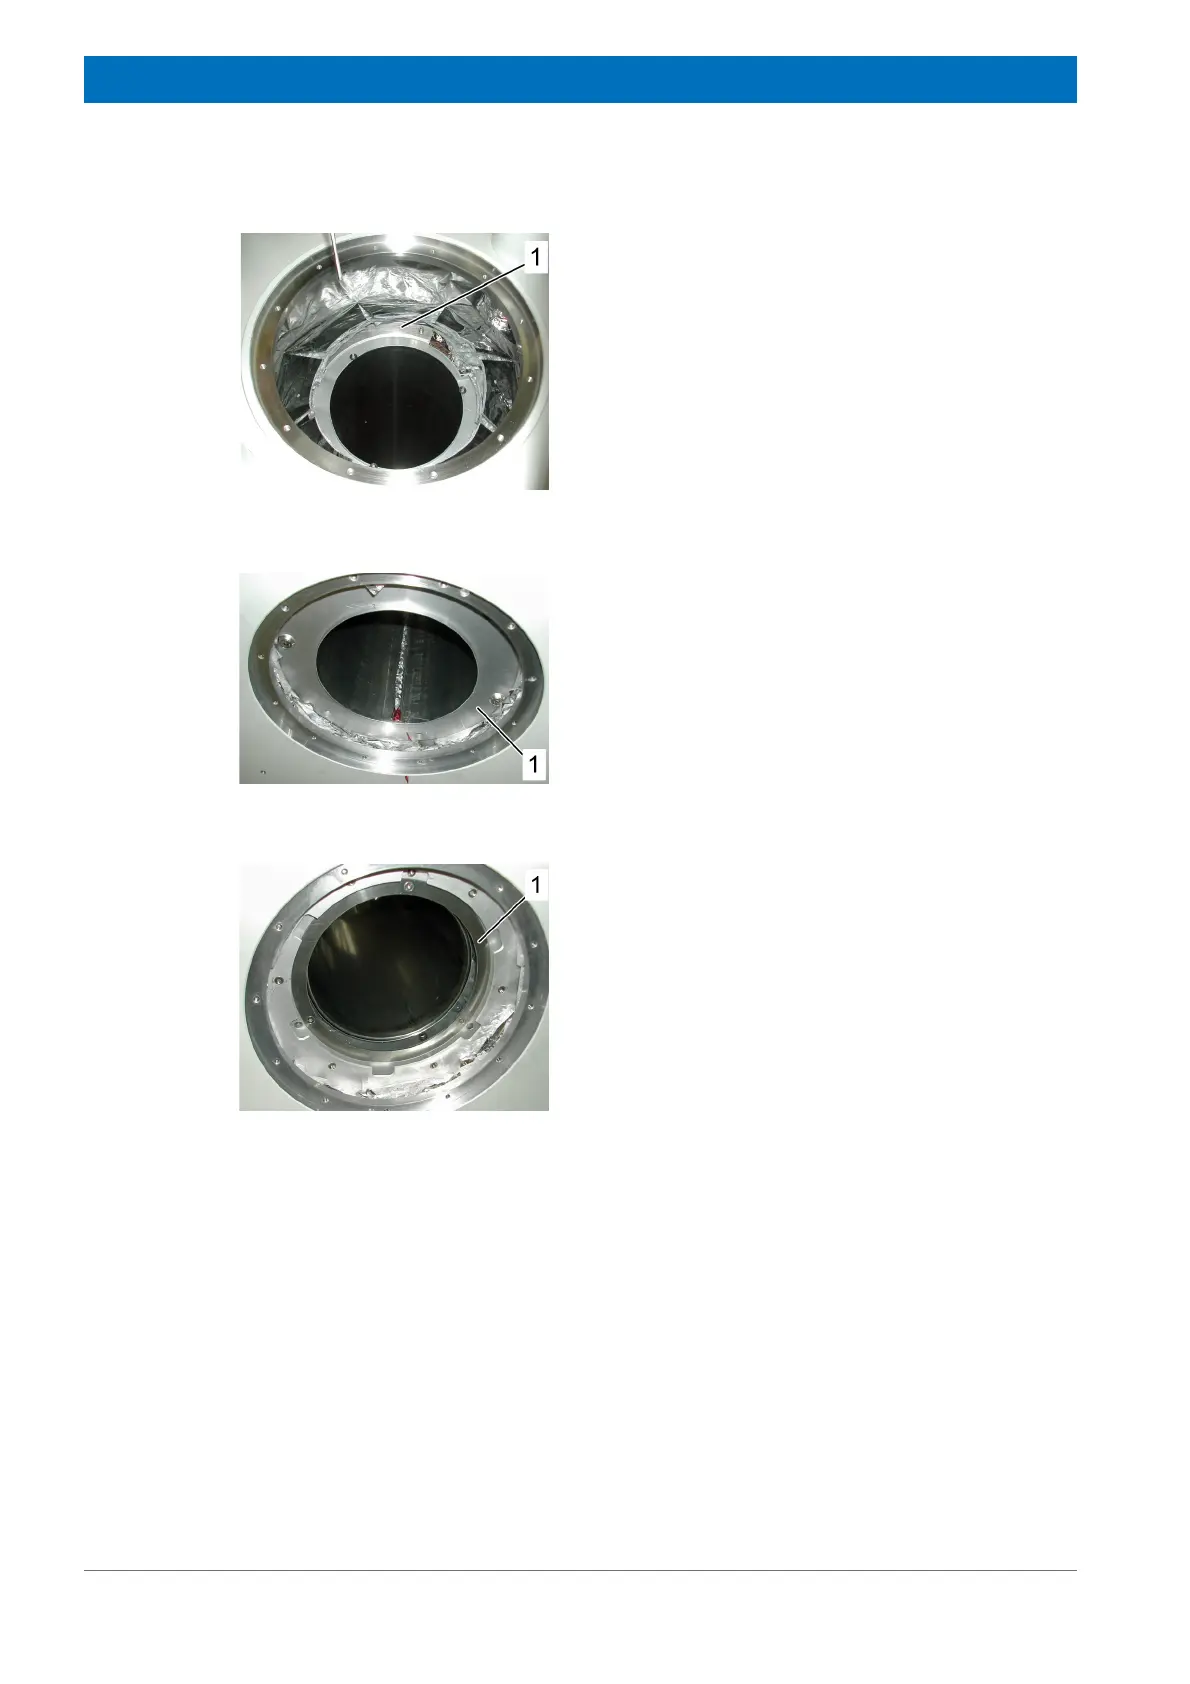
Figure 8.4: Disassembling the Nitrogen Tube - step 1
5. Remove the upper nitrogen contact flange
(1).
6. Remove the nitrogen tube from the top. Pre-
vent any contamination (finger prints, dirt
e.g.) to the nitrogen tube surface using
clean gloves. Prevent any damage (scrat-
ches, buckling) to the nitrogen tube by
carefully handling it. Restore it in its original
box.
7. Remove the RS reduction flange.
Figure 8.5: Disassembling the Nitrogen Tube - step 2
8. Remove the bottom RT closure flange and
the bottom RT reduction flange. Leave it
assembled.
9. Remove bottom nitrogen contact flange (1).
Figure 8.6: Disassembling the Nitrogen Tube - step 3
10. Remove the bottom reduction flange (1).
11. Remove the three getter containers.



 To Next Page