61
ZTKS0156 / Z31820 / Rev.: 03
Assembling
4.3.3.3 Mounting the Rotary Valve and Flex Lines
i
The Aeroquip® couplings of the connection line, rotary valve and cold head and the flex
lines are protected against damage and dust with plugs. Keep them for future
transportation in the rotary valve box.
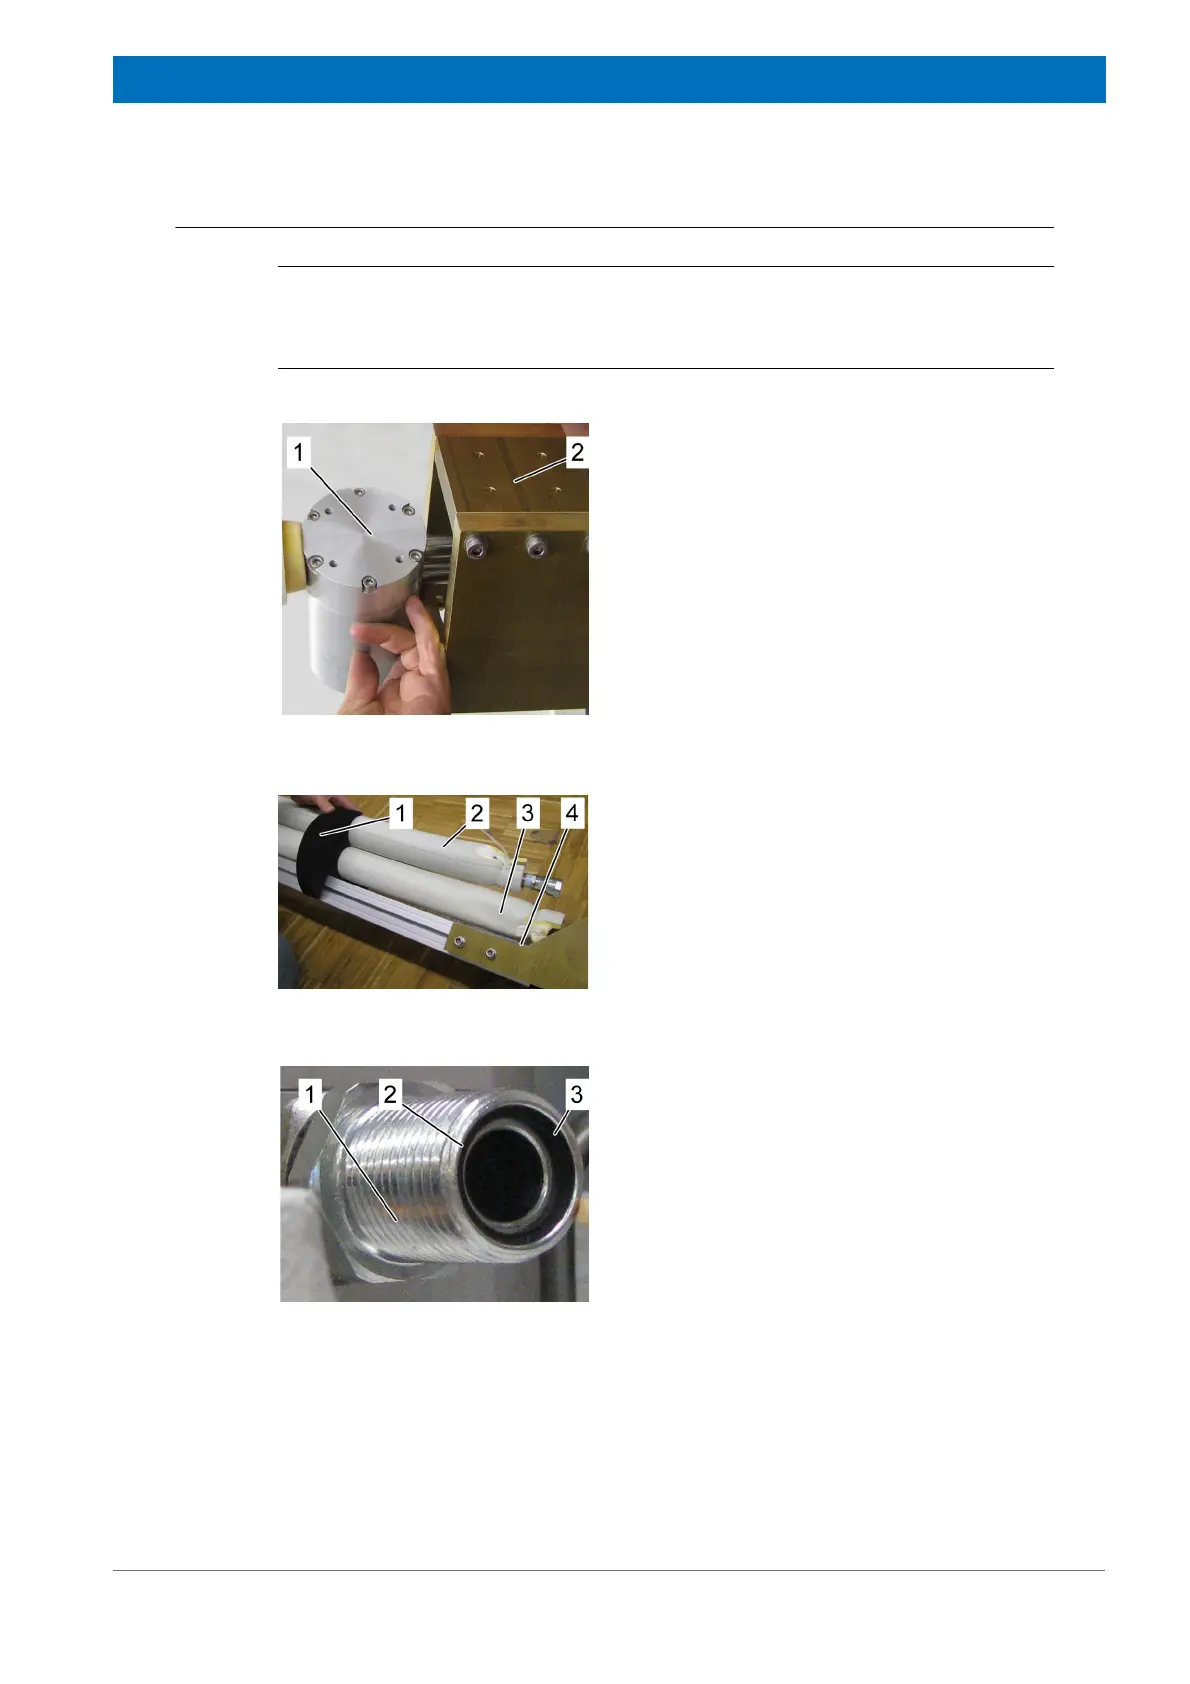
Figure 4.52: Mounting the Rotary Valve and Flex Lines - step 1
1. Put down the Rotary Valve Column on the
clean floor.
2. Mount the rotary valve (1) with four M 6 x 35
screws to the front plate (2) (torque 20 Nm).
Figure 4.53: Mounting the Rotary Valve and Flex Lines - step 2
3. Remove the flex lines from their box.
4. Thread the high (2) and low (3) pressure flex
lines through the base plate and the flex line
positioning disc (1) as shown.
5. Thread the motor cord (4) through the base
plate and the flex line positioning disc (1) as
shown.
Figure 4.54: Mounting the Rotary Valve and Flex Lines - step 3
6. Clean the male parts of the hose couplings
(1) from the high and low pressure sockets
of the rotary valve with ethanol.
7. Clean the sealing surface (2) with ethanol.
8. Check and clean the O-ring (3) with ethanol.
9. Check the correct position of the O-ring (3)
before closing the coupling.