84
ZTKS0156 / Z31820 / Rev.: 03
Operation
5.2.5 Removing the Current Lead
1. Check the helium level is above "minimum level during energizing" (see Appendix
Technical Data of the supplied User Manual). Refill the helium vessel if necessary.
2. Insert the auxiliary shorting plug into the helium fill-in turret.
3. Check the current at all Bruker Power Supply cables is 0 A.
4. Switch the Bruker Power Supply OFF.
5. Remove all cables from the current lead.
6. Remove the current lead as quickly as possible.
7. Insert the dry warm shorting plug with the shorting plug tool into the current lead tur-
ret respecting the correct position. The shorting plug can only be inserted in one
position.
8. Close the current lead turret with the turret cap. Be careful with the baffles.
9. Remove the auxiliary shorting plug out of the helium fill-in turret.
10. Close the helium fill-in turret immediately with the plug of the turret cap.
5.2.6 Complete Energizing
1. Refill helium to a value of 95 % at the helium level sensor.
2. Check the helium flow system correctly mounted as shown.
3. Tighten the three M 6 screws (torque less than 1 Nm) again to push down the cold
head in operating position. The assembly is correct, if there is a gap of about 2 mm
between cold head flange and turret flange.
4. Tighten the three M 5 adjustment screws (torque less than 1 Nm) and fix them at the
cold head flange with the nuts.
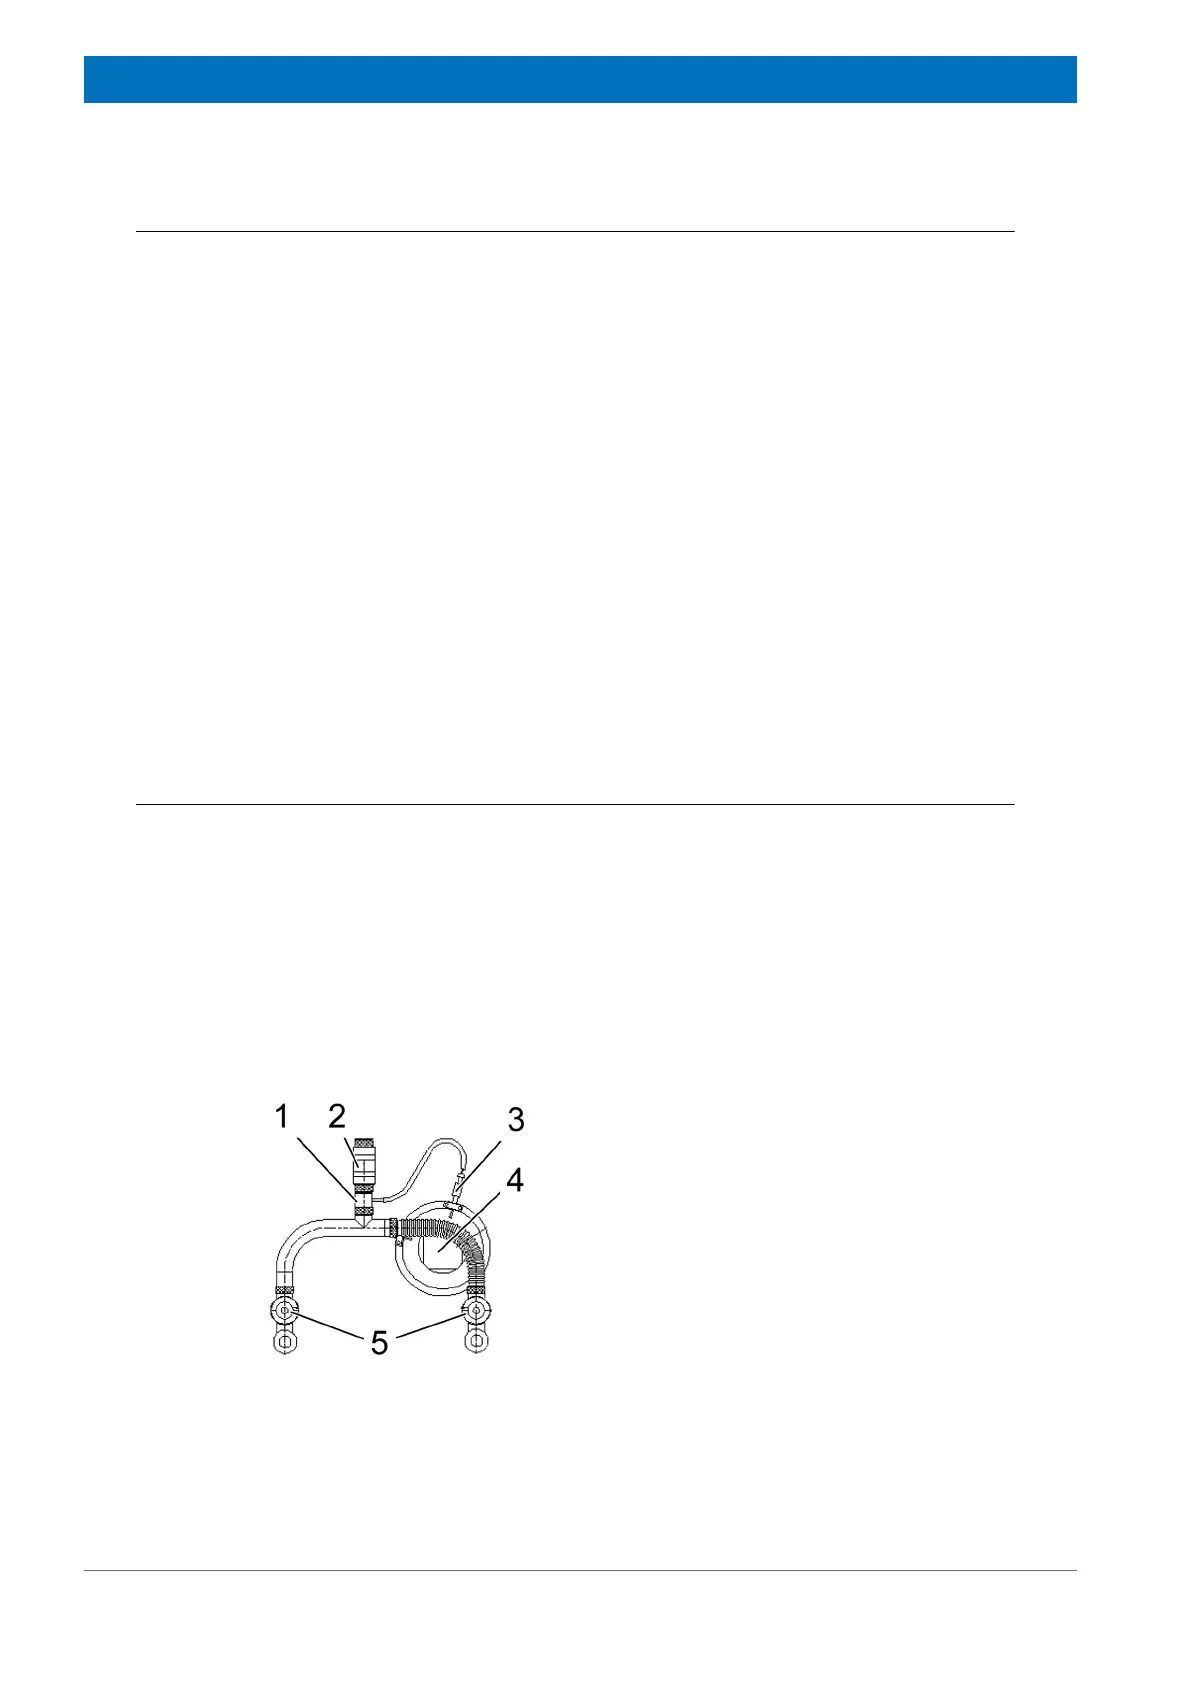
Figure 5.2: Helium Flow System during usual operation
1 Connector
2 One way valve
3 Stop valve
4 Cold head
5 Quench valves