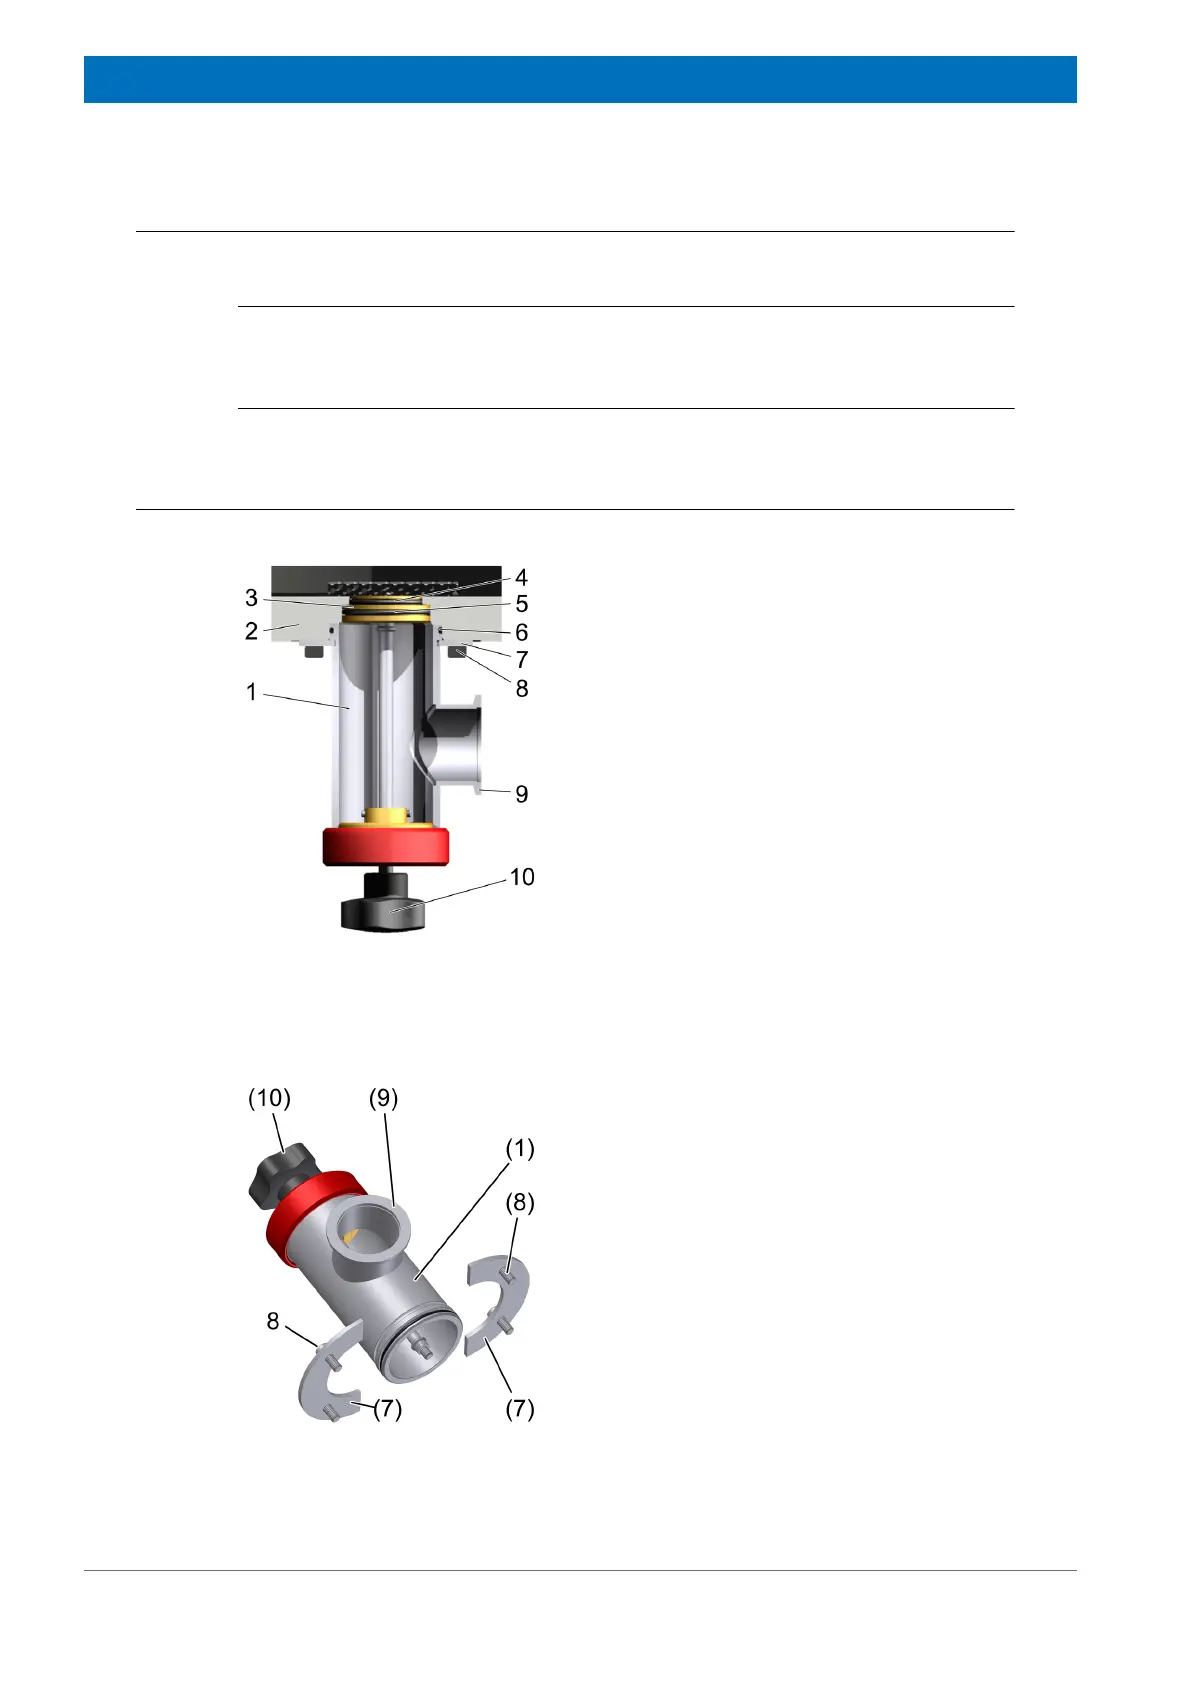
1. Remove the protection cap of the vacuum
flange at the bottom plate (2) of the cryostat.
2. Install the valve stem (10) onto the sealing
plug (3) and tighten it slightly. Do not fix the
valve body (1) to the cryostat yet.
3. Pull out the sealing plug (3) off the bottom
plate at the valve stem (10).
4. Clean the sealing plug.
5. Check the sealing plug and the O-rings for
damage.
Replace damaged O-rings.
• (4) O-ring 36.14 x 2.5 (Material No.
40692)
• (5) O-ring 44 x 2.5 (Material No. 40693)
• (6) O-ring 57 x 2.5 (Material No. 40695)
6. Grease the O-rings with vacuum grease.
7. Pull out the valve stem (10) of the valve
body (1) until it snaps into place. The snap-
ping is well defined and will be heard and
felt.
8. Check if the sealing plug (3) inside the valve
body is fully inserted.
9. Insert the Vacuum Valve into its seat inside
the bottom plate (2).
10. Turn the Vacuum Valve in the desired posi-
tion (KF 40 flange (9) looking outwards).
11. Insert the two half rings (7) as shown into
the slots of the valve body (1).
12. Fix the half rings (7) with four M 6 x 12 (8)
screws.