53
ZTKS0156 / Z31820 / Rev.: 03
Assembling
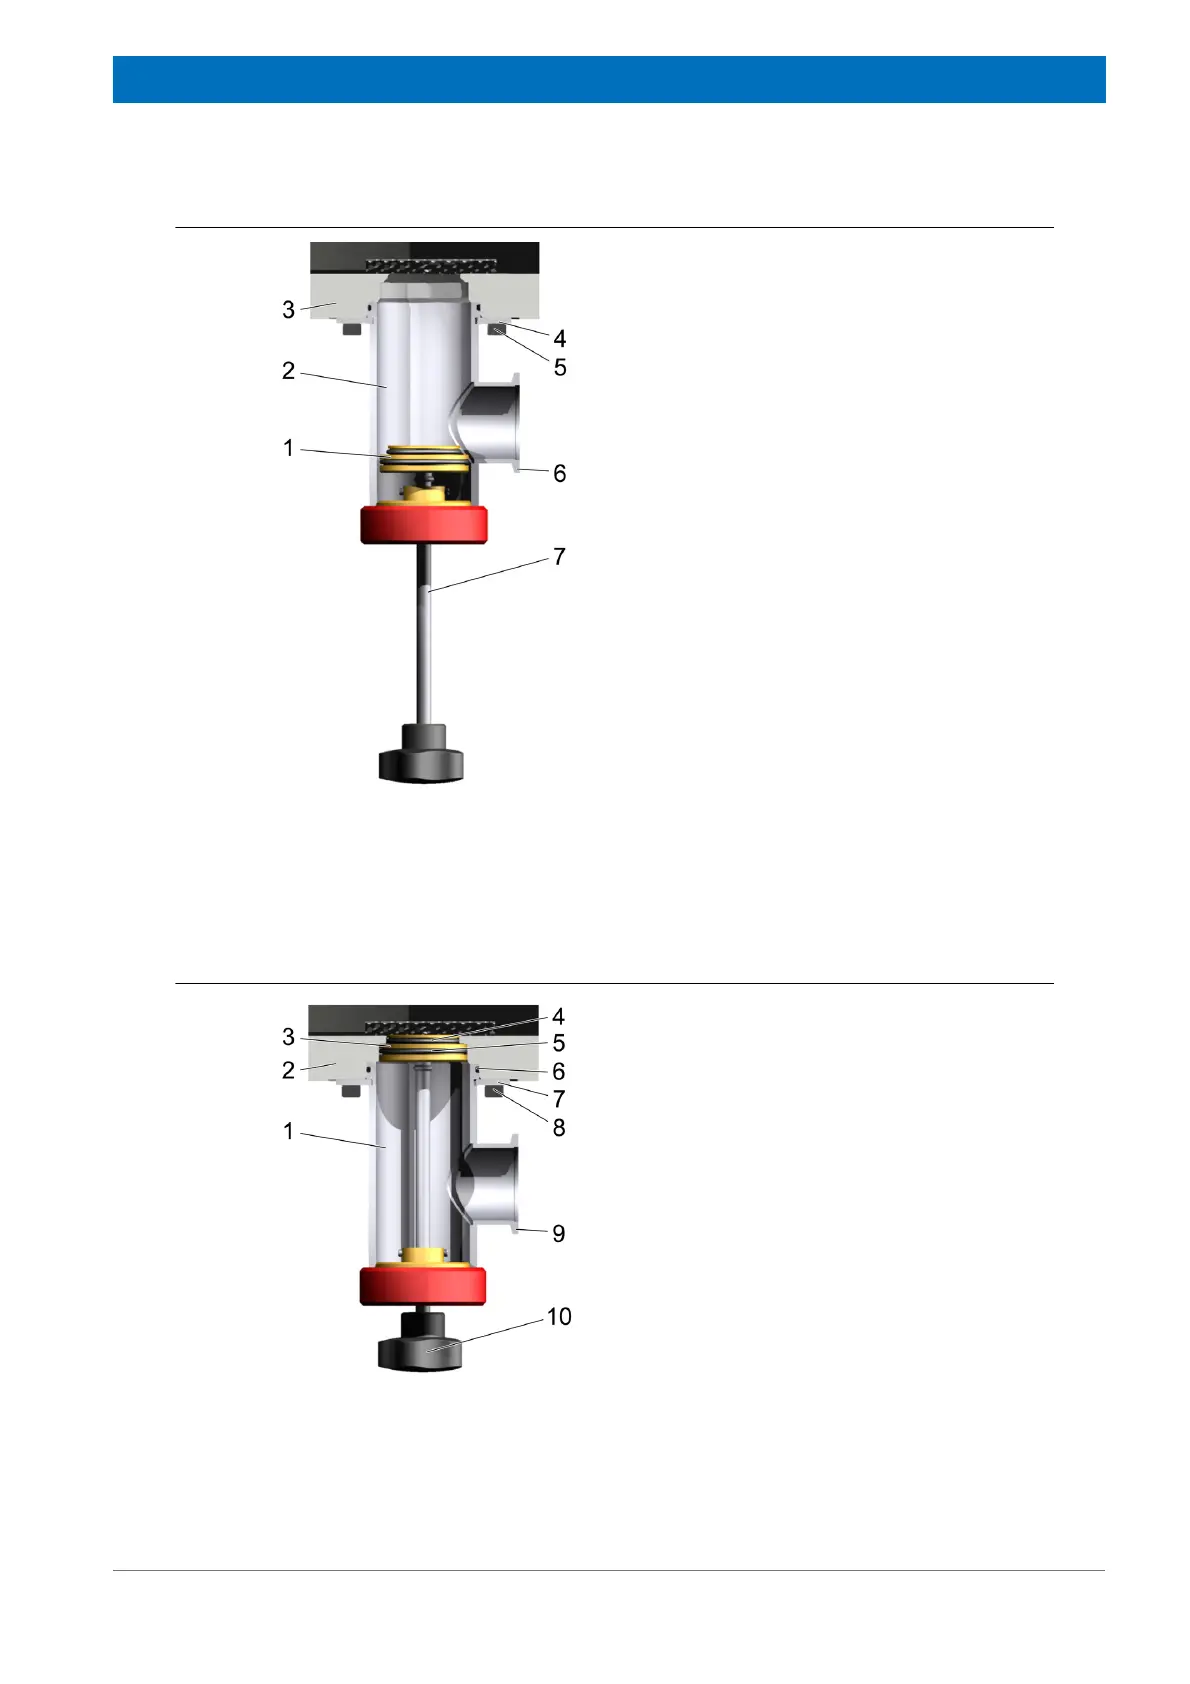
4.3.2.4 Rebuilding the Vacuum
4.3.2.5 Removing the Vacuum Valve
Figure 4.30: Rebuilding the Vacuum
Figure 4.31: Removing the Vacuum Valve
1. Connect the vacuum pumping unit to the
KF 40 flange (6) of the Vacuum Valve (2).
Use a short pump line with large diameter.
2. Generate a vacuum of 10
-4
bar with the
roughing pump.
3. Generate a vacuum of less than
5 x 10
-8
bar with a turbo pump.
4. Pull out the valve stem (7) of the valve body
(2) to release the sealing plug (1) out of the
bottom plate (3).
The sealing plug (1) snaps into place. The
snapping is well defined and will be heard
and felt. The cryostat is open after this pro-
cedure.
5. Continue generating a vacuum of less than
5 x 10
-8
bar (up to 48 hours).
6. Push the valve stem (7) slightly and fully into
the valve body (2) to insert the sealing plug
(1) into the bottom plate (3).
The sealing plug (1) snaps in. The snapping
is well defined and will be heard and felt.
7. Stop pumping.
1. Ventilate the pump line at the pumping unit.
2. Remove the pump line at the KF 40 flange
(9).
3. Release the valve stem (10) from the
sealing plug (3) and pull out the valve stem
(10) until it snaps in.
The snapping is well defined and will be
heard and felt.
4. Remove the four M 6 x 12 screws (8) from
the half rings (7).
5. Remove the half rings (7) and the vacuum
valve (1).
6. Mount the protective caps on the vacuum
flange at the bottom plate (2) of the cryostat.