36
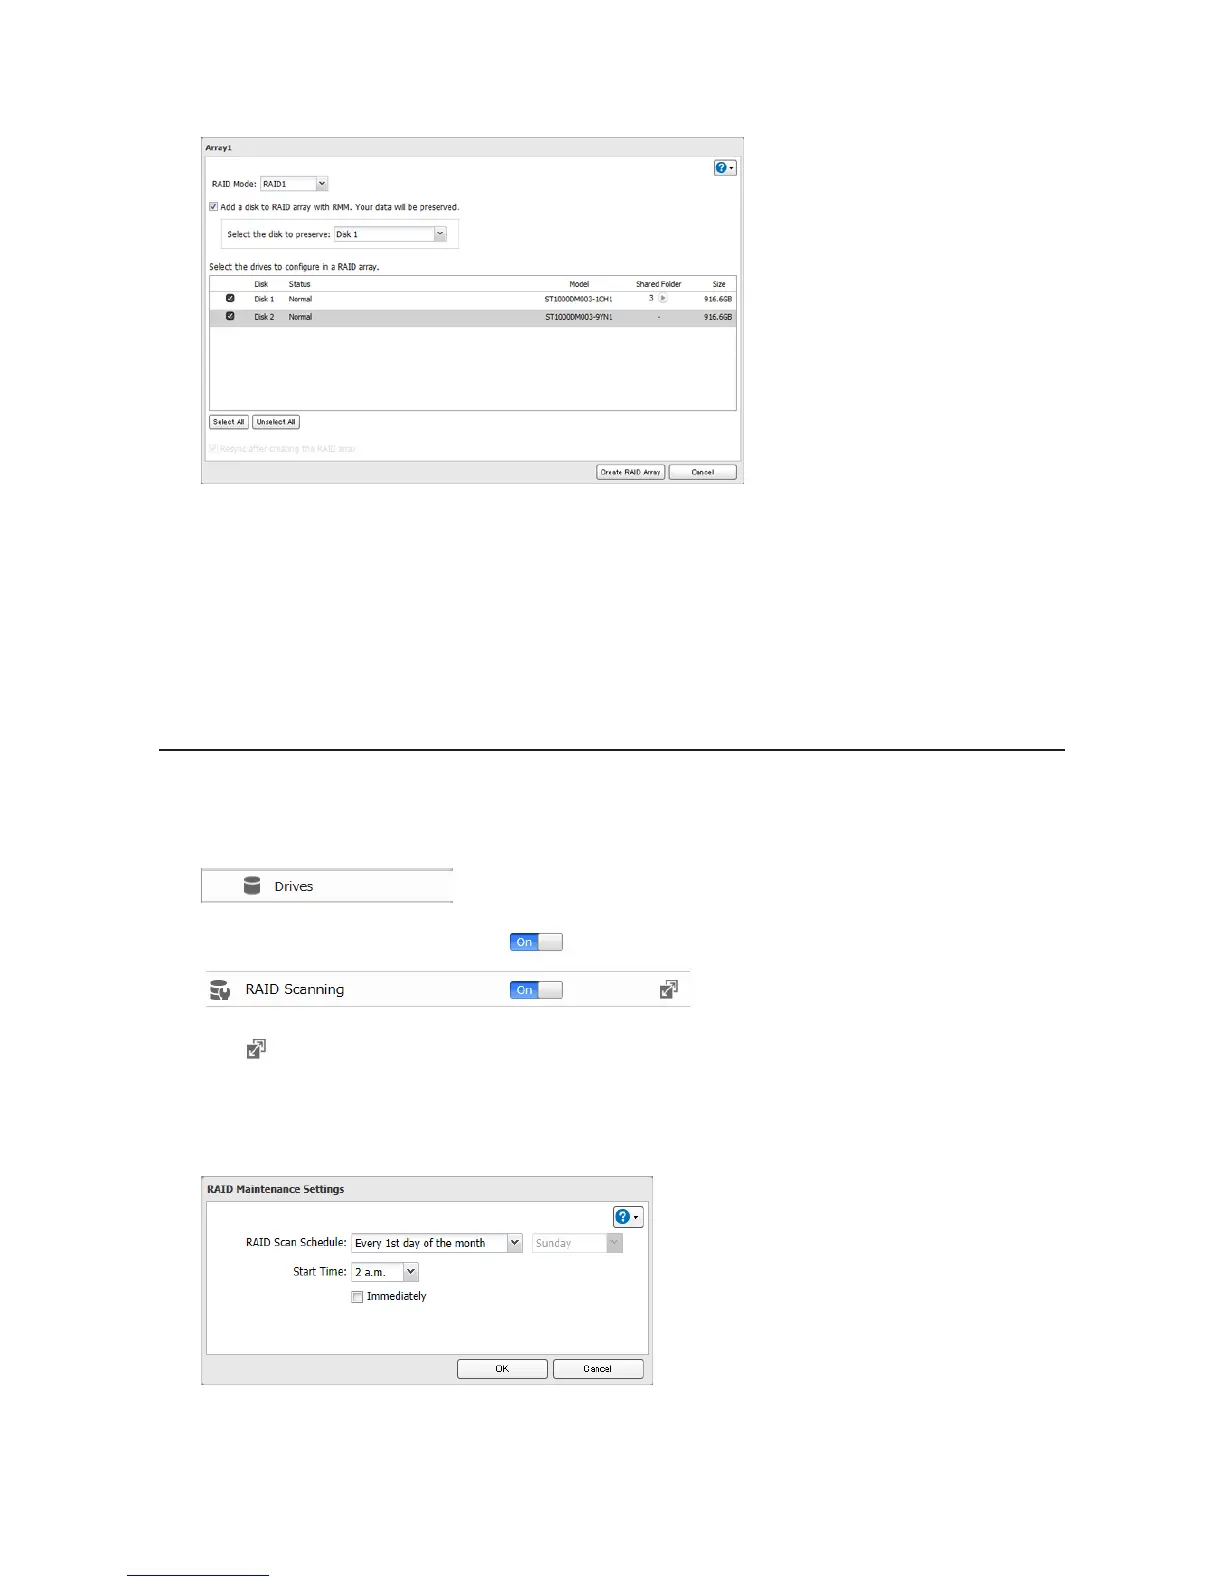
5 Check "Add a disk to RAID array with RMM. Your data will be preserved.".
6 Select the drive whose data will be saved from the drop-down menu.
7 Select the drive to add to the RAID array.
8 Click Create RAID Array.
9 The "Confirm Operation" screen will open. Enter the confirmation number, then click OK.
RAID Scanning
A RAID scan checks your RAID array for bad sectors and if it finds any it automatically repairs them. RAID 1 arrays are
supported. For best result, run RAID scans regularly.
1 In Advanced Settings, click Drives.
2 Move the RAID scanning switch to the position to enable RAID scanning.
3 Click to the right of "RAID Scanning".
4 Click Edit.
5 Select the schedule for running RAID maintenance, then click OK.
Notes:
• Check "Immediately" to run a RAID scan immediately.
• To stop a RAID scan, click Cancel RAID Scan.