Chapter 2
2-21
F-2-78
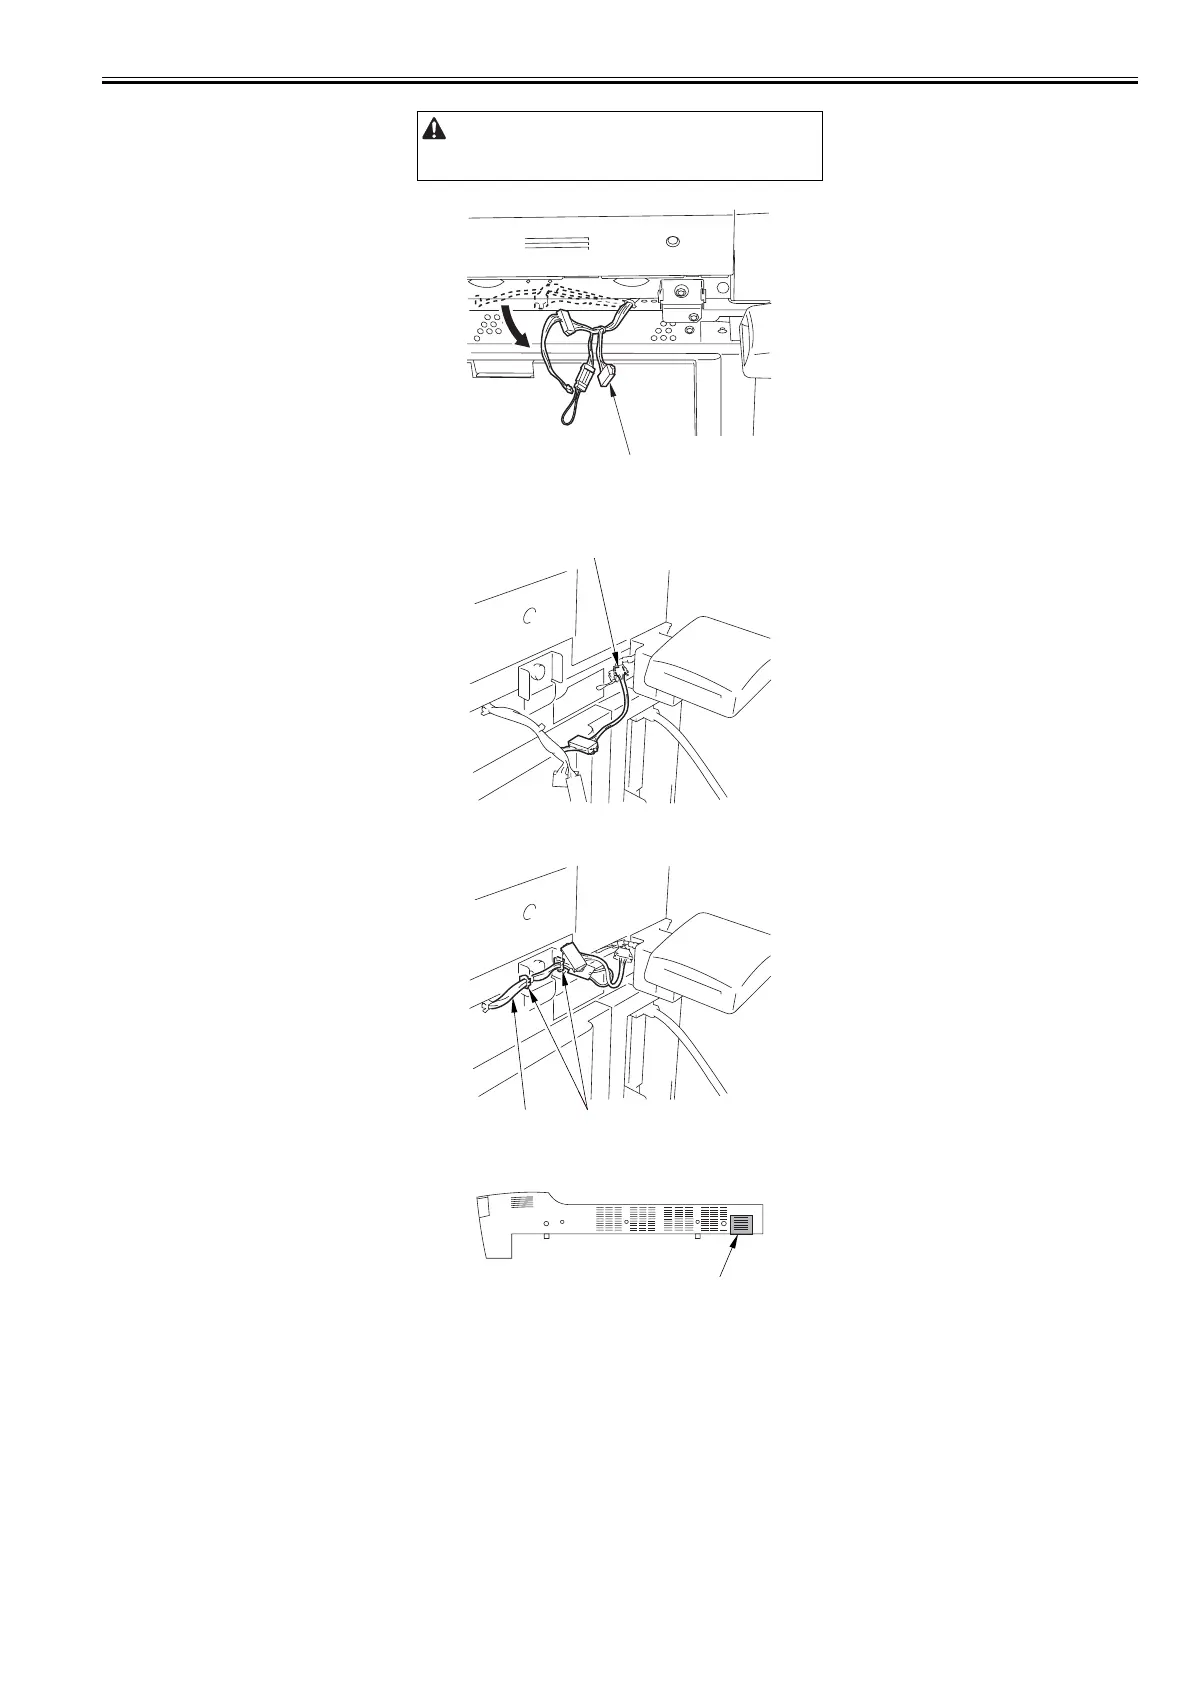
8) Connect the card reader harness with the connector [1].
F-2-79
9) Put the cable [1] of the card reader through the 2 clamps [2].
F-2-80
10) Cut the area [1] of the right cover (upper) with a wire cutter etc.
F-2-81
11) Attach the right cover (upper) detached in the step 2).
12) Close the toner replacement cover.
13) Insert the power cable (for the plug).
14) Turn on the main power switch, and then check the display demanding setting of the control card.
15) Input the card number (1 to 2001) to be used in the service mode (COPIER > FUNCTION > INSTALL > CARD).
- Input the smallest card number for the user to use.
- Up to 1,000 cards having been input are available.
16) Operate the touch panel following the instruction on the screen of shutdown sequence in order to turn off the main power switch.
17) Turn on the main power switch.
18) Insert the control card and check the status where copy is possible.
2.5.5 Installing for imageWARE Accounting Manager
0015-7624
iR5065 / iR 5055 / iR5075 / / /
If the cable is difficult to remove, drivers etc. will help make the
operation easier.
[1]
[1]
[2]
[1]
[1]
 Loading...