2
Select the printer in the dialog box, and then display the printer driver dialog box. (See "Accessing the Printer
Driver Dialog Box from Applications .") ➔ P.162
3
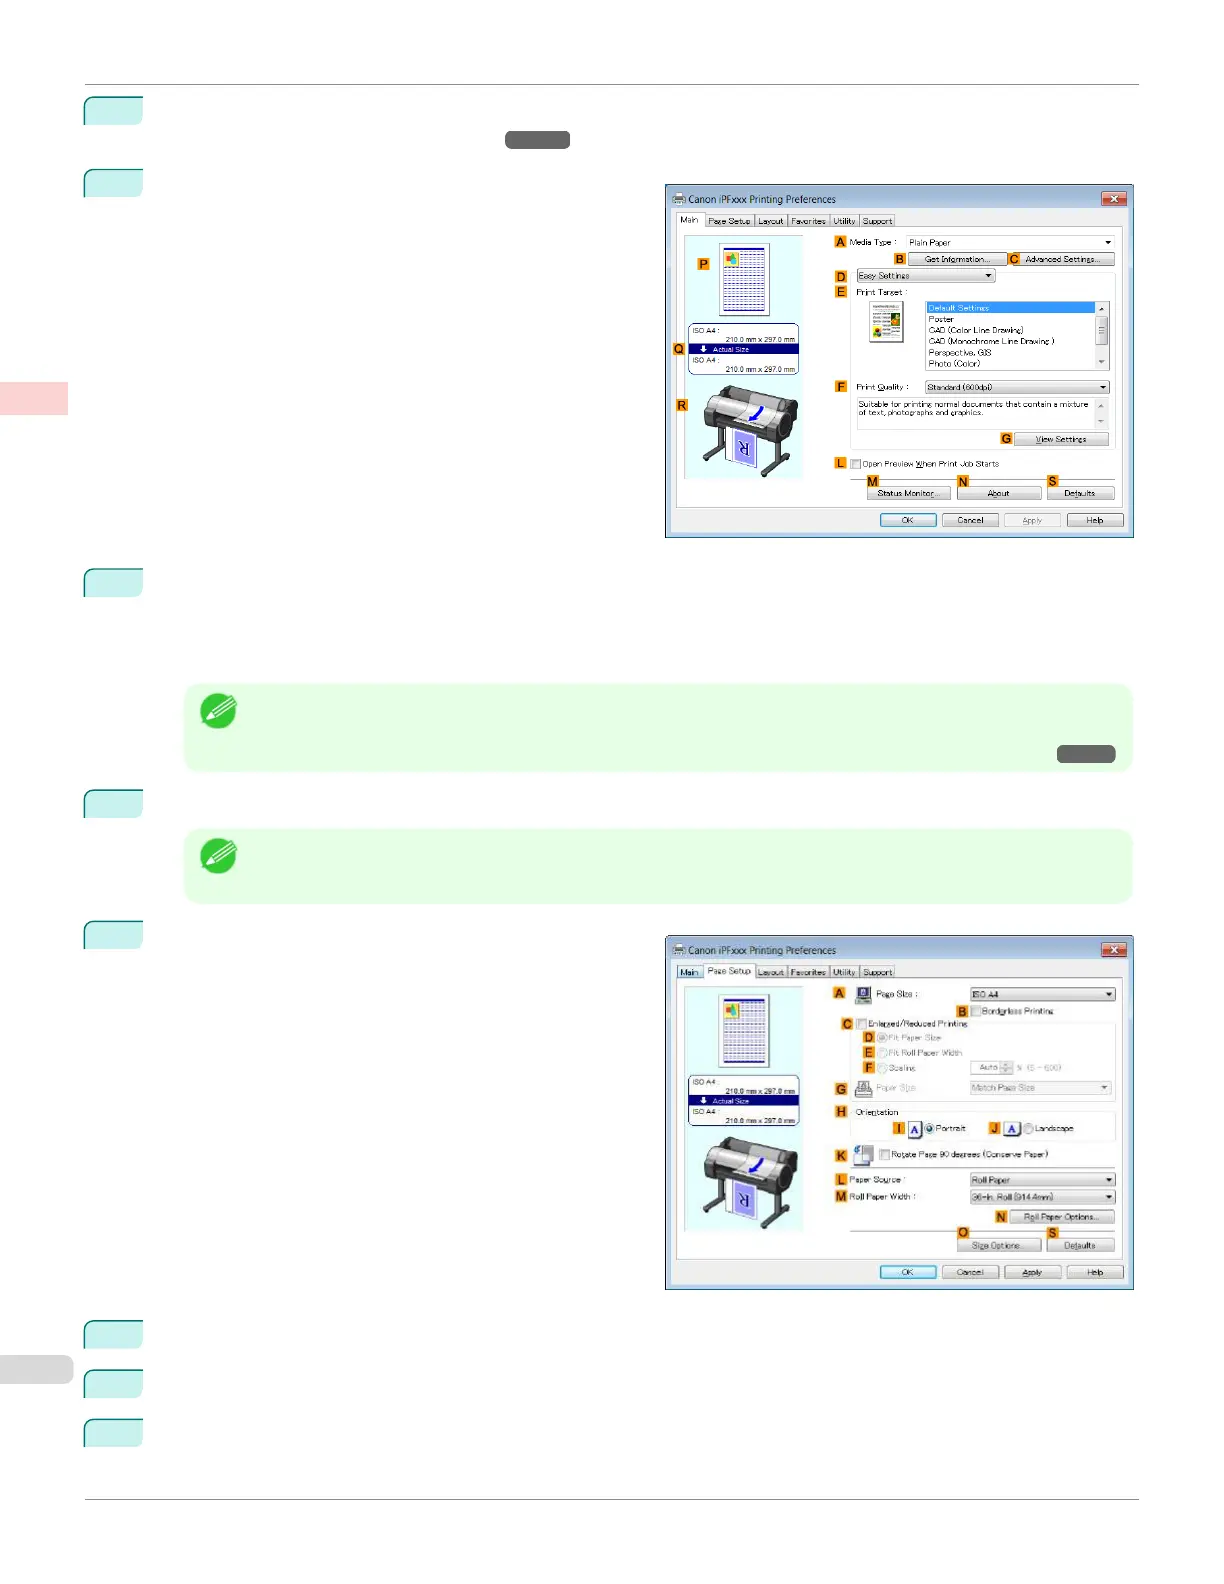
Make sure the Main sheet is displayed.
4
In the A Media Type list, select the type of paper that is loaded. In this case, click Canon Premium Glossy
Paper 2 280.
In the A Media Type, choose the type of paper used for printing, such as Glossy Paper, Canon Coated Pa-
per, and so on. Make sure the paper you select is loaded in the printer.
Note
•
The paper type setting in the printer driver and related software (as well as on the Control Panel ) is updated
when you install the Media Configuration Tool from the User Software CD-ROM or if you change paper infor-
mation by using the Media Configuration Tool. For details, see "Media Configuration Tool (Windows)." ➔ P.387
5
After confirming that D Easy Settings is selected, click Photo (Color) in the E Print Target list.
Note
•
You can check the settings values selected in the E Print Target list by clicking GView Settings.
6
Click the Page Setup tab to display the Page Setup
sheet.
7
In the A Page Size list, click the size of the original as specified in the application. In this case, click 10"x12".
8
Select and click a roll paper in the L Paper Source list.
9
Select the width of the loaded roll in the M Roll Paper Width list—in this case, 10-in. Roll (254.0mm).
Printing Photos and Images (Windows)
iPF670
User's Guide
Enhanced Printing Options Printing Photos and Office Documents
32