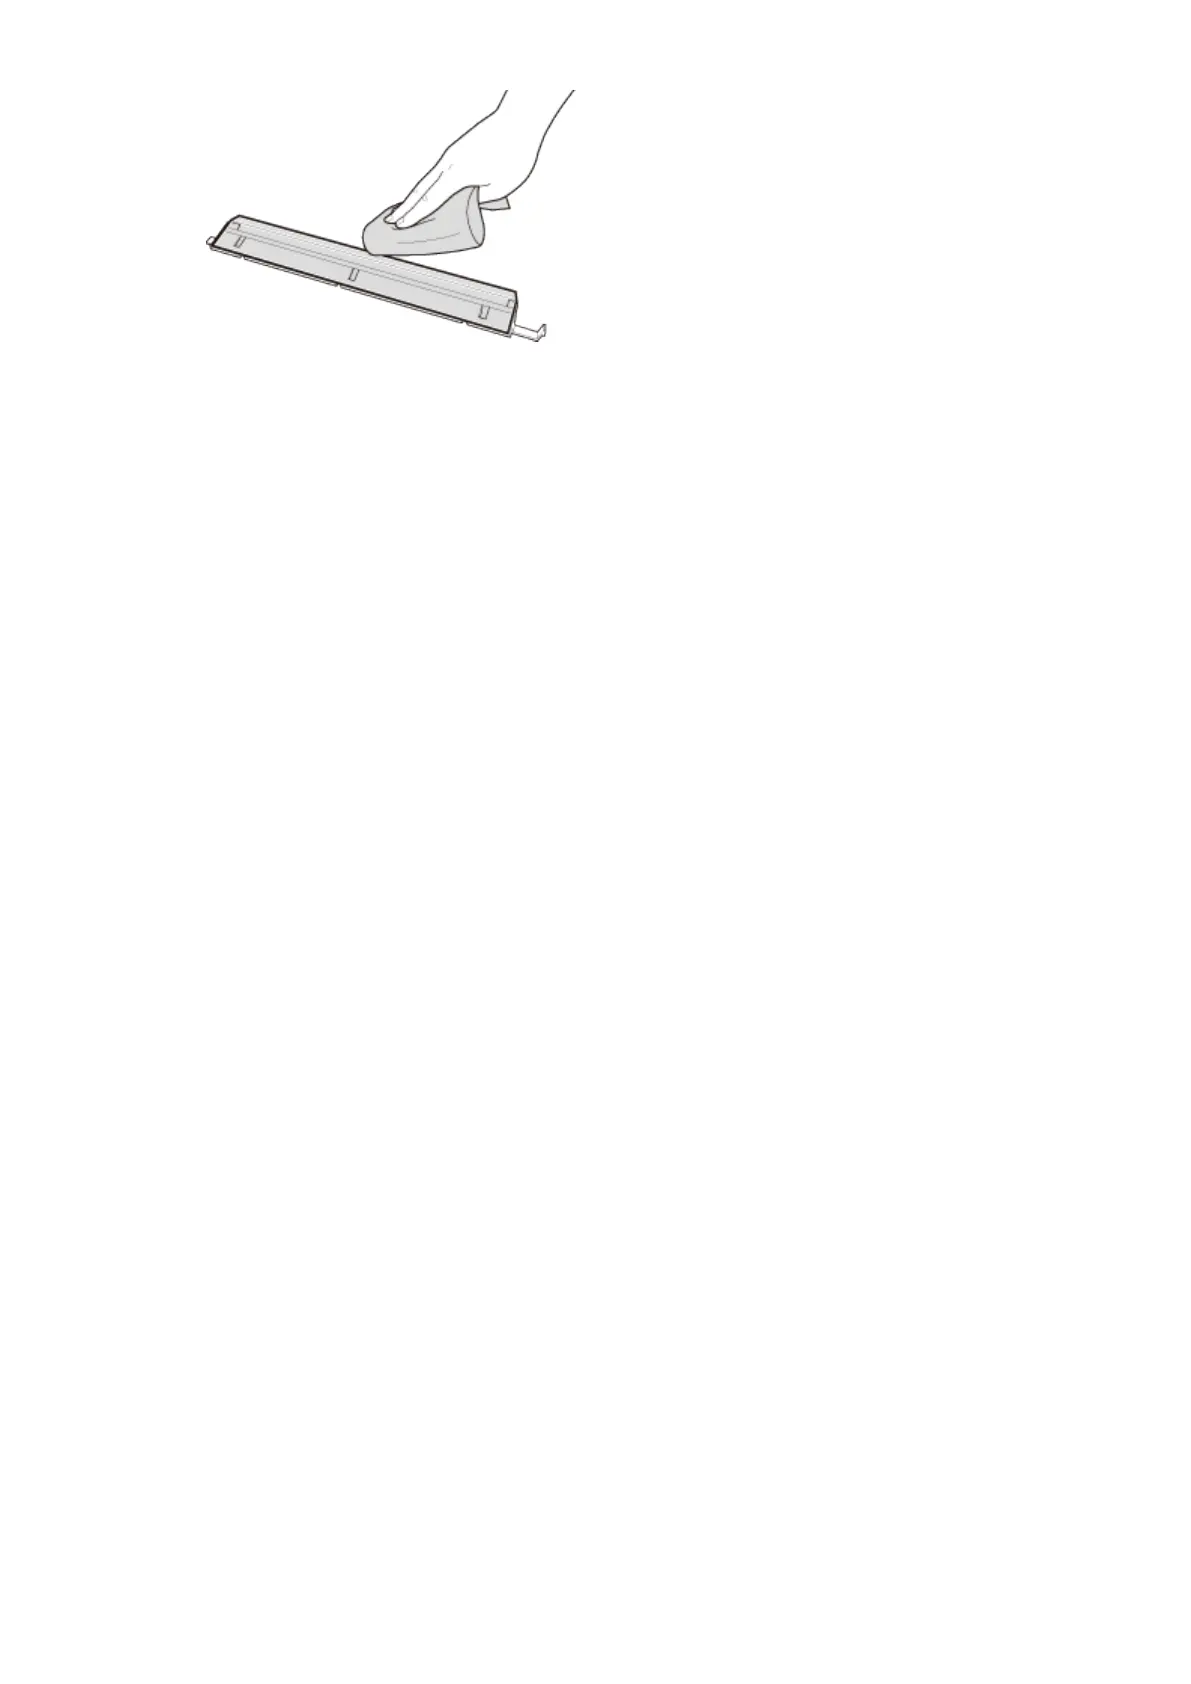
4
Wait for the plastic part to dry completely.
5
Place the transparent plastic part back into position.
● Make sure of the proper orientation, then hold the tabs and place the plastic part back into position
by gently lowering the frontward end rst.
4
Wait for the cleaned area to dry completely.
5
Gently close the feeder.
6
Reconnect the power cord and turn ON the machine.
Maintenance
594




 To Next Page